Dosa is a savory version of the widely popular crepes. Consider it an Indian take on the dish made by soaking, grinding and fermenting rice and lentils. 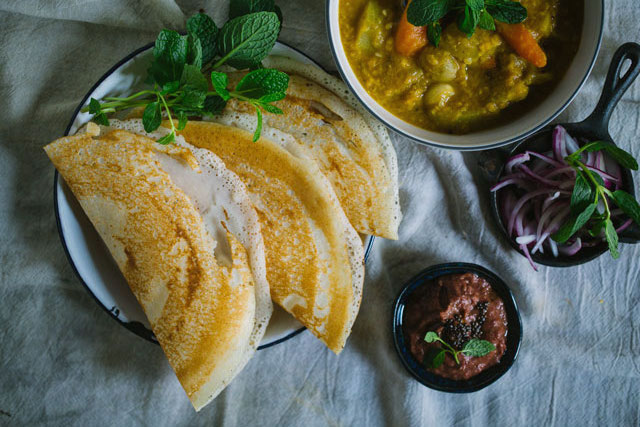 There weren’t many restaurants around the small town I grew up in. And I do not know whether that was the reason or not but it wasn’t a norm for us to be eating out at restaurants very often. An occasional ice cream in a few weeks if not months was all we went out for apart from grabbing some steaming boiled eggs with a happy sprinkle of zesty chaat masala to pep the eggs up a little bit or fresh, fire roasted chana (black chickpeas) and puffed rice. That was our “grab while you are out”, snack, not a cake pop from starbucks or corn dog from a street vendor like my kids now. And I still do not remember feeling I was missing out for we were more than happy and content with what mummy cooked at home which was an array of dishes considering the ingredients she had available around her. Mostly Indian but delicious home cooked meal made with fresh organic ingredients.
 Being from a North Indian family, aloo gobhi and rajma was more common in our household so dishes like dosa and idli were a happy change that we needed once in a while. Out of several “special dishes” mummy made, dosa was one thing all of us enjoyed for dinner. Dosa, an Indian answer to crepes is normally but not always made with a fermented batter of ground rice and lentils. You can make it with practically any kind of lentil, any kind of rice, even grains like quinoa and wheat work great. Can be enjoyed for breakfast, lunch, dinner or all of the above! They can serve as a good gluten-free alternative to many unless you are making wheat dosas. They are also a healthy choice considering they are high in carbs and low in calories and fat.
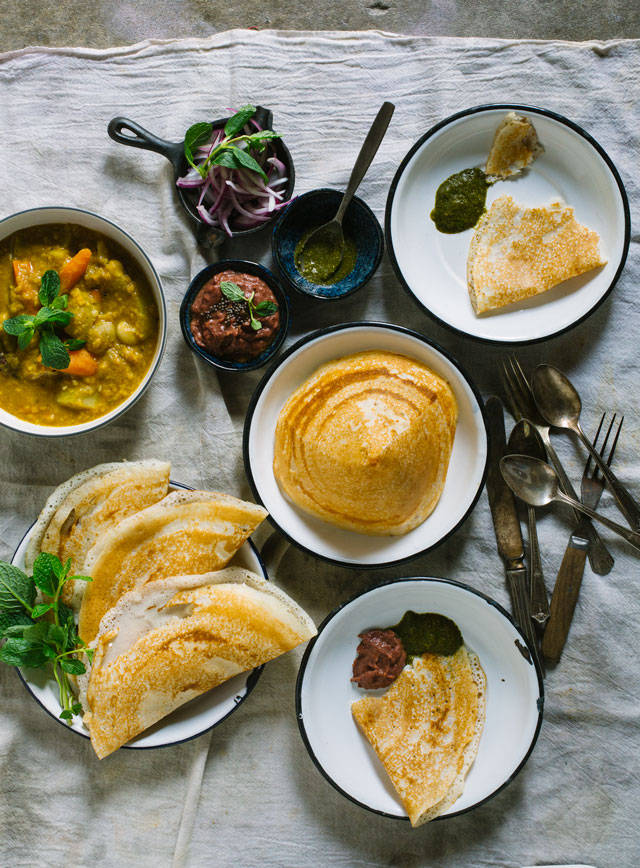
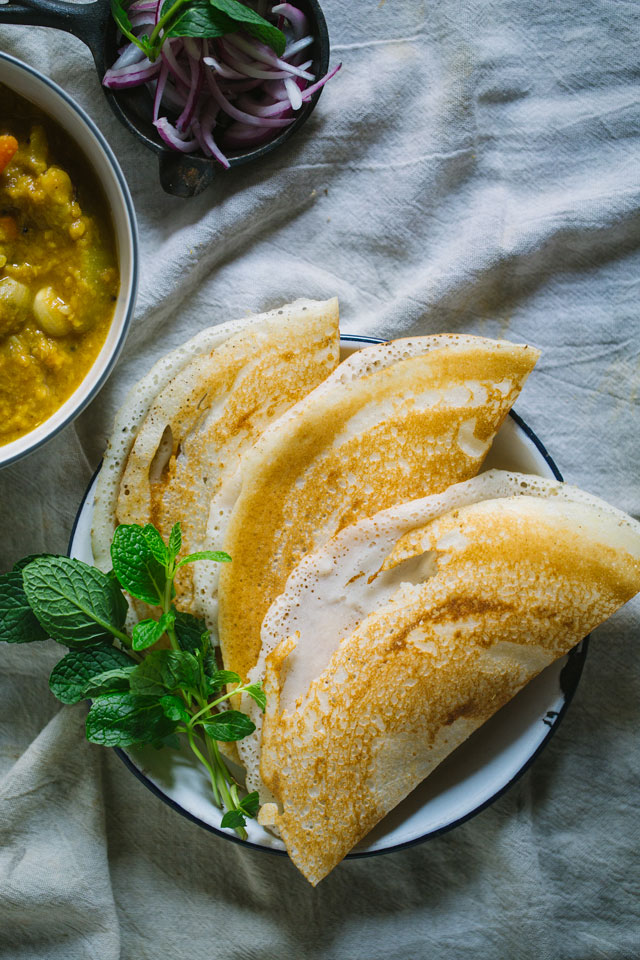
 Mummy although I do not think considered all of those details and mostly made them by soaking rice and black gram over night. Then ground to a smooth paste, fermented for lightness and cooked them paper thin on a hot griddle, then rolled them around some spicy potato filling and served with chutney and sambhar. Divine, marvelous and supreme! I will be sharing more on mummy’s dosa but before that let me quickly share a few other varieties of dosa I love for my family and often make at home. Will be sharing these recipes on Indian Simmer too as we go. But a quick look at them for now.
Masala Dosa: Follow the same dosa recipe as mentioned here, just add some spicy filling inside. The one most commonly used is a spicy potato filling.
Mung bean dosa: Also called Pesarattu (I believe), for this recipe all you have to do is soak mung beans, grind with ginger and thai chili and then fermented (or not) before making dosas out of it.
Brown Rice Dosa: Follow the recipe below, only substitute white rice with brown. They say it’s healthier!
Quinoa dosa: Simply substitute the rice in the recipe below with white or red quinoa
Neer Dosa: In sanskrit, the language hindi and several other languages spoken in India originated from, water is called “Neer”. That’s where this dosa derives its name from because the batter here is as thin as water unlike the common dosa batter and the batter doesn’t even need to be fermented. Just grind, add a ton of water to make it runny and start making Neer dosas.
Rava Dosa: Another quick dosa recipe that asks for semolina being mixed with water to a runny consistency and then cooked on a skillet. To the same batter add onion and it makes onion rava dosa, another popular variety.
Wheat flour dosa: Wheat flour, water and you are good to go.
 Ingredients:
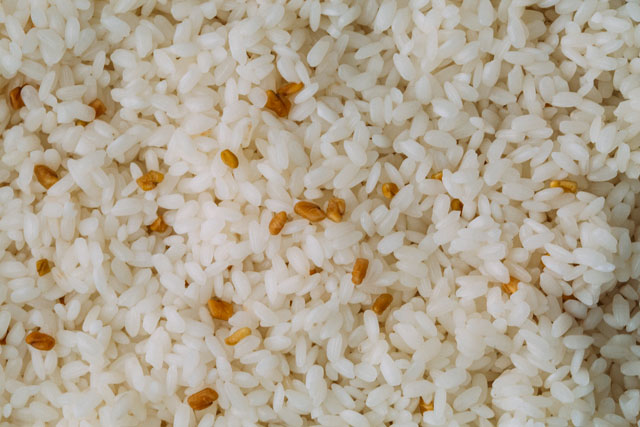
1 ½ cups parboiled rice (washed and soaked overnight)
½ cup split urad dal (washed and soaked overnight) I use washed urad dal with no skin on.
2 tbsp semolina or poha (flattened rice) – Using this makes dosa crisper.
1 tbsp salt
Oil (If you have an oil spray then better.)
You will also need:
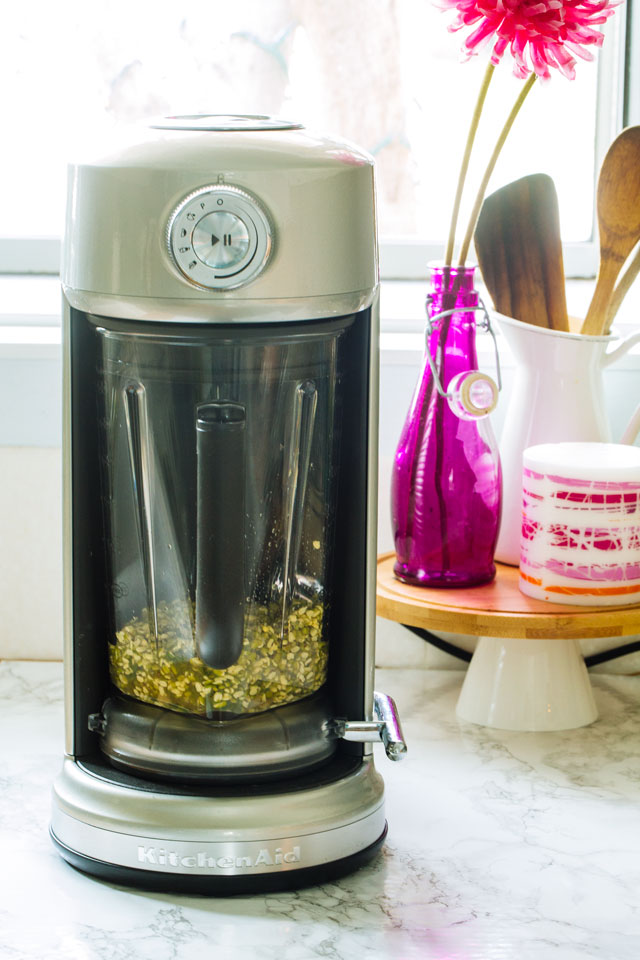
Griddle, spatula, a wet grinder (to grind rice and lentils) – if you don’t have a wet grinder your blender should also work but with a wet grinder the batter is just smoother.
Method:
Soak rice and urad dal for at least 6 hours or overnight. Then grind them separately into a smooth flowing batter. Grinding the two separately and then mixing makes the batter lighter. It also helps in speeding up the fermentation process.
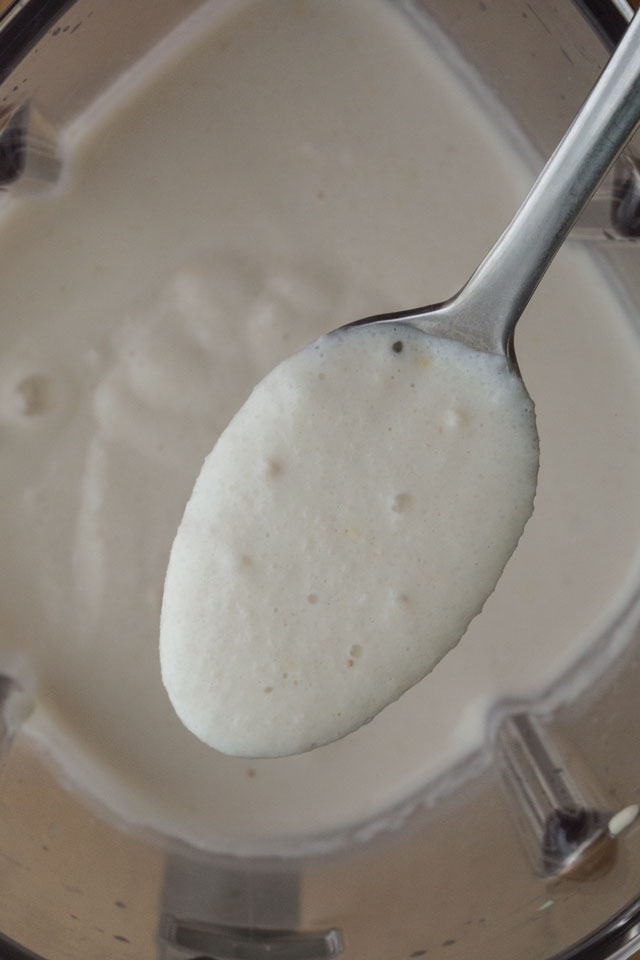 Mix the two, add salt and cover the batter. Let it ferment overnight. The lid should be tight enough to trap the temperature inside but loose enough to let a little circulation of air. So don’t use an air tight container. Also the temperature should be somewhere around 80-85 deg. F for a proper fermentation.
Making of crepes:
Heat a griddle. To test I sprinkle water on the griddle, if the water sizzles away right the moment then the griddle is hot enough.
In a bowl, mix water and oil. ½ tbsp. oil to 2 cups of water. This water and oil mixture is used to clean and oil the pan after every dosa comes out of the griddle.
Spray some oil on the pan. Dip a piece of cloth on the water oil mixture. Squeeze out extra water and then rub it over the pan to clean excess oil.
Now pour a ladle of dosa batter. Starting from the center in an outward direction, swirl the ladle in a circular motion spreading the batter into a thin crepe.
When the batter is spread, after a few seconds (8-10) it will start getting dry, spray or sprinkle oil on the dosa.
Give it a few more seconds and the bottom of your dosa will start getting darker and golden brown in color. This means your dosa is almost ready.
At this point if you want to add any filling in your dosa, you can place it in the center and fold the two sides, one over the other. The filling can be a simple potato filling or vegetables or even minced/cooked meat.
Traditionally dosa is served with sambhar (lentil soup cooked with vegetables) or spicy coconut chutney.
Disclaimer: This post was sponsored by Kitchenaid but the ideas, techniques and reviews shared here are mine.