


There are a few things in life that you can do and then there are some that you cannot. Sooner you get in terms with that, the better. Like I have come in terms with the fact that I just can not bake a beautiful loaf of bread. However hard I try it never comes out to be crusty on the outside, light and airy on the inside. But I always want to bake one and look for people who can teach me the right tricks to do so. So today I thought of inviting my dear friend Shulie who knows a thing or two about the art of baking a bread! Shulie like me also has her roots back in India. She comes from an Indian Jewish family and was born and brought up in Israel but has lived in the US for half her life. You can imagine how culturally rich her kitchen and her recipes must be. When I expressed my lack of skills in the baking front she very kindly offered me to teach a few tricks. What better recipe to learn from her than a Challah, right? So let me present you Shulie from Food Wanderings, a gorgeous and informative blog you just can’t afford to miss!
When the wonderful and very talented Prerna asked me to guest for her, initially I was thinking of something Indian from my mom’s. When I saw a recipe by an Israeli chef for a spelt savory challah filled with sauteed vegetables the opportunity presented itself. For years now I wished to bake with different grains. Somehow I felt the spelt would go perfectly with chocolate and upon further baking and experimenting, I felt my original proportion for the honey challah worked best. For example instead of the 3/4 cup oil I only used 1/2. One thing led to another and I thought what better recipe to share with Prerna than one from my Jewish and Israeli heritage. Although the recipe is evolved from savory to sweet and tweaked, originally it was dubbed A Galilee Challah.

This dough is very versatile. If you wish to make only rolls, reduce sugar to 1/2 cup and make knots for individual mini rolls. You can also make sweet rolls and leave the recipe as is. You can make 2 Babka loaves with two thirds of the dough and mini individual rolls with the third remaining dough and so on…
Spelt flour can be found at Whole Foods or at least in the DC area in some mainstream supermarkets. It can also be found online . I bought two organic brands Arrowhead Mills and Bob’s Red Mill. I baked with both batches challah rolls and babkas, both came out fabulous. They vary slightly in texture and moisture level. Arrowhead is slightly coarser, Red Mill more floury. Arrowhead seems to have more moisture. Add to both doughs water slowly while kneading in mixer as different spelt flours from different companies vary.
Ingredients:
½ kg (1.1lbs) all purpose unbleached flour
½ kg (1.1lbs) spelt flour
25 grams (3 ½ packets) of active dry yeast (each packet is 1/4oz)
¾ cups sugar in the raw
1 tablespoon salt
2 eggs
1 1/2 – 1 3/4 cups mineral water
½ cup canola oil
1 egg for egg wash
Sesame seeds
Chocolate Filling:
Ingredients:
12oz bitter sweet chocolate chips
4oz butter
2oz corn starch
Method:
In a mixer with a hook attachment, add both flours, yeast, sugar, salt, canola oil and eggs. Mix on low and slowly add water. Knead on low for about 8-10 minutes. Coat with a light film of oil and set back into mixer bowl. Cover bowl with plastic wrap and let rise in a cool spot for an hour until doubles.
While Dough is rising, melt butter and chocolate in a bain-marie, a water bath, until melted to smooth silky texture. Take chocolate/butter mixture off the heat and add corn starch. Mix well and let cool.
Cut risen dough into thirds. With one third, work on lightly floured surface. Return the other two parts to the bowl and cover with a plastic wrap. Butter 9X5X2 ¾ inch loaf pan. At this point you can butter three loaf pans to make entire dough into three loaves
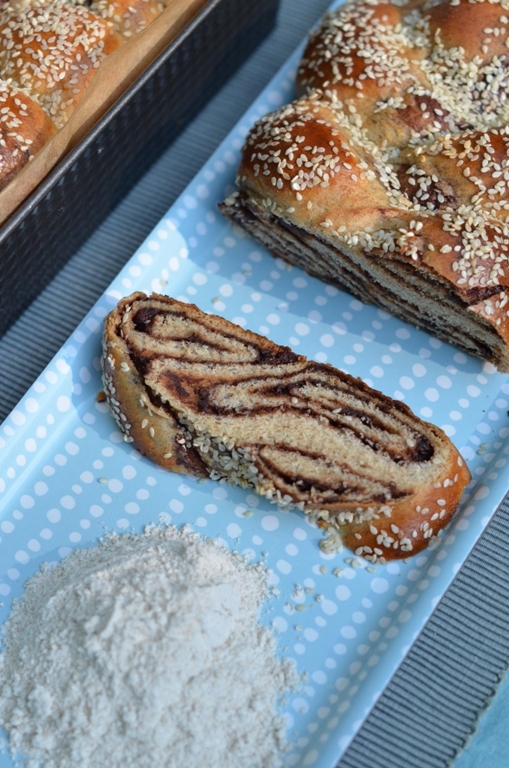
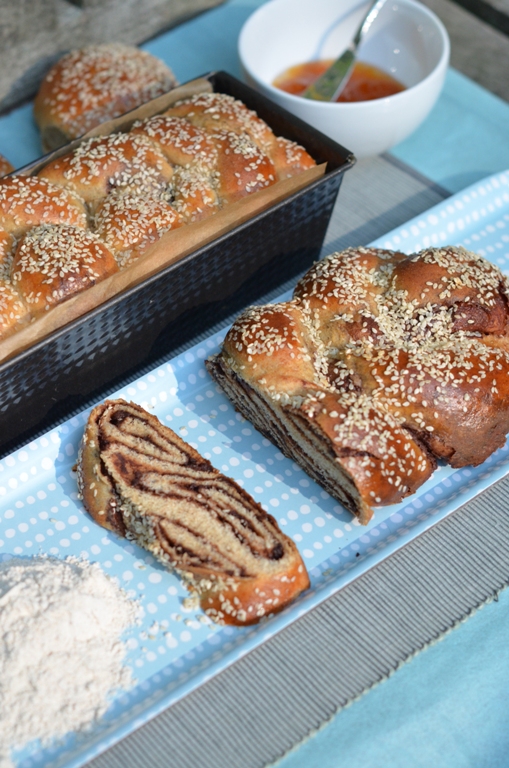
Roll out each third into about 18×14 inch rectangular shape. Spread third of chocolate mixture on rolled out dough surface, leaving an uncovered edge/border of about ¼ inch all around. Fold ¼ inch wide edges and start folding into a rolled torte shape from long side. Twist rolled dough 5-6 times/twists and fit into loaf pan.
Brush with a beaten egg wash and sprinkle with sesame seeds and let rest for 20-40 minutes covered with plastic wrap. Bake in a preheated 350F oven for about 30 minutes or until deep golden on top.
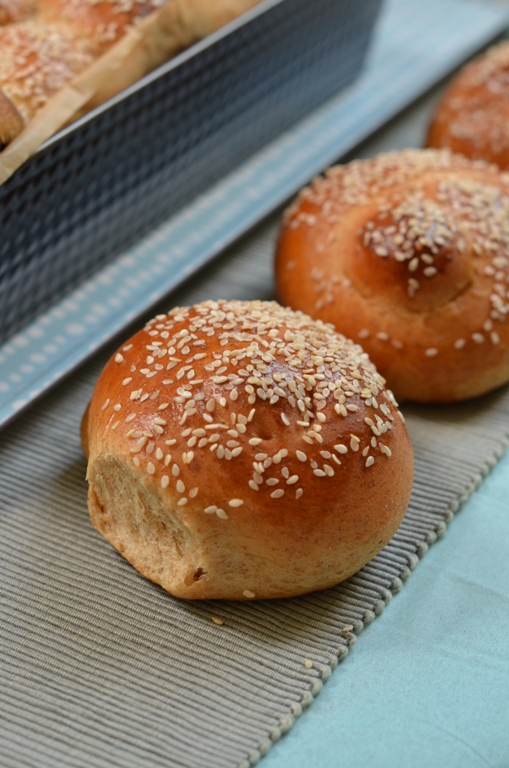
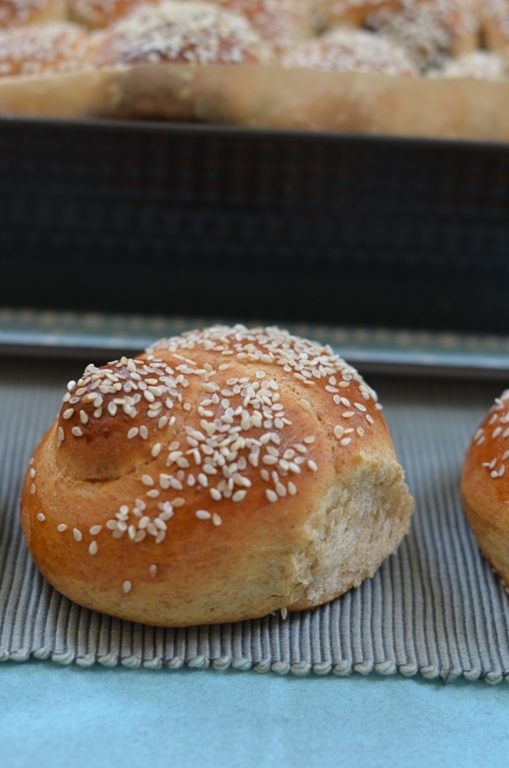
If you wish to make plain spelt challah roll knots, divide dough into palm size rolls, roll out to about a nine inch cylinder and knot like first knot of a shoelace, with one edge of the knot popping up through the hole. Brush with an egg wash and sprinkle with sesame seeds.
Let rolls rise for 20-40 minutes on a parchment lined cookie sheet, one inch apart from each other, covered with plastic wrap. Pop cookie sheet into a preheated 350F oven for 15-25 minutes or until deep golden.
Once cooled, loaves can be frozen wrapped in foil and then plastic wrap. Reheat oven to 350F before serving, take plastic wrap off and reheat in foil for about 20 minutes. Put frozen loaf directly into preheated oven.
")

Did I tell you we went to Napa for the 4th of July weekend? Ok, not exactly the whole long weekend but made a quick one day trip to Napa. Enjoyed a fabulous weather, tasted some wine and had our little family picnic. It was after quite a while that we as a family spent some relaxed time. Just the three of us! Chased the little one in an open field, fell off and laughed till our stomach hurt. Good time! And this is when come pouring the memories of your own childhood.

I remember as children we did not have the luxury of getting away every long weekend. We had to wait the whole year for the summers to come until there were summer vacations. Every summer vacation our parents would take us to a new place. A new city every summer. India is a country of diverse cultures and one part of the country is so different from the other. So every trip used to be a new experience. Every summer used to be different from the previous. This one summer we went to Bombay (now Mumbai), the big city with the ocean, local trains, bustling streets and vada pav! Vada Pav was the first thing that we ate at the train station as soon as we stepped into the city. I remember me and my dad loving it so much that we ate just vada pav for the next three days! A fried potato dumpling sandwiched between two pieces of a pav (bread). It was good and its taste lasted long – until today!

It’s a hugely popular street food in India and has its origins in the state of Maharashtra. For the vada pav you need some potatoes – don’t ask what kind. In India back then if you asked for potatoes you’d get potatoes. No Russets, Yukons or Idahos, just potatoes. So out of two most important things for vada pav, one is potato and the second is pav. Pav is the dinner roll you use at your home every day. But it was not before I bit into the vada pav I made for this post that I realized that there was a third very important ingredient. That is this dry red coconut and garlic chutney. I forgot to make it before taking photos but very soon I realized the mistake, so please try and make this chutney to accompany your vada pav.

My friend Brian from A Thought For Food invited me over to his lovely blog to share an Indian recipe with him and his readers. It was 4th of July and I had made these Vada Pav for the picnic. Prefect time for me to share this recipe which is easy, simple and yet packed with tons of flavors. Brian says his readers loved the recipe. If you want to check it out head over to Brian’s blog. But let me warn you that its going to be tough for you to come out of it. Yes, he is awesome and so is his photography and blog. Hope you enjoy!

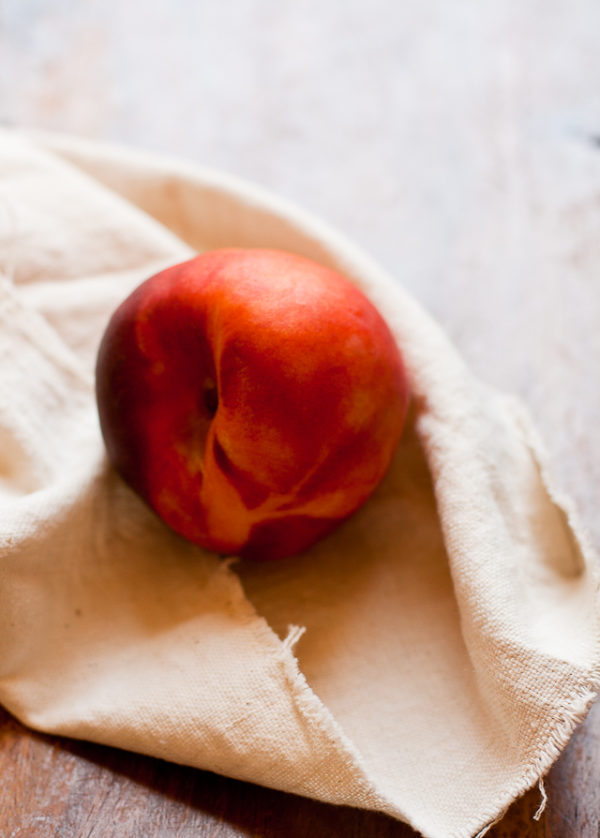
Summer is here in full swing. We are all enjoying the seasonal produce, trying to experiment with new recipes and also enjoying some old favorites. Food Network thought it would be great to kick off the summer fest again. So they teamed up with some food bloggers and brought back Summer Fest 2011. I had so much fun doing it last year that I had to say yes! If you are not sure what Summer Fest is, its a season- long garden party. Every week or every other week a favorite seasonal produce is featured and we cook and bring something new to the table. This week’s theme was peaches.

On the 4th of July weekend we took a stroll to the wine country to taste some wine. While driving through the gorgeous scenic roads of Napa Valley I bumped into a fruit stand. The fruit stand had fresh produce straight off the trees from the farm right behind it. They had some of the juiciest and sweetest berries and cherries, ripe red apples and then there were peaches – prefect for my summer fest recipe! So I bought a bag, brought them home and made Peach Gujiya.

You can call Gujiya a sweet Indian twin brother of Empanadas. A flaky and slightly salty flattened dough wrapped around a sweet filling and then deep fried. Traditionally the filling is either made of mava/khoya (a milk derivative made by reducing the milk to a thick paste or even a dry form). In some parts of India it is also filled with sweetened coconut mixture. Inspired by sweet empanadas and pies, I gave the traditional gujiya my own twist and made a sweet, fruity and peachy one!

For the outer crust of a gujiya you work pretty much like you do for the dough of your empanadas or pie crust, just a little less butter. For the filling I used nice and ripe peaches, the slightly harder ones will be chunky in your mouth and will not melt as well but if you like it chunky, use the ones that are a little harder. Then another challenge I faced was the extra juice or liquid the fruit sheds once you add sugar and working with that can become a problem. For that I first drained all the extra liquid from the fruit before adding sugar and then when you add grated coconut the consistency is perfect. You can even cook the fruit in a little butter to get rid of the extra liquid.

While playing around with the recipe I used two interesting spices – black pepper and cardamom. Boy, that tasted good! Sweetness from the peach, a light aroma of cardamom and punch with pepper worked well together! Ok, you can imagine what I am trying to say- Try it, because its good!
Do you also have some peachy recipes up your sleeve? Share some of your flavor experiments in the comments section below or join the conversation on twitter using the hash tag #cookingwith. I will come back with some more peach recipes by other participants tomorrow.

Ingredients:
For the filling:
2 1/2 cups ripe peaches (diced and drained)
1/2 cup grated dry coconut
1/4 cup granulated sugar
3/4 tsp crushed black pepper
1/2 tsp crushed cardamom seeds
1 tbsp cornstarch
For the dough:
2 cups all purpose flour
8 tbsp ghee
1/2 tsp baking soda
Oil for frying
Method:
For the dough mix flour, baking soda and ghee together. For the ghee to mix well with the flour I pick a little flour in hand and rub it between the palms. If you hold flour in your fist and on opening the fist it holds itself in a ball and doesn’t run out then you know the proportion of ghee and flour is right and its mixed well.
Now while sprinkling little water, try to knead the flour forming a stuff dough. You should not be able to penetrate the dough very easily when poking with a finger.
Cover with a damp cloth and set aside.
For the filling mix all the ingredients together. Set aside.
Divide the dough into equal parts and make balls off of them.
Dust your working station and roll each ball into circle (if the circles are not “circular” enough then just use a small plate or cup as a cutter).
Put a tablespoon of filling on one half of the circle. Run a finger dipped in water around the edges. Fold the other half over it so the edges meet, forming a half moon.
My life was a little easier because my mom got me these gujiya fillers and cutters from India. But you can use a fork to press the edges and stick them together forming tiny lines all around the edges, just like you do for empanada.
Repeat the same for the rest of the dough and filling. Cover it with damp cloth.
Heat oil/ghee for deep frying and fry gujiya until its golden brown on the outside.
I poked a hole on one side of the gujiya as soon as it came out of the deep fryer. I think it helped release the hot vapors from inside of the gujiya without letting the juicy liquid seep out of it. I can be wrong too.
You can either serve it hot or when its cold enough to not burn your tongue!
Be sure to check out these peachy links from other participants.
CIA Dropout: Peachy Keen Panna Cotta
In Jennie’s Kitchen: Easy Peach Preserves
Daily Dishin: Fresh Peaches and Cream No-Bake Pie
Cooking with Books: Peaches and Cream Cheesecake
Cooking With My Kid: Peach & Friends Cobbler Pie
White on Rice Couple: Peach Heirloom Tomato Salad
Cooking With Elise: Bruschetta with Grilled Peach Chutney
FN Dish: Summer Fest: Peach Recipes
Taste With The Eyes: Warm White Peach and Blackberry Cobbler
Recipe Girl: Fresh Peach Pie
A Way to Garden: Farm Fresh Peaches Frozen to Perfection
Napa Farmhouse 1885: Fresh Peach Cookies
Sassy Radish: Peach, Apricot and Blueberry Cobbler with a Cornmeal Crust
Sweet Life Bake: Sweet Peach Ancho Chile Salsa
Pinch My Salt: Creamy Peach Smoothie
Dixie Chik Cooks: Peach Cobbler
Food2: 5 Killer Peach Flavored Cocktails
Healthy Eats: 8 Ways You Didn’t Know You Could Eat Peaches
Cooking Channel: Peaches on the Grill
Add a Pinch: My Grandmother’s Peach Cobbler
And Love It Too: Pan Seared Salmon with Fresh Peach Salsa
The Sensitive Epicure: A Summer Peach Tart, Gluten-Free
From My Corner of Saratoga: Double Caramel Peaches
She Wears Many Hats: Peach Wontons
I Am Mommy: Peach Bread
 Sorbet for this 4th of July")

Still the ray of sunshine sneaking through the window and the sound of ice cream truck passing by in the afternoon reminds that its summer time. It reminds that no matter what country and what part of the world you live in, simple things in life always remain simple. Boxes of strawberries bring the same joy on the little monster’s face as the bags of mangoes did to ours as a child. Kids selling lemonades by the street just like at those nimbu pani and shikanji stalls in India.

Summers in India are not the sunny, warm and bright summers like California. Summers in India mean scorching heat, sand storms and sweaty days and these nimbu pani and shikhanji stalls are a sigh of relief. These can be found anywhere throughout summer. Back in the day they would sell a glass of shikanji for 50 paisas. From rikshawwalas to those coming out of a car, people would stand in lines to grab one and kill the heat even for a few minutes. It worked like magic, brought smile to faces and made the day a little brighter.

You can call Shikanji an Indian version of limeade. Water, lime juice and sugar. To spice it up, add some ginger and a little mint adds more flavor. I tried to take it to another level and make a sorbet of it. Or to be honest it was the little one who gave me the idea. She is a lover of i-pream (ice cream). She demands that I make an ice cream of everything I put in front of her, even pasta and lentils! Ok, I did not go that far but I try to throw everything I can in the ice cream maker. The same happened to my shikanji and thank god she demanded me to do so because a shikanji sorbet tastes SO much better than a normal shikanji. Even better than the one they sell outside the bus-station in summers in India. Try this shikanji sorbet this 4th of July and you will thank the little monster for this idea like I do now!

Ingredients: Serves 4
1/3 cup lime juice
1/3 cup sugar
1 inch fresh ginger root
1/2 cup fresh mint leaves
3 cups water
In a tall glass or a bowl, pour lime juice and sugar. Add mint and ginger root and mull it well.
Let it sit for half an hour.
Then pour it into the ice cream maker along with water. Process according to the instructions.
Freeze in an airtight container for a couple hours and then serve.
In case you don’t have an ice cream maker I have tried the recipe with a smoothie maker. Just that instead of water, you add 5 cups of ice to the shikanji mix and set the blender to ice crusher setting. Blend it all together until the mixture is smooth and stiff. Serve immediately.
 for Journey Kitchen")
Kulsum was one such person to me when I stepped into the blogging world. I was new and unsure of what I was doing. I think so was she and maybe that was the reason we hit it off the first time we spoke (or chatted? or tweeted? or exchanged emails? Okay! I don’t remember what happened first but it was one of the above!). We both shared the same roots back in the same country, loved to talk and were eager to learn. It has been almost an year (or maybe more) since I know Kulsum and she has come a long way with her blog ever since. Without even seeing each other face to face we have become friends so when she asked me to guest post for her it was exciting for me. Thanks Kulsum for letting me hijack your space for a day!

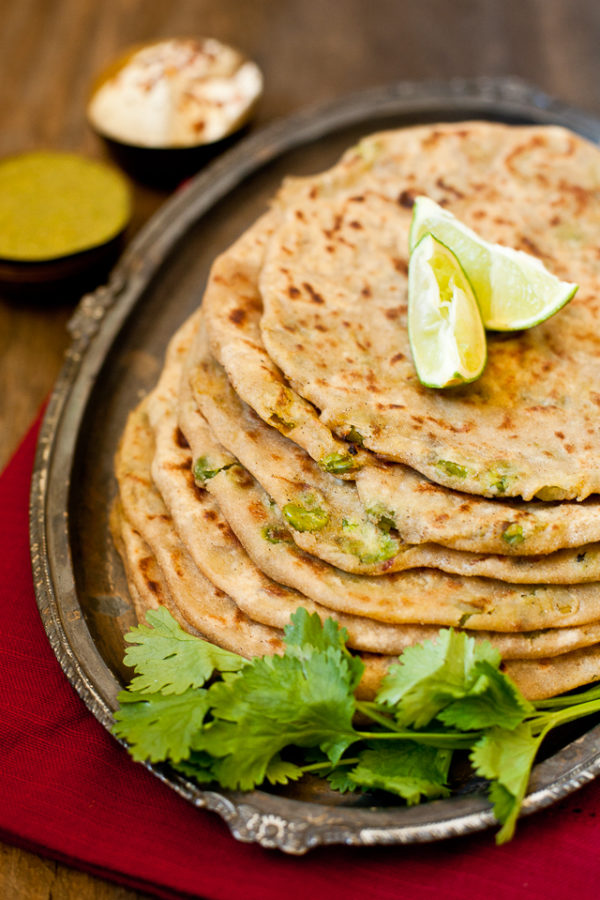
Kulsum wanted me to cook something Indian. Something very simple and yet comforting. Something that can take a lot of us Indians back home and still be easy for everyone to cook. And she wanted to share a breakfast recipe. What can be more comforting and easy breakfast recipe for Indians than a hot paratha fresh off the griddle? So I decided to make some Aloo Matar Paratha (Potato and green peas stuffed pancakes).

Now parathas are Indian pan fried flat breads and when you stuff them with any stuffing then they are called bharwa paratha (stuffed flatbreads). I am all about making Indian food approachable and sexy. And this recipe asks for some very simple and easily accessible ingredients. Fry onion with some very basic spices like cumin and coriander powder, add some heat with chili and mix it all with potatoes and peas. Even then if you can’t find anything just grab some potatoes and green peas, boil them, salt them and stuff it in your parathas and still your parathas (pancakes) with taste amazing! If you can then please fry them in ghee (clarified butter) because only then you can smell that comfort and feel that warmth that mom’s parathas give. But if you can’t find ghee or want to stay on the healthier side just use olive oil or vegetable oil as you like.
To see a step by step photo of how to make a stuffed paratha please click on the link below. And for a detailed recipe head over to Kulsum’s gorgeous blog. While you are there don’t forget to check out recipe for Masala Chai. I remember a lot of those emails asking me for one. Hope you enjoy!


When asked about what I should be cooking for her, Jaden said she loves Chicken Vindaloo and would love to share its recipe with her readers. So Chicken Vindaloo it is! It is a dish which, if not most popular, must be one of the most popular Indian dishes in the world. Vindaloo is a popular curry that hails from a tiny little state of Goa in India. Portuguese had their colony in Goa for decades and so the state has a great influence from Portuguese culture. It is believed that the name Vindaloo was also derived from Portuguese dish where “vinho” means wine and “alhos” is garlic. Usually the recipe asks for pork and wine along with garlic. In course of time Vindaloo evolved and cooks started making it with chicken or lamb and wine was substituted with vinegar.

I am sure you will always notice that the Chicken Vindaloos served in restaurants have potatoes in them. Aloo in hindi means potatoes and since Vind- aloo has aloo in it, I assumed that potatoes are a must in the dish. But after doing a little bit of a research I found that potatoes are not really an essential ingredient. A traditional Vindaloo just asks for meat, garlic, wine or vinegar and lots of chilies in it. So the potatoes you see in the Vindaloo they serve at your favorite Indian restaurant are probably because they either want to make the gravy thicker or increase the volume but definitely not because the recipe asks for it!

Most important part of a Vindaloo masala (spice mix) is the chilies in it. The dish is mostly fiery hot because Vindaloo masala is a chili based preparation and that is where it gets all its flavors. In my recipe I used the dry whole red chilies found at Indian markets. You can make it milder to your taste and use Kasmiri Mirch (a mild form of red chili). This will help make the curry red and pretty but still not very hot.
Now to check out my recipe for an easy and perfect Chicken Vindaloo please head over to Jaden’s Steamy Kitchen.

In the past few weeks a lot of things slipped off my mind. It slipped off my mind that I had to attend parties and respond to invites that were sent my way. It slipped off my mind that there are a few deadlines I need to meet. It slipped off my mind that when people write emails they expect a reply back AND it slipped off my mind that there was a lot of POM juice sitting in the back of my refrigerator! Nice people at POM Wonderful were gracious enough to send me a big box of POM juice to try. Well, my whole family is a huge fan of its sweet and tangy flavor and the fact that its 100% Pomegranate juice with no added sugar makes it perfect for me. So thank you “nice people at POM Wonderful” for being so gracious!

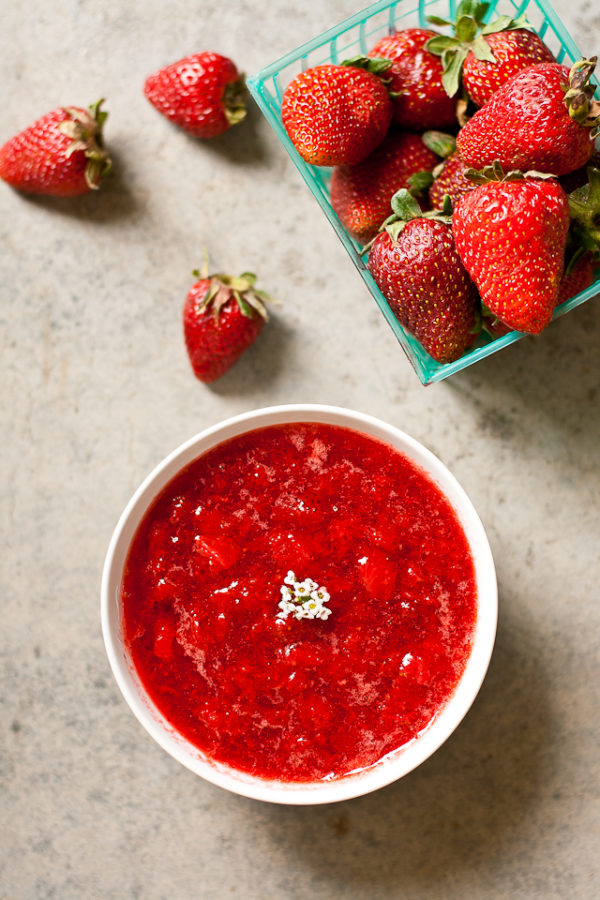
Not before we started packing that we realized how many things were in the house that escaped our eyes. Those bottles of POM juice were one of them! I panicked because I had to use them to their last drop and I did not have enough time. So apart from making some sorbet and pomegranate molasses I made use of a ton of strawberries from the berry picking we went a few days back. I thought I will try this chutney recipe that my mom makes using raw mangoes with jaggery and panch foran (five spice mix). Only I made mine with strawberries and added pomegranate juice for tartness.

I somehow assumed that every Indian cook must know about panch foran. But the more I spoke with people, the more I realized that it was not as common in all parts of India as I thought it to be. Panch foran is a mix of five whole spices in equal parts – black mustard seeds, fenugreek seeds, fennel seeds, ajwain seeds and nigella. You can use it as a tempering while making stir fried vegetables (eggplants taste best when stir fried with it). You can coarsely crush them and rub it on your meat before grilling or you can make some out of the world chutney with it! So much can be done with these five spices that I think I will do a post on it soon (I promise!).

For this particular mango chutney, my mom uses jaggery which is an unrefined form of sugar cane sugar. Its WAY better for your health than sugar but if you can’t find it easily you can use sucanat or dark brown sugar. If nothing, then use just plain old white sugar that you have in your kitchen. My point is don’t run to the grocery store if you don’t have jaggery. So here’s the recipe for my Strawberry POM chutney using panch foran.

Ingredients:
1lb hulled strawberries
1/3 cup POM juice
1/2 cup jaggery or packed brown sugar OR 1 cup sugar
1 1/2 tsp panch foran (spice mix)
2 tsp oil (olive oil or vegetable oil)
Method:
Heat oil in a thick bottom saucepan. Add panch foran in it.
Once it starts to pop add strawberries a in it and stir it once. Then add POM juice. Mix it all together and turn the heat to medium and bring the mixture to boil.
As soon as it starts boiling, turn the heat to low and stir in jaggery/brown sugar/sugar.
Keep stirring until the sugar dissolves. Gently boil until the strawberries are clear and thick.
To test if your chutney is done, take some in the back of your spoon and let it stay out in the air for about 10-15 minutes then run a finger through it. If it wrinkles then its done.
Turn off the heat and let it cool.
Although I have never done it before, I am sure you can “can” and store this chutney in your refrigerator for 2-3 weeks.
I asked my friends if they can help with their trusted source for canning and one name kept that popping was Food In Jars. And I agree with them! If you want to learn anything about food in jars or canning visit this blog.