Indian Simmer loves….. Sinfully Spicy!

I have been asked this question over and over again…what blogs do you read? Would you recommend a blog? What are the blogs that Indian Simmer loves? Every interview I do, any research or survey I am a part of, every person I meet who happens to know that I am a food blogger. Through emails, online chats or in person this question has been asked to me way too many times that I thought I better start making the answer more public than I already do. Hence came into existence the idea for this new series named, “Indian Simmer loves…..”. There are so many beautiful blogs in the blogosphere and so many people doing some exceptional work through their websites. Through this series I simply want to let you know what Indian Simmer reads and loves. And when the lovely people behind those blogs agreed to help I thought why wait? Let’s start it from today itself, shall we?

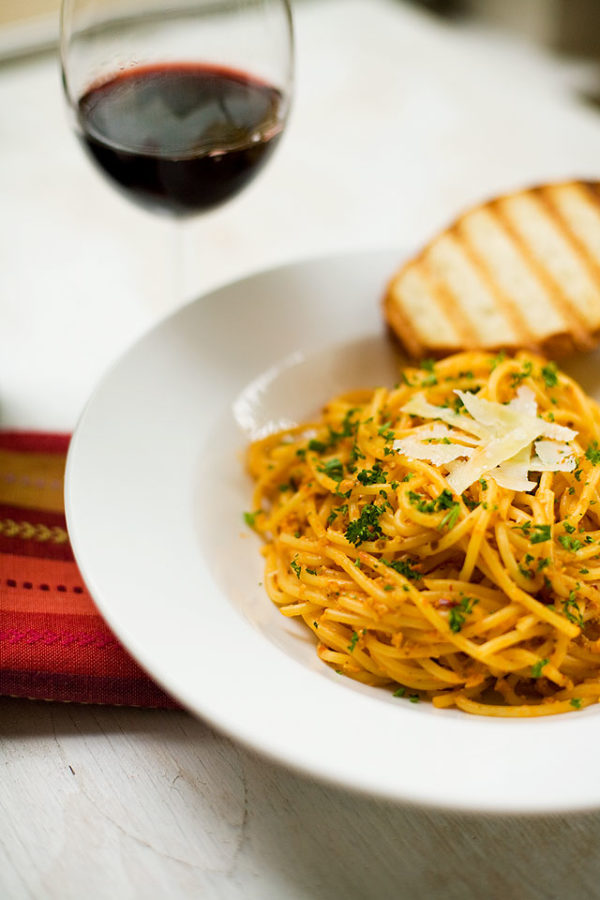
As a part of this series I will showcase one of my favorite blogs/bloggers each month. To kickstart the series I have a very dear friend of mine who like me hails from India and shares her stories, experiences and recipes from the country. I just like the refreshing feel of her blog. Her simplistic writing accompanied by the gorgeous photography is just a breath of fresh air. Will not waste time because she is the one who is going to do all the talking today. Let me introduce you to Tanvi of Sinfully Spicy and lets show my homegirl some love!

Image1

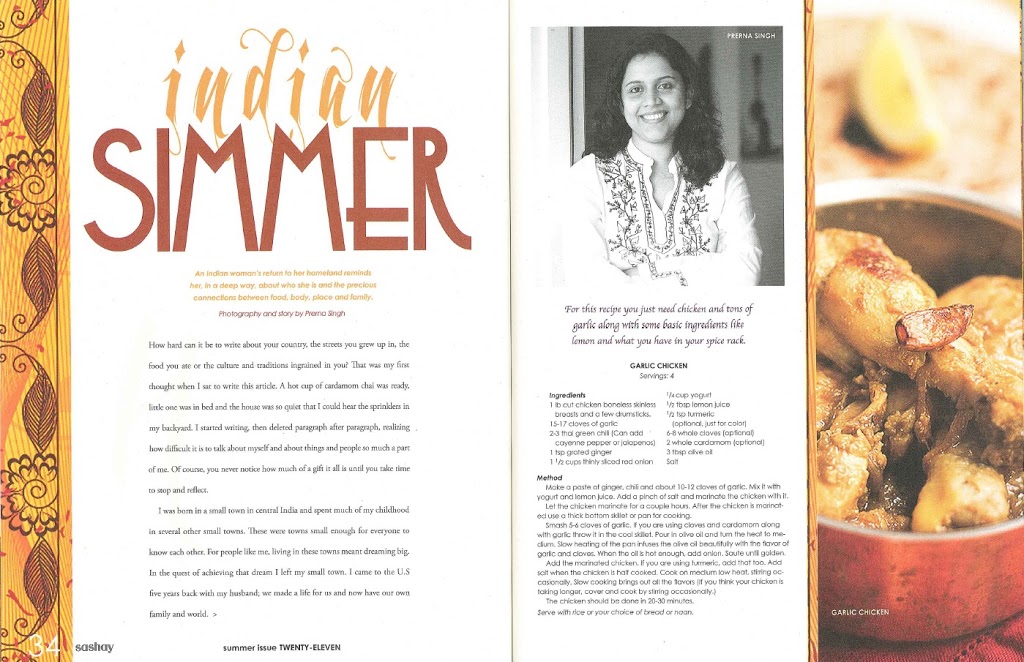
Prerna is one person who never fails to fascinate me with her warmth & energy. Always full of excitement, I would say that she is one of the most cheerful lady I have met in the blogging world. They say that you need an eye for beauty, as much as I have known her, I feel that the kind of emotions & personality you carry around in life tend to reflect in everything you do – be it words, lens or recipes. Beautiful people make beautiful blogs – Indian Simmer is a testimonial of exactly that! Her lens is what personifies indian cuisine to the root  – Vibrant, colorful & mouthwatering.
I was honored when she asked me to guest post on her blog. Thank you so much, Prerna! Among many of her creative ideas, she came up with this series where she wants to feature her favorite blogs. Well, the thought of kick starting the series is jaw dropping for me! Thank you so much again Prerna for inviting me here. To make the series fun, she posed me with a little questionnaire, which I tried my best to answer. Please keep in mind that this is the first time EVER in my life that someone interviewed me, don’t mind if I got carried away at places 🙂

Image2

Tell us about yourself and what you would say is your food philosophy?
Hi, I m Tanvi  & I blog at Sinfully Spicy. I grew up in Delhi, India in a food loving, big joint family. No points for guessing that cooking caught my interest interested right from childhood. Indian families have this tradition where elders give money or gifts to kids as a token of appreciation for any good deed done.With my grandma, cooking always scored; what started as a hobby to fill up my piggy bank, slowly turned into a passion. Whatever I have learnt in kitchen, I owe it to her & my mom, who are two of the greatest cooks I have come across in my life.

My food philosophy is very simple – I like to cook from seasonal ingredients, include lots of whole grains & legumes in our daily diet and follow portion control. I hardly buy any canned produce and stick to natural (and sometimes organic) food items. I maintain that meals cooked with fresh ingredients & good mood always come out delicious. My family likes food with spice level spiked up; our daily meals are full of flavors from Indian spices but low on oil & cream. While weekdays are mostly home cooked meals, on weekends, we like to experiment with different cuisines when eating out.

Image3

What led you to starting a food blog?
Before shifting to USA, I led a very busy corporate life & believe me that I had never heard of a food blog! After coming to USA as a dependent wife, my life became as slow & boring as it could be. Just to kill the boredom of lazy afternoons, one day I reached out for the camera & starting taking pictures of the meals I cooked. It went on for a week before my husband spotted the images in my laptop & suggested that I should document them somewhere & share the recipes, the blog was born within an hour & as they say rest is history!

Dip1

What would you say is “Sinfully Spicy” all about and please share a recipe that best describes your blog?
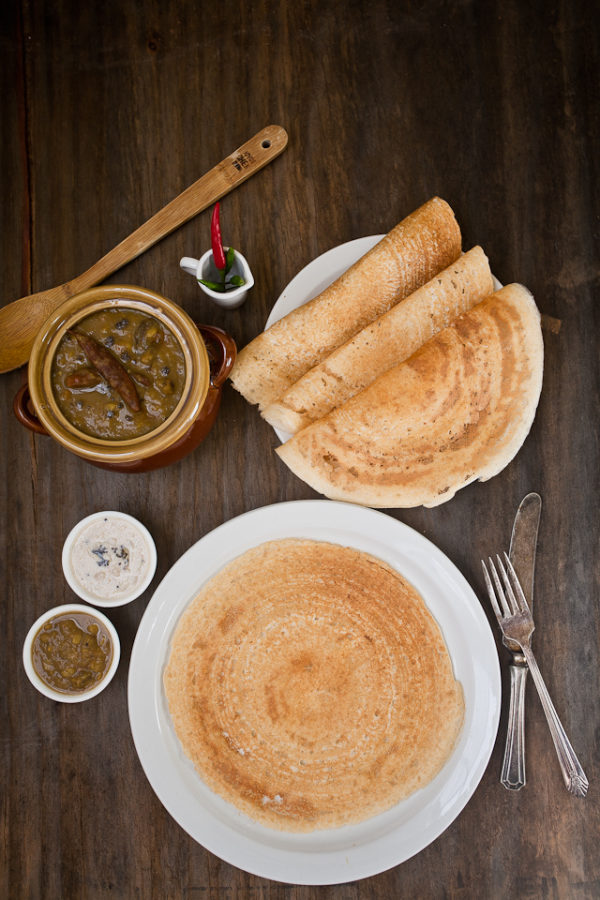
Sinfully Spicy is my humble effort to showcase the magical world of Indian spices & share how to use them creatively in preparing delicious indian recipes. Usually people think that spicy food necessarily has to be “hot”, it’s my sincere wish to clear this misconception with this blog. As with the rest of the world, the only “ hot” spice in Indian cuisine is red chili powder, all other spices are to enhance taste & flavor. Spices need not add heat to food always, they are as diverse as moods of life – warm, sweet, pungent, comforting, sour, bitter and when used in the right proportion, make food tasty and not fiery.

Image4

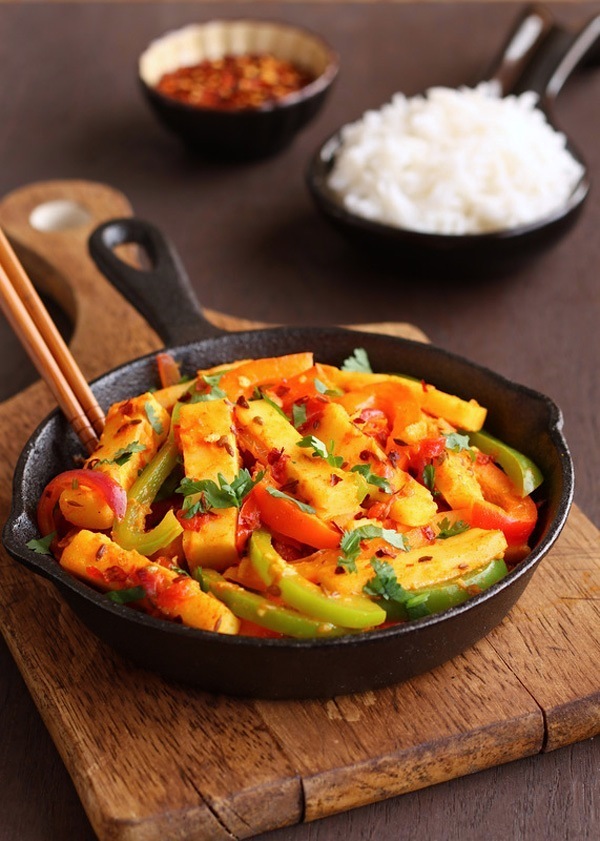
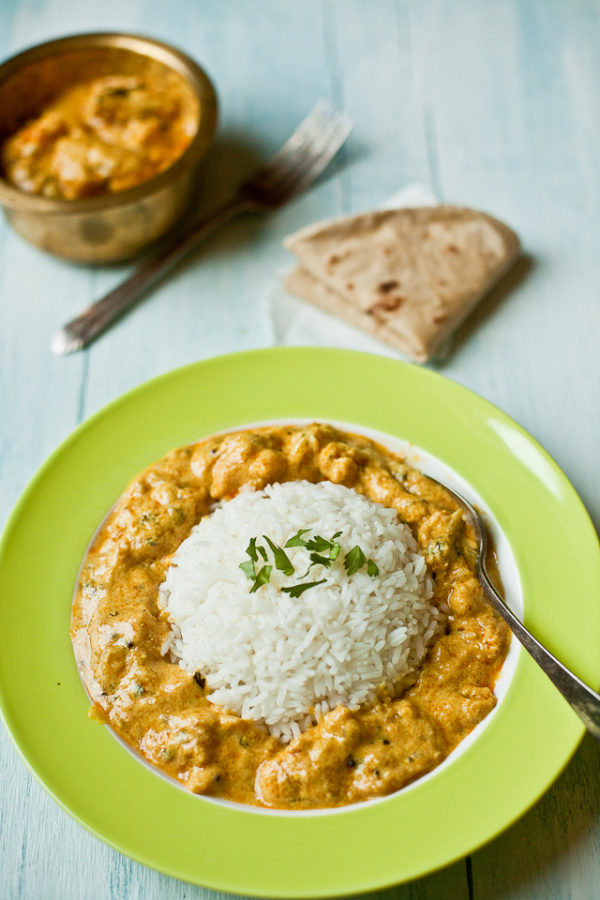
Paneer Jalfrezi is a spicy indian stir-fry made with bell peppers, onions, tomatoes & spices. As with many Indian dishes, Jalfrezi is not a dish in itself but a cooking method. You substitute paneer with rotisserie chicken or shrimp and make your own version. The idea is to make a quick stir-fry with ingredients, which require less cooking time. The dish was initially created by The British to use left over meats but, over the years, it has evolved as a popular side dish in Indian restaurants. Jalfrezi dishes are colorful, have pronounced use of chilies and the texture of vegetables is crunchy. You can add stock or cream & make a sauce & serve as a main dish but I like to prepare it a dry curry.

Image5

Ingredients  (Serves 2):

3 tbsp canola/olive/sunflower oil
1 tsp cumin seeds
1 tsp coriander seeds, lightly crushed
1 large onion, sliced
2-3 garlic cloves, minced
1″ fresh gingershoot, minced
2 Thai green chilies, chopped
2 medium roma tomatoes, quartered & sliced
3/4 tsp turmeric powder
1.5 tbsp red chili flakes (adjust to tolerance)
1 cup sliced bell peppers (use any colored peppers of choice)
7 oz / (200gm) paneer (Indian cheese), sliced into 2” batons
Salt to taste
½ tsp garam masala
1.5 tbsp white vinegar / fresh lemon juice
¼ tsp sugar
Chopped Cilantro for garnish

Method:

Heat oil in a cast iron skillet or pan /wok/kadhai on high. Once smoking, add cumin & coriander seeds and fry for 30 seconds or so till they crackle.
Next, add the minced ginger & garlic along with green chilies and cook for another 30 seconds till you smell the aroma.
Reduce heat to medium and add sliced onions next to the pan and fry till soft and translucent. About 2-3 minutes.
Add sliced tomatoes, turmeric powder & red chili flakes to the pan next and fry for 5-7 minutes till tomatoes begin to sweat & soften but do not turn mushy. You will see oil separating on sides of the pan. Stir frequently to prevent tomatoes from sticking to the bottom of the pan. Add the sliced peppers next, stir and fry them for 5-8 minutes so that they cook slightly but still hold their shape & are crunchy.
Add the paneer next along with salt, increase heat to high and cook for 2-3 minutes with gentle tossing so as not to break the cheese.
Remove from heat, sprinkle the garam masala, sugar & top up with vinegar. Combine well. Garnish with chopped cilantro & serve with steamed rice or Indian breads.

Dahi Ke Aloo (Potato and Yogurt Soup) for Navratri and a guest post on Eat Live Run

Potato and yogurt soup

That time of year is here again. Back home this was the time when monsoon would begin to wave a bye bye. After days and weeks of playing hide and seek, sun would finally decide to show up and umbrellas would go back to the closet giving way to woolen pullovers and shawls. This would tell its time for festivals and celebrations. And right now we are in the middle of one such celebration or as someone recently said, “in the middle of celebration of mother!”. The time when we celebrate Maa the embodiment of strength, knowledge, prosperity, nurture and Shakti. For nine days we celebrate that mother – the reason for our very being! At the end of nine days, we do a small pooja at home and invite little girls over to our house for a treat and pooja meal. I wrote a whole post on pooja meal last year.

Yogurt and potato soup with toasty bread

Today I did the same. Cooked a simple meal for the little girls who are considered goddesses. I made some traditional dishes and here is the recipe for one today. This is something very simple, goes well with the pooja meal because it doesn’t ask for strong spices, onion or garlic and as my husband says, its very carby. So perfect for a meal after a day of fasting.

Potatoes

Ok, raise your hand if you don’t like potatoes … everyone loves potatoes! At least I do, or maybe I like them a little more than I should but I don’t regret it. As a child I was the pickiest eater and potato was the only vegetable I could eat (does that count as a true vegetable?). But now that I am past that phase, potatoes still remain a favorite because you can do so much with them. Especially in Indian cooking when you can make something as royal as a Mughlai Aloo Dum or a simple stir fry, potatoes will always shine. The recipe I am sharing today is one such recipe.

Dahi ke aloo

Dahi is hindi for yogurt and Aloo means potatoes. When potatoes are cooked in tangy and creamy yogurt with few simple spices they become Dahi Ke Aloo. I call it potato and yogurt soup. My mom serves it with hot and crisp fresh out of the griddle rotis, I served it with some fresh baguettes.

But if you want to take it up a notch then serve them with nice and crisp parathas (pan fried flatbreads). Even better if you do it with lachha paratha. A layered and flaky Indian flatbread which is pan fried in some ghee and is in itself an art form! I am guest posting today on my dear friend Jenna’s beautiful blog Eat Live Run and there I made some lachha paratha for you. Go check it out! But again, whatever you call this soup or whichever way you serve them, they still remain classic comfort food and an easy quick fix dish.

 Ingredients: (As I guest posted on Veggy Belly)
4 medium size potatoes (boiled, peeled)
2 cups yogurt (room temperature)
2 cups water
1 tsp cumin seeds
1 tsp red pepper flakes (a little extra if you want to garnish)
1 tsp turmeric powder
1 ½ tsp coriander powder
Salt to taste
1 tbsp. olive oil (extra to drizzle on top of your soup)

Method:
Mash the potatoes. Thoroughly mash one and mash the others to bite size pieces. Set aside.
In a bowl whisk together yogurt and water leaving no lumps.
Heat oil in a medium size pot. Add cumin seeds. Once they start to pop, add turmeric and coriander powder.
Mix the spices together and add potatoes immediately. Mix spices well with the potatoes.
Stir in the thinned yogurt. Mix it well together with the potatoes.
Wait till the soup comes to a nice rolling boil and then add salt.
You can serve it hot. I like mine lukewarm with some extra virgin olive oil drizzled and some red pepper flakes sprinkled on top.

To all my friends who celebrate, wishing you all Shubh Navratri!

Rajma Masala

43
Rajma Masala

During the initial days of our married lives when I had just moved to the US, Abhishek used to cook a lot. Not sure if that was to impress his new bride or because the new bride’s cooking was not as “edible” as it is now, but he’d cook. I would wake up to a nicely set table with cumin scented scrambled eggs, crisp brown toast smothered with buttered and cardamom tea boiling in a copper pot perfuming the whole house. Ahh, those blissful newly-wed days! That did not last very long but yes it happened to me. I always say to myself that maybe I very quickly evolved to be a “fabulous” cook and he realized that its time to move out of the kitchen to make home on the couch in front of the television.

IMG_1175

One of the very first things that he cooked for me was a Rajma Masala, red kidney beans cooked with several spices long enough for all the spices to blend together and enter each and every bean in the pot. Rajma Masala he cooked that day was good and he very excitedly told me it was his all time favorite meal, rajma masala drizzled with ghee and steamy puffed rotis on the side. I still wonder why he made his favorite meal to impress me but maybe that was something he knew he will not go wrong with, and he did not. Even today (well until he reads this!) he does not know rajma masala was one of my least favorite dishes until that day. Maybe no one cooked it for me with so much excitement and love before. And now whether it is an occasion or not, if it has anything even remotely to do with making Mr. Singh happy then there has to be Rajma Masala somewhere. If I am making it at home then it should be enough for him to last the next two three meals.

When we were planning a small birthday celebration for him last week this one had to be on the menu. I cooked it as usual and everyone liked it as usual. Now when people ask me for a recipe they assume that they can just check it out on my blog. That’s when it hit me that a dish which is my favorite person’s favorite meal and is so close to me, I do not have its recipe up on my blog. That is just not right. So I made amends as soon as I could. Hence sharing the recipe for Rajma Masala and wishing the husband a very belated happy birthday!

Well, the recipe coming up must be the shortest recipe directions/method that I might have written in this entire blog! And if you had read my last post on Indian Curry paste then you might just know the reason why. As I told you in my last post that if you know how to make Indian Curry paste then you can easily make half the curries with no effort. This is what I did with my rajma masala. Just added curry paste to boiled rajma (red kidney beans) and I was good to go. Instead of using canned beans I buy dry beans from the super market, soak them for 6-8 hours and then boil them with salt and cloves. If you think that is too much work for you then you can you use canned beans and you life will be even easier. Just clean your canned beans with water thoroughly before using and give it a nice boil with curry paste and some water. That’s how easy this recipe is. So check it out-

Ingredients:

1cup dry red kidney beans (or two 8 oz canned red kidney beans)
2-3 cloves
Salt to taste.
3/4 cup curry paste (recipe in detail here)

Method:
Wash dry beans with water, then soak them in water three times the quantity of beans. In this case I used 3 cups of water. Let it soak in water for 6-8 hours or overnight depending on how fast your beans absorb water and get soft.
Drain all the water. Add fresh water, this time four times the quantity of beans (in this case 4 cups).
Add cloves, salt and pressure cook until the beans are cooked.
If you don’t have a pressure cooker I would say using canned beans would be more convenient because it will take you long to cook dry ones. But if you want to do it from scratch then add water enough for the beans to cook in a pot and boil until they are tender.
Once the beans are cooked, add curry paste. Give it another quick boil.
Turn off the heat. Garnish with chopped cilantro and serve with warm steamed rice.

Indian Curry Paste Recipe: How to Make Curry Paste at Home

Jump to Recipe

See 10 amazing curries you can make from this curry paste

This Indian Curry Paste recipe is the base of any Indian curry. This is a master Curry Recipe that can be used to make anything from Chicken Curry to Chana Masala.

Curry Paste in a serving bowl

Saturday was fun and interesting. It was Abhishek’s birthday but he had to go to school so he left early leaving me and the little monster with enough time to plan something nice for him. I took this as a good opportunity to go meet a few friends of mine. pent a lovely afternoon with them talking about food, food blogging and the rest of the world while watching the kids play.

That was so fun, I almost forgot that there is a party at my house in the evening and a birthday cake needs to be made. There needs to be a whole post to tell you the story about that birthday and the birthday cake which probably I will do later! But while deciding his birthday menu I realized one thing. One of the most common masala mixture (spice mix) that is used in Indian curries is a curry paste and I never shared a post on it. So I thought before sharing what I cooked for his birthday I should share this basic Indian curry recipe for curry paste whose variation is present in almost all Indian curries.

Ingredients for an Indian Curry Paste

What is an Indian Curry Paste made of:

But I feel like it is my duty to tell you that every Indian household has its own recipe for any Indian dish and the same goes with a curry paste. I come from the northern part of India where curry paste is mostly tomato-based. In South Indian kitchens use of curry leaves, coconut, some kind of lentil or tamarind will be prominent. Mughlai Cuisine is comprised of whole or ground spices and the addition of cream or a dairy product to make the sauce rich and creamy.

How to Make Indian Curry Paste

Let’s take it a little slow and focus on the basics first and start with a basic Indian Curry Paste. It can be used to make almost all kinds of Indian curries. So you start with this tomato-based curry paste recipe as the base and then add layers to it based on what you want to achieve. Add a rich cream and/or nut paste for mughlai curries or curry leaves, coconut or maybe some mustard seeds to give it a more south Indian flare.

To create an authentic Indian curry paste, blend a harmonious mix of wet and dry masalas. The wet blend, crafted from pantry essentials like onions, garlic, ginger, and chilis, infuses vibrant flavors into your dishes, while the dry mix complements with aromatic depth and complexity.

Experiment with various chili peppers like Thai green chilis, jalapenos, or dried red chilis to tailor the heat level to your liking, or omit them altogether for a milder yet still richly flavorful curry base.

Dry Masalas for Indian Curry Paste

Spices used to make an Indian Curry paste:

The foundation of Indian curry paste lies in the aromatic blend of dry spices akin to garam masala powder, a medley often personalized by each cook’s unique touch. In my family’s rendition, this mix features black cardamom, cinnamon, cumin, coriander seeds, cloves, black pepper, and bay leaves ground into a fragrant powder, melding seamlessly with the wet masala for a symphony of flavors.

After incorporating the garam masala powder into the wet mix, the addition of tomato puree or diced tomatoes serves as the final flourish, simmering until the sauce reaches a harmonious consistency, evoking the essence of traditional Indian cuisine in every bite.

Indian Curry Paste

This Indian Curry Paste recipe is the base of any Indian curry. This is a master Curry Recipe that can be used to make anything from Chicken Curry to Chana Masala.

Course Basics of Indian Cooking
Cuisine Indian
Keyword How to make
Prep Time 30 minutes
Cook Time 45 minutes
Servings 1.5 cups
Author Prerna Singh

Ingredients

Wet Paste

  • 1 cup red onion chopped
  • 1 inch ginger
  • 3-4 cloves garlic
  • 3-4 TBSP water extra if necessary

Garam Masala (dry spice powder)

  • 2-3 no. bay leaves depending on the size of the leaf. 3 if small, 2 if big
  • 2 tsp cloves whole
  • 2 tsp peppercorn whole
  • 3-4 no. black cardamom whole
  • 1/2 no. cinnamon stick whole
  • 1/2 TBSP cumin seeds whole

Whole Spices (for the curry paste)

  • 1/2 tsp cumin seeds
  • 1 inch cinnamon stick
  • 2 no. black cardamom gently smashed a couple times to break the outer shell

Extra Ingredients (for the curry paste)

  • 1 tsp turmeric powder
  • 2 TBSP coriander powder
  • 2 TBSP cooking oil preferably mustard oil, but can substitute with canola or olive oil.
  • 1 tsp ghee
  • Salt to taste
  • 1 cup diced tomatoes pureed

Instructions

Wet Paste

  1. Bring ingredients for the wet paste together in a food processor or blender/grinder.

  2. Add 3-4 tbsp of water. Add extra if needed for the blades to move smoothy. Grind into a semi coarse paste. Set aside.

Garam Masala (dry powder)

  1. Bring all the ingredients together in a spice grinder or coffee grinder. Grind into a fine powder. Transfer into a jar with air tight lid. Set aside.

    We will only use half of this masala for the curry paste recipe, to follow. Store the remaining garam masala powder in an air tight container and store in a cool, dark place for later use

How to make Indian Curry Paste

  1. Heat 2 TBSP cooking oil in a thick bottom wok, or pan, over medium high heat.

  2. Add whole spices, in the order listed in the ingredient section.

  3. As the spices sizzle, give it a quick stir. Add the wet paste into the cooking pan.

  4. Stir well. Cook, on medium heat, stirring at regular intervals until all the excess water has evaporated, 5-8 minutes.

  5. Add turmeric and salt. Turn the heat to medium heat and stirring at regular intervals (every 30 secs. to a minutes), scraping the sides and bottom, cook the paste for approx. 5 minutes, until it starts to change color and darken to a light brown color.

  6. Add ghee. Mix well. Scrape the sides and bottom.

  7. Add coriander powder. Add tomato. Turn the heat to medium high. Stir well and cook for 5 minutes, until excess water from the tomato has evaporated.

  8. Add half of the prepared garam masala powder. Store the rest for later.

  9. Mix well. Cook for 1 minute, scraping the sides and bottom, bringing all the masala together.

    Your curry paste is ready to use.

Recipe Video

Recipe Notes

  • Add vegetables to this curry paste if you are making a vegetable curry. Add browned, baked, stir-fried, or deep-fried meat to make a meat curry. You can also add it to rice with a few vegetables and make a tahiri (spicy rice pilaf).
  • Curry paste can be stored in a refrigerator for weeks. All you have to do is let the paste cool down completely and then transfer it to an airtight container and freeze.

See 10 amazing curries you can make from this curry paste

Looking Back- My 7 links & Gojee Feature

30
A couple weeks back my lovely friend Jenn from gorgeous Jenn Cuisine sent an email to me telling about this fun, kind of a relay post thread floating around the blogosphere called My 7 links. In this post you basically answer a few questions which are mainly about your blog and then hand it over to other bloggers who you love for them to take it forward. Jenn asked if I would want to join. I thought it would be interesting and maybe fun to look back at all those posts that you very carefully collected together for the past sometime. So very excitedly I said yes. But little did I know how difficult it is to comment on your own work. Every post that you put forward on your blog has a little bit of you so to pick a few from the whole bunch is difficult. It took me sometime to answer these very simple questions and although I am still not sure the answers are correct, still I am sharing it with you today.

Most Beautiful Post:-

IMG_1110

I am one of those people who always criticize their own work. Every photograph I take, every dish I make and every post that I share I find some or the other flaw which I later think should have noticed before. So you can only imagine how difficult it must be to answer the very first question in the series. That being said I would say I felt pretty good about one of my very early posts about Pasta in creamy tomato sauce with pumpkin seeds. Not sure if that was my most beautiful post but I had fun shooting each and every photo from that post and looking back I realize that there was some effort that went into it.

Market behind Jama Masjid

As you know I have a series that I run on my blog called Wordless Wednesday which is basically a non-recipe photography post where I share with you some of my photographs. From that series the post that is really close to my heart is the post where I shared the photos I took at Chandani Chowk. Post was named Colors of Chandani Chowk (India). I can’t stop staring at all the vibrant, full of life and colorful images from the day when I just walked on one of the most crowded yet popular streets of India.

Most Popular Post:- 

IMG_9954

Most popular post on my blog has to the Homemade Naan with Malai Kofta. It was not before I shared this post on Indian Simmer and I looked at the response of people that I realized how much a simple flatbread that I never gave credit to was so popular all around. I am not a huge fan of the use of yeast in my flatbreads so I usually make my naan without one using different methods. I thought it would go well with Malai Kofta so I shared it here and expected people to like the malai kofta recipe. But instead everyone was more excited about the homemade naan recipe. This post is the one that has been featured in many other blogs and websites. It has been the most searchable post of mine so far, got the most comments and I still get emails from people telling me that they tried the recipe and liked it. 

Most Controversial Post:

Chicken Tikka Masala

I am always open to people’s criticism/feedback and always appreciate it either its good or bad. I have been so lucky to always have had a good response from my readers. Once in a while someone would say not so good things about you but I choose to never delete even those from the comment section of my blog. But with my Chicken Tikka Masala and Cumin Scented Rice Pulao there was a different kind of objection that some “anonymous” readers had. The use of a particular beverage which I very innocently used as a prop disturbed some and that created a bit of a discussion. If you know me then you know that I am just not a confrontational kind of a person but those comments hurt me a little because they questioned my ethics. I responded to those comments but as usual the “anonymous” commenter stayed anonymous!

Most Helpful Post:

Making Paneer

Turns out my readers love homemade food and they always appreciate when I share a way to make something that they usually buy from a store, at home. Another homemade recipe that I shared was of Paneer (Indian Cottage Cheese). After naan this has to be another post that I always have people writing to me about. They are amazed at how easy it can be to make paneer at home and they say the post helped them change the way they look at Indian cheeses now. That is a huge compliment!

IMG_2855

Although it has has been pending for a long time now but I started a series named Food Photography- My Process on my blog. The very first post from the series got a great response and feedback from my readers was that it has helped them take a different approach on food photography. In the post I spoke about my planning process and the use of light in food photography. I am so bummed that I am not able to publish the next post from the series and still have readers/friends ask me to work on one. Today I promise I will work on the next post from the series and will share with you soon.

Post Whose Success Surprised me:-

IMG_2715

Another question that is difficult for me to answer. I always think that you, my readers have always been so appreciative of me and always give me a positive feedback. But the following two posts were the ones that I never would have thought that you will like so much. One was A Simple Hindu Pooja Meal. This post I wrote almost an year back, somewhere around the auspicious days of Navratri. Navratri (which literally means nine nights) are nine days when Hindus worship the goddess of strength, prosperity, patience and kindness. The several aspects of woman and we believe goddess Durga is an epitome of that. We cook some dishes that use close to none spices and are called pooja meal. The recipe from this post have again been featured in several places including the one I am going to talk about later in this post and also got a great feedback.

IMG_2351

Another post which I never thought would get such great response was that of Molten Chocolate Liquor Cake.

Post that did not get attention it deserved:

IMG_9724

I might have said before that the belief that Indiasn eat naan everyday at home is not really true. We love naan that is for sure but the bread that we eat everyday at home is not naan but something even simpler like a phulka, dosa, paratha or roti. That is what my grandma used to make everyday, and her grandma AND her grandma! I shared a recipe for the easiest and quickest Indian flatbread on the planet a while back. This post was one of my very early posts when no one knew who Prerna or Indian Simmer was. Maybe that’s why it never got the attention of people but I think if you like Indian food and want to learn about it then you should know Roti- An Indian Staple!

Post I am proud of:-

IMG_2595

The day I try a recipe that my dad loves, or a dish that no can cook better than my mom, or the day I master my husband’s favorite dish that he thinks his mom makes best that day is a “I feel proud of myself” day for me. These are the little achievements that make me want to try new things and cook something for my family that they have never eaten before. But then someday you cook for a cause, you cook to show how much you care about something and to show your support. When those dishes and those posts get the support of readers like you that makes me feel prouder. One such post is Rose Panna Cotta- Celebrating Pinktober. I have many close friends and family who have been touched by cancer so the topic is personal to me. I will do anything to spread awareness about the topic, this was one such effort.

So here are my 7 links. Hope you liked them. I would also want to nominate five blogger friends of mine who run absolutely gorgeous blogs. I know you would love them if you don’t already know them.
Kulsum from Journey Kitchen
Joy from Joylicious
Sabrina from the Tomato Tart
Radhika from Food For the 7 Stages of Life
Sala from Veggie Belly

And now the other news that I am excited about lately. Gojee.com approached me a while back and asked if I would like to be a featured contributor to their website. My answer was, “hell to the yeah!”. I have been a fan of the website ever since they launched it. They are fun people and that shows through. Today they are revealing the contributors on their website which includes some very well known names and the little me too! Check out Gojee its one of the coolest recipe sites out there.

Kadhi Pakora

It has been close to six years since I left homeland and started my own family and a kitchen. There were quite a few initial challenges and kitchen disasters but slowly I think I got a hang of it and started cooking some decent edible food. But there are two things that still make my legs weak when someone asks me to make – Indian pickles or a kadhi. A very close friend of ours is pregnant and the mommy-to-be has been craving kadhi, a lot! Lucky enough for me an Indian restaurant close to our place makes really good kadhi. Every few days I have to make a trip there. But after a few trips I realized I better face this fear and try to perfect the art of making kadhi myself.

Simple Confort Food (kadhi pakora)

There is no right way to make kadhi and you can find tens and hundreds of recipes out there. A Gujarati kadhi (popular in the state of Gujarat), Maharashtrian Kadhi (from the state of Maharshtra), Pujabi kadhi (coming from the state of Punjab), Aunty Sheila’s kadhi, mom’s kadhi and so on… A perfect example of what a traditional Indian food is, everyone has their own version with a few tweaks here and there but fundamentally they are all the same. Simple comfort food that fills up your belly, warms up your heart and you can never have enough of it!

Flour

Kadhi is simply a spiced soup that you make with thinning out yogurt with water and cooking it with some chickpea flour. Yes, that is all what kadhi is and then you can add whatever you want to it and make it your own. Some like to make it with some deep fried chickpea fritters, some add veggies or some like my mom make it with tomatoes. Some like to add more water and make it really thin, some don’t and so they add a little more flour to make it denser. Then the use of spices also varies from region to region. In some parts of the country mustard seeds and curry leaves are very important when making kadhi, while in other parts spices like fenugreek seeds and whole dried red chili pepper are used.

Chickpea flour fritters

My mom makes it in one way and my mom in law makes it in another so when I try a recipe like this I take the middle route. Some of hers and some of hers! Some might find this recipe a little closer to the Punjabi kadhi and I would say those frequent trips to the Indian restaurant might have to do with that too. For the tempering, I used the spices that my mom uses and for the consistency I went with my mom in law’s style. I made some deep fried chickpea battered fritters and also some with vegetables. I am sharing the recipe with no vegetables here because that is what is commonly used for kadhi. If these fritters don’t look perfect or they look sloppy to you then please pardon me. Making gorgeous looking and perfectly shaped bhajia is just not my forte so I say “I kinda like them that way!”

Kadhi Pakora

Check out the recipe over at 6 Bittersweets, a gorgeous blog by one of my very good friends Xiaolu. You must remember Xiaolu from one of the most beautiful guest posts on Indian Simmer, the recipe post for orange grand marnier souffle. She is a very talented photographer, blogger and one of the most beautiful blogger friends that I have. Few weeks back she asked me to do a guest post for me and requested I make some kadhi for her and I did! So please head over to 6 Bittersweets for my guest post that I did a couple days back.

Pickled Red Chili Peppers

After two weeks of crying, whining and emotional blackmailing, today was the first day our little monster and I had a calm ride up to the daycare. It is a little tough to see that “maa why are you doing this to me/us?” look in her eyes but slowly things are getting better (at least beginning to!).  Abhishek aka A started his business school a few weeks back which got him busier and hence made it even tougher for me to answer all her questions, verbal and non-verbal. Where are we going? Why are we going? When will we get back? and now adding to the list, Is Papa coming? Why not? Why does he need to study? How long will he study?! Papa is the one who tells her all the stupid imaginative stories and answers all her questions. When he is not around Maa becomes clueless. I am neither imaginative nor a good story teller for a two year old! But after a month of exercising immense patience and perseverance, I am slowly getting a hang of that too (at least beginning to!). This is what kept me from coming here and sharing stories with you on Indian Simmer. After all the lion, mouse and dragon stories, I was left with no creativity by the end of the day and I did not want to write a post just for the heck of it. So I kept quiet here and tried to take care of one part of my life first. Hope you missed me because I missed you like nothing else!

Not a lot happened here on my blog but there was still a lot going on in the kitchen. There were some new recipes developed, some new flavors tasted and some old school Indian recipes that I tried to learn. Some of them that I am really proud of are my mother-in-law’s kadhi that now I can tell her that I have mastered and a few pickles that my mom makes. My take on mummy’s aam ka aachar, pickeled raw mangoes in which I used green apples instead (will share the recipe soon) and pickled red chili peppers.

Pickled red chili peppers

My mother might not be the most adventurous cook in the world but there are few things that no one can ever, ever cook better than her. She makes okra fry that I have never tasted anywhere else and I have eaten a lot of okras! And no one can pickle red chili peppers like her. I am not saying this because she is my mom and her food will always be the best in my eyes, but seriously she just knows how to do it right! I have tried a lot of her pickle recipes but never tried pickling red chili peppers because I never found the peppers that looked like the ones she uses to make hers in India.

Red HOT peppers

But few days back I got lucky when I entered a small grocery store run by a Mexican family. They have the freshest and gorgeous looking produce from the local farms right in their tiny store. And I fell in love with the place the moment I saw those red chili peppers lying on a brown jute basket underneath the shelves. I swear I screamed when I saw them, grabbed as many as I could, brought them home and did what I had wanted to do with them for the past six years. Filled several jars with pickled red chili peppers.

Pickling red chili peppers

Although according to my mom you should not eat it until its been in there for at least a couple months. They say the longer you keep Indian pickles sealed and stored in a cool, dry place the better they taste. Longer they are allowed to blend in with the spices the more they absorb flavors and taste better. If stored in favorable conditions they stay good for years. But I couldn’t resist and a half jar is already gone. So beware, they can be hot, spicy and way too much addictive!

Ingredients:
About 45-50 medium sized red chili peppers (I used Fresno peppers)
1 tsp cumin seeds
2 tsp fenugreek seeds
1 tsp Nigella
50 grms fennel seeds (approx. 2 oz)
50 grms coriander seeds (approx. 2 oz)
50 grms mustard seeds (approx. 2 oz)
50 grms Aamchur (dried mango powder) (approx. 2 oz)
200grms Salt (approx. 7 oz)
8 oz virgin mustard oil.

Method:

Thoroughly clean the peppers with water, pat dry them, spread it on a baking sheet or something similar and lay it out in open sun to dehydrate a little. 4-5 hours of nice hot sun or an hour in the oven at 170 deg. F should be just right. You just want the outer skin just to get a few wrinkles.
Clean the jars you are going to use for canning and let them air dry as well.
In a pan roast fennel seeds, cumin, fenugreek seeds and nigella over medium high heat just for 3-5 minutes until begin to smell the spices. Turn of the heat, set it aside and let it cool.
Coarsely grind all the spices mix it with half (around 4 oz) of oil.
To fill the peppers you can do it in two ways, either make a long slit lengthwise and fill it with the spices or chop the head off, take out the seeds from inside and then fill it with the prepared spices. I do the latter and I also mix the seeds I take out from inside of the peppers into the spice mix and fill it into the peppers.
After filling the pepers you can either dip each pepper in oil and then place it in the jar or fill the jar with the stuffed peppers and then pour oil over it.
Airtight the jars and store in cool, dry place.
Every couple days shake the jars a little so the oil slowly coats all the peppers.
You can dig into the pickles in a couple weeks time but ideal would be to open the jars not before at least a month.

Wordless Wednesday: Colors of Chandni Chowk (India)

38
I know I have been out of sight for a long long time now and must have kept you all wondering. Got some vote of confidence that I have your love and support even if I choose to stay quiet for a while or try to take a little break. Also received a few emails and messages from some lovely friends checking on me which never ceases to warm up my heart. Thanks so much!
Just so you know I am doing very well, so is the family and the little monster. Just trying to get comfortable with a few changes in the day today life about which I will tell you later. Today I am here to quietly share some photos which somehow managed to escape my eyes. Photos from my last trip to India and an afternoon at Chandani Chowk, one of the busiest and most popular market of India. Hope you enjoy!

Chandani Chowk

Rooh-af-zaah!

Collage1-2

Colors Colors Everywhere

Chai Wallah

Chai Stove

Collage2-2

Colors!

IMG_9319

Seekh Kababs on the street

Dhaba

Collage3-2

Deep fried Indian breads

Juice Vendor

Vendor

Market behind Jama Masjid

Gorgeousness!

Bustling Streets

Jama Masjid

Eid Mubarak everyone!

Rabdi infused with saffron over summer berries

Summer berries with rabdi.

A couple months back we moved to this town in the suburbs of San Francisco. California was the first place we called home after I and the husband got married. We started with a small one bedroom apartment that had these huge windows with tall sheer white curtains and a stream running outside, just a few feet away from our patio. We made so many memories with this place and so many friends here before moving to a different part of the country. We lived there longer than we did in California but I always felt this place was home and I knew I will come back. And I did!

Now we are here again, closer to the places we loved and also discovering new places that we never knew existed. One such place that I discovered and I am so glad I did is this cute little farm blocks away from our new place. It’s a tiny little farm, nothing fancy, run by a cute little family. They grow seasonal fruits and vegetables and sell it right outside their gate by the street under a small shade. And that fruit stand is like a godsend to me. I mean where else can you just drive up, ask the fruit seller for cherries and he steps into the farm, picks some straight off the tree and hands them to you? Taste of the produce increases manifold when it is still warm with the hot sun falling on the tree. To be honest, I never knew that peaches can be so juicy, plum and peachy!

Fresh berries from the farm

These days the farm is loaded with fresh berries and so is my refrigerator and fruit basket. Bonus, the little one is crazy about them too. She can have them all day long seven days a week and still won’t get bored. So the perks of trying something new and just throwing berries in it are even more. And I have come to realize that berries make everything taste good. And when you add it to something as good as a rabdi then I can’t even tell you how good the result is!

Saffron

When you cook sweetened milk at low temperature until it thickens to a creamy and rich texture, it becomes rabdi. To step it up a notch and to add another layer of flavor and aroma, cardamom powder or saffron is added. This is a hugely popular dessert in India and is usually accompanied with rasgulla (cheese balls cooked in a sugar syrup), jalebi or eaten as is.  A friend once told me how they add clementine wedges to it. So I started adding any fruit that had a bit of a tang to it and I have to say berries work best. It is rich and creamy, and saffron gives it the perfect warmth. The best part is that its super easy to make.

How easy you ask? Find out at the merry gorumet. A beautiful blog by my friend Merry-Jennifer. She is right now with her friend Jennifer Perillo who is hurting . The moment she learned that her Jennie is in pain Merry-Jennifer did what friends do, she packed her bags and flew to comfort her. Merry-Jennifer asked if I could fill in for her in the meantime and I said yes. So please head over to the blog of this wonderful person where I am proud to be guest posting!

Lamb Kofta Curry

Lamb Kofta Curry

I made some malai kofta a while back. People loved it but that was a vegetarian version and so my carnivore friends felt a little left out with that. I got emails asking for a meaty kofta curry. When Dara from Cook in Canuck invited me for a guest post and demanded the same thing I thought this might be the perfect opportunity to make some. So I am here sharing the recipe for my mom’s Lamb Kofta Curry. Don’t even get intimidated with the name because this is nothing but an Indian version of meatballs. Meatballs cooked in a creamy and spicy curry sauce. A few ingredients or spices must be different but the comfort and warmth you get with those meatballs you will find the same here.

Cashews

Kofta is hindi name for meatballs. In this case I am using ground lamb to make koftas but you can definitely use any meat of your liking. Cooking time will change according to the kind of meat you are using. Now the curry sauce is prepared the same way as you do in any other Indian curry with onion, ginger and garlic as the base. Then later different spices are added to form layers of flavors that burst in your mouth. But in this case there’s a simple ingredient which gives it a little twist. Cashews. Cashews are blanched and then ground into a smooth paste, mixed with some heavy cream and is added to the curry at the end. This gives the sauce its creamy and rich taste.

Another ingredient that I try never to miss when I am making a mughlai dish is kasuri methi (dried fenugreek leaves). Don’t ask me why. If you find it, just throw a couple tablespoons in there and that earthy taste in your curry sauce will tell you why. Its super inexpensive. You can find it at any Indian store for maybe a couple bucks and it lasts me forever. So if you can find it put it, if you can’t then no worries the earth will still survive!

To check out my recipe for a Lamb Kofta Curry head over to Dara’s gorgeous blog Cook in Canuck where I am guest posting today. While you are there don’t forget to check out how-to posts which are some kitchen simple techniques she shares every week, I find them very educative. So hurry up to Cook in Canuck and enjoy your time there!

The Art of Making Crisp Dosa

I told you there has been a lot going on behind the scenes of Indian Simmer! One of the things that is keeping me busy are the guest posts that I have been doing for some very special friends of mine. One such friend is Shulie from gorgeous blog Food Wanderings. I and Shulie were talking a while back. It all started with a casual conversation and like with all the food lovers, it ended up being about food. I told her about my lack of ability to cook a beautiful loaf of bread and she empathized with me. She told me how her family, especially her better half, loves dosa and I shared how easy it is to make. The conversation went on and by the end of it somehow we were deciding on dates when we should share those recipes with each other. What better way to share a recipe with a food blogger than through the blogs. So for you fabulous readers and for a bit of our own selfish need we thought lets guest post on each other’s blog and share the recipes we both love so much. Last week Shulie came as a guest on my blog to share her recipe of a perfect and ah so gorgeous Challah. Today she very generously invited me over to her space to share my recipe for a crisp, golden brown and comforting dosa.

Dosa (South Indian rice crepes)

For those who are not very familiar with dosa, it is an Indian style crepe or thin pancake. While in the north India roti or bread made usually with wheat is popular, dosa is a southern favorite. It is usually made by mixing rice and lentils in a particular ratio and then ground and fermented before making crepes out of it.

Rice and lentils

I come from the northern part of India, the part where rotis are more of a staple than dosas. Although I do make dosas at home all the time but I wanted to learn more about them so I took a quick lesson from my friends Vijitha and Rose. Dosa is kind of their forte and they did teach me a lot about several varieties of dosas common in a South Indian family. Some dosas are savory and some are sweet. Some are thicker and soft while others are thinner and crisp. They can be made with wheat flour, a lentil based batter, semolina based batter and what not. But to share with you here I decided to pick the kind that is most common and also popular. The kind you can find at any Indian restaurant and the kind that is made with a two simple ingredients – Rice and Urad dal (Split black gram).

I have realized that making dosa is no rocket science! Just two main things to keep in mind – one, the ratio of rice and lentils must be accurate and second, fermentation has to be done carefully. Ratio between rice and urad dal for a dosa should be 3:1. Three parts parboiled rice and 1 part washed split black gram. The two are soaked separately in water for a few hours or overnight. Then the two are ground into a flowing batter later to be left to ferment in a warm dry place. Usually I let it ferment overnight, so technically getting a dosa batter ready to finally make the crepes takes at least 24 hours. But if you own an oven or enjoying some warm weather then you might be in luck and things might speed up a little for you!

Art of making crispy dosas

To learn how to make paper thin, crispy and golden dosas check out Shulie’s blog Food Wanderings where I am guest posting today. Look out for some little tips on how to make a crispy thin dosa which I have discussed with you. But I have to add that everyone has their own little tricks for making dosas, these are mine and I am sharing because they work for me. If you have any other tricks up your sleeve feel free to share and educate us!And while you are already there feel free to surf around because I know there’s so much great things to learn from her blog.

Acorn squash with fenugreek seeds and garlic

I have been missing Papa (my dad) for the past few days. Not that I am sad and neither am I out of control happy, I am doing just fine but I am missing him. We talk over the phone whenever we feel like, although after me becoming a busy mom the frequency has decreased but still we talk frequently. We spoke yesterday and maybe I will call him as soon as I finish writing this, but still I am missing him. We were a close knit family of four. Telling everything on each others face close, can’t eat without each other close and sometimes “why the heck do you need space” close. Yes, that close and then slowly we grew up. Both me and my brother moved out of the house then out of town and now out of country to shape our lives. And now when I spend some memorable moments with this little family of my own that I created I miss the time I spent with them. When I go out shopping for a new furniture I miss my Mummy. When I hang up the phone after arguing for the nth time with my brother over a movie or new song, I miss him. And when I take the little one to the park and a gentleman helps his grandkid up the swing I miss my Papa. Whenever there’s some good news or something sad, a new beginning or an end you miss them and specially when you are hundreds of thousands of miles away, you miss them even more.

I was excited about the good news that my first story to a magazine made it to print. Sashay magazine contacted me a few months back, as a matter of fact they did when I was in India with my family and asked if I would want to do a story for them. I was thrilled with the offer and said yes. So when last week their summer issue came out and I for the first time held my work in my own hands and saw the whole 5 page cover story, all in glossy print, my jaws dropped! Everything looked gorgeous and first thing that came in mind was, Papa would have been proud!

So when you miss someone what do you do? You try to do what they like and when you are a food blogger you end up cooking what they like. That’s what I did, I cooked what Papa likes and Papa likes kaddu ki sabji (pumpkin). My father is a simple man and very simple things in life make him happy. Indian pumpkin cooked with fenugreek seeds, garlic and chili with a little sweetness and a little tang make him happy.

After quite a while I realized that the pumpkin we get in India is very different in taste, shape and size from the ones we find in the US. And after a lot of trial and error I finally found a variety of squash that comes closest to the taste. Acorn squash is what you need if you want the taste of Indian pumpkin. There are a lot of ways pumpkin is cooked in India, this is the way my grandmother taught my mom and then I learned from her. Its very simple with just a few ingredients you can easily find at home and it tastes pretty good. My mom stresses in the use of mustard oil which I always say is to Indian food (after ghee of-course) as olive oil is to Italian. But I used olive oil because that’s what I and a lot of us can easily find in our pantry. If you can find aamchur (dried mango powder) then fabulous or else you can use lime/lemon juice as well. So here’s the recipe.

Ingredients:

1 medium size acorn squash  (skinned, seeded and cut into 1/2 cubes)
1 tsp fenugreek seeds
2 dried whole red chili
1 tbsp freshly minced garlic
1 1/2 tsp aamchur powder (dried mango powder) or 1 tbsp lime/lemon juice
1/2 tbsp brown sugar
1 tsp turmeric powder
1 tbsp coriander powder
1 tbsp oil (mustard, olive or vegetable oil)
Salt

Method:
Heat oil in a wok or thick bottom pan. Add fenugreek seeds.
As they start to sizzle add garlic and whole chili (broken into pieces)
When garlic starts to brown add acorn squash. Add turmeric.
Mix it all together and cover with a lid stirring occasionally until its half cooked.
Once squash is half cooked, uncover and add salt.
Now cook it without the lid until squash is cooked through.
At one point squash starts to get mushy so go easy while stirring or it will break. Not that there will be any change in taste but it just won’t look as pretty. So just try not to mash everything up while stirring.
Once its cooked through add aamchur (or lemon/lime juice), sugar and coriander powder. Mix everything well.
Cook for another minute and then turn the heat off.
My mom serves it with hot rotis and lentil soup. You can even use it as a spread on your bread or serve it with rice.