Starting 2012 with Pure Vegetarian by Lakshmi- Indian Simmer Loves

This blog and my readers(you people!) have been one of the most important part of my life for the past almost two years. You laugh with me when I laugh, you are excited on my achievement, you are worried when my little one falls sick, and you always lend you ears when I want to talk. But for the past one year I always regretted that because of a busy and unpredictable schedule I was not a very good listener to you guys. I was not not able to respond to your emails as promptly and was not able to keep this space up and running as you would have expected me to. Then again family and some demanding food writing projects made things even busier and crazier by the leg of 2011. Some residual is still here but stepping into 2012 I promised myself to change that. So cheers to that and wishing all you extended family a Very Happy New Year!
What better way to start the new year with a post by a person who’s images have the ability to take you to a different place and recipes will leave you drooling! Today I present to you Pure Vegetarian by Lakshmi. With her flawless writing, dreamy photographs, yogi lifestyle and a pure heart I promise you will love her because Indian Simmer loves Pure Vegetarian by Lakshmi!

Going Raw!

Collage1

When Prerna kindly asked me to write a guest post, I hesitated. I’m on a break from blogging for good reasons. One of them is that I saturated myself with sugar during the autumn while baking and making sweets more than necessary. By December I reached my limit of tolerance and took time to adjust and reform my diet. As I’m writing now, I’m sipping delicious green smoothie made of broccoli, spinach, avocado, sunflower seeds and simple spices. I’m going raw.
Don’t worry; it is a temporary phase of detox to balance the metabolism! It is perfect. It gives such clarity and vitality. My digestive system is relaxed and satisfied. I’m mentally alert, focused and enthusiastic. For a long time I haven’t felt physically so content. Combined with regular exercise in the fresh winter air, life couldn’t be better! Welcome New Year!

Collage3

Tell us about yourself and what you would say is your food philosophy?Cooking and relationship with food have interested me since childhood. I grew up eating home cooked meals by my mother. She is an austere person and our breakfasts, lunches and dinners reflected the mood. There was enough to eat – and it was tasty – but there was an underlining reverence that kept the act of eating on a serious side. We never indulged.

As a teenager I turned vegetarian for ethical reasons. I ate raw vegan food for many years. When I came in contact with the Vedic culture and philosophy of India, cooking, serving and eating revealed a sacred dimension unparallel to anything I had been aware of. Preparing food became one of the most important spiritual practices and an integral part of the yoga process to me. It is an easy, concrete way to approach divine through consciousness.

As a bhakti-yogi I am a servant of Krishna. Krishna is a Sanskrit name for God introduced in the ancient yoga literature. It means “all attractive”. Everything belongs to God and is godly by nature. It is a paradigm 100% opposite to materialism that is rooted in the idea of me, the living entity, possessing and controlling everything. In the Western tradition God, at best, is providing for our needs: “…please forgive our sins and give us our daily bread”. In the Eastern tradition, man is the one who owns nothing and whatever is given under his care or has any value to him, he offers back to God. It is the way to sanctify life by cultivating virtues like selflessness and humility. And it is the path and perfection of yoga, connecting with God with love and devotion.

Yoga-lifestyle is different from the secular way of living in regards of the state of mind. Externally it looks the same. There are many vegetarians in the world and we may share the same recipes, but the thoughts, feelings and motivations that drive us while cooking produce different results. In our line of discipline, we want to connect the cow who gives the milk and the plant that bears the berry, fruit or vegetable also to God. It is done via mantra, a prayer, uttered with sincerity. Whatever is accepted by God, we enjoy as prashad, mercy. It is a blissful reciprocation.

Collage2

What led you to starting a food blog?
Cooking makes me happy. It is an intimate dialogue with Krishna. It is a meditation and allows me to be who I am in the deepest sense of understanding.

I bought a camera and started to photograph what I cooked in order to share my gratitude and happiness with others. It was a surprise there are people who like the pictures. Having had posted on Flickr for a year, I felt a need for a dining room in the Cyberspace where I could better serve visitors.

Attached to Flickr and other social media there is lot of extra package: psychological hang-ups, egos and ambitions that border unhealthy traits of interaction at times. I have a constant inner-conflict of how much I want to be part of and contribute to that. A blog is naturally more peaceful venue to meet and get to know people because I can set the content and mood to correspond the values that nourish me, and hopefully others, too.

What would you say “Pure Vegetarian By Lakshmi” is all about and please share a recipe that best describes your blog?
I’ve been blogging for a short time, six months to be exact. I’m not able to define what Pure Vegetarian By Lakshmi is about better than a work in progress. It is a partial documentation and by-product of a simple, meaningful life that I live. I live to live; not to blog. Whatever I do, I aspire to be physically, mentally, intellectually and spiritually present and do it as well as I can, because every moment spent in hankering, lamenting or dreaming of something else, better or more is a moment lost. Self-satisfaction and gratitude in all circumstances open unexpected opportunities even in situations that seem doomed and insignificant. Therefore I don’t go out of my way to look for exotic ingredients or fancy recipes, but utilise whatever there is at hand.

Collage4

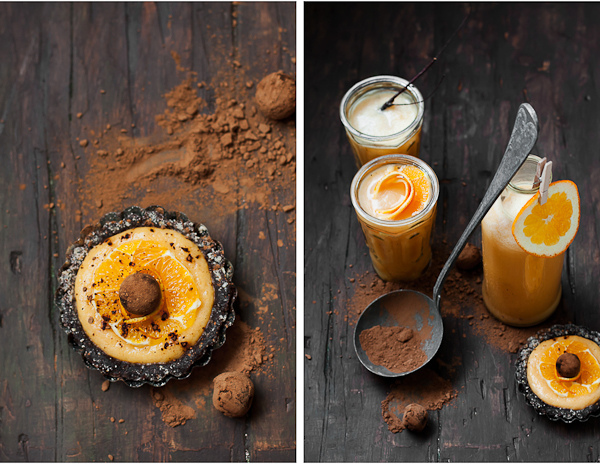
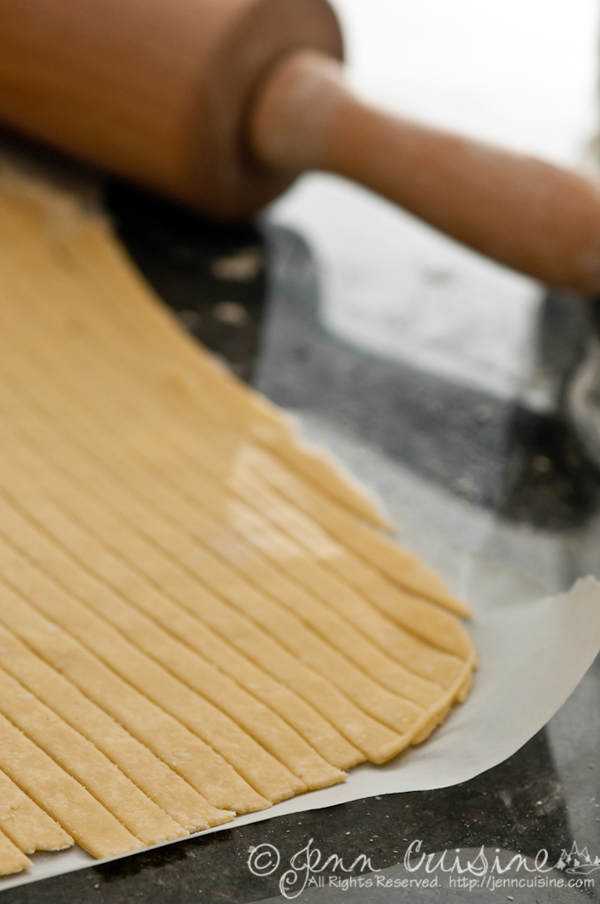
For today’s recipe here at Indian Simmer I made raw pastry as a sweet treat. When you stay away from sugar long enough, taste buds will celebrate the natural sweetness of fresh and dried fruits! Sophisticated beauty may not be the foremost character of these sweets, but they are oozing peppiness and energy. After eating them, you feel empowered and light, as opposite to dull and heavy caused by regular sugar.

Because I had leftover filling, I made a refreshing smoothie by adding rice milk to it. What a wonderful lunch!

Raw Pastry (makes about 6-8)

2,5 dl (250 ml = 1 Cup) whole almonds (with skins)
1 dl (100 ml = 0,4 Cup) walnuts
200 g dry dates, pitted
4 tablespoons carob powder
Juice and zest of one small orange

For handling the dough:
1 dl (100 ml = 0,4 Cup) hazelnut powder

Filling:
2 bananas
1/3 pineapple
1 carrot
1 large, juicy orange

Instructions:
Mix the pastry ingredients in a blender until smooth.
Sprinkle the pastry dough with hazelnut powder for easier handling.
Line small pastry forms with the dough.
Make sweet balls from the leftover dough, rolled in carob powder.
Mix the filling ingredients in a blender.
Fill the pastries.

Smoothie:
Mix the leftover filling with enough rice milk to get a running consistency of your liking.

Nankhatai (Indian Spiced Cookies) for the Holidays and a Food Network UK Feature

IMG_1881

I have not been very good at posting anything on this space lately. And your endless emails and messages have made it clear that you are not exactly liking it. After months of crazy, busy schedule, Abhishek got a few weeks off from school and work, so without missing a moment we immediately got into party mode. We are trying to spend as much family time as possible. Doing things that we were waiting to do together for months like taking a long walk, going to the park, watching a late night movie and house hunting and a vacation thrown into the mix.

I am in Mexico right now with the two best people of my life. When you wake up every morning to beauty like this then you sort of want to just stay in the moment and not come out of it. That’s what’s happening with me and so my blog and the whole blogging thing has taken a back seat for now. Hope you will pardon me for that.

Mexico is a beautiful country. So vibrant and colorful on one hand and serene and peaceful on the other. Sitting by the pool, overlooking the ocean and listening to bursting waves while sipping on hot tea has been our daily morning ritual lately. Life is a lot slower here, no one’s running after anything and people take time to know each other. I have been soaking it all in as much as I can in a few short days.

IMG_1890-2 IMG_1834-2

IMG_1855

I will tell you all about it once I am back home but today I am mainly here to wish all you fabulous people a very happy holidays! All set to welcome Santa? Making cookies and baking cakes while humming Christmas carols playing in the background? I and the little one baked some cookies too before leaving home which Food Network UK very kindly featured on their website along with a quick interview of yours truly! You can check in out here.

IMG_1849

These are Indian shortbread cookies called Nankhatai. Nankhatai is a simple eggless cookie with butter, flour and sugar as the main ingredients. Some spice is added to give the cookies an extra zing. I used a mixture of besan (gram flour), all purpose flour and semolina (cream of wheat) as base. Black pepper adds warmth to these sweet buttery cookies and a little bit of fruity jam or almond on top gives these thumbprint cookies their last finishing touch. You can use any kind of nut or jam of choice. This holiday season treat Santa with some of these nankhatais and a warm glass of milk or chai if he prefers that!

IMG_1851

Ingredients: Yields 30-35 cookies. I made 16 cookies with almonds and 16 thumb print jam cookies.
2 1/2 cups besan (gram flour)
1 cups all purpose flour
1/2 cup semolina
1 cup unsalted butter (room temperature/softened)
1/2 cup dark brown sugar
1 tsp salt
1 tbsp crushed black pepper
1 tsp bakingpowder
16-18 halved almonds
2 tbsp any fruit jam

Method:
Whisk together softened butter and sugar. Beat until its light and pale yellow in colour. Set aside.
In a separate bowl sift together all the flours and also salt, pepper and baking powder. Mix flour mixture into the sugar and butter mixture, little at a time until everything is mixed well together to form soft dough. Knead the dough for a couple minutes to form a smooth big ball. If it’s a little sticky, wrap it in a cling film and refrigerate for about half an hour.
After about half hour take the dough out of the refrigerator and knead again for a couple minutes. The warmth of your hands will soften the butter in the dough slightly.
Now divide the dough into equal parts. With this measurement it should make about 30-35 cookies.
Make smooth balls out of each portion. Because of the butter, the cookies flatten and crack when baked so make sure your dough balls are smooth with no cracks in order to make pretty cookies.
Place dough balls on a lined cookie sheet and bake then at 350deg. F for 20-22 minutes or until the bottom of cookies are golden in color.
Enjoy warm cookies with chai or you can also store them in air tight containers for several weeks.

IMG_1827

Happy Holidays everyone! Wish you a Merry Christmas and a Very Happy New Year!

Frog’s Leap

A few weeks back a very dear friend of mine was visiting California. With another lovely friend of ours we went for a day trip to Napa. It was a beautiful day, everything was perfect and we together had a fabulous time but a part of me was sulking through out the day. Why? Because I forgot to bring my camera with me and if you are a blogger then you know that in a blogger’s world that is a crime! Then my friend decides to take us to a winery which turned out to be THE most gorgeous and peaceful place I had been to in a while. I sulked more!
Going back to Frog’s Leap again went straight to the top on my to-do list. That’s what we did this Thanksgiving. We took a trip to Napa with family and some close friends. This time I slept with my camera a night before we were supposed to go, making sure I don’t commit the same “crime” again. So sharing some photos I took at Frog’s Leap Winery.

IMG_1767
Collage3
IMG_1742
Collage4
IMG_1739
IMG_1761
IMG_1764
Collage2
IMG_1727
IMG_1762
IMG_1734
IMG_1712
IMG_1756
Collage5

And finally this cute little guy who I was seriously hoping not to miss and I didn’t. He was still there lounging on his chair by the fireplace. This photograph makes me so sleepy.
IMG_1715

Oh, and I did not forget about the giveaway. The winner is Lynn. Congratulations!
Please send me an email with your address and your choice of one of Martha Stewart Professional Cookware item.

Easy Chinese Recipes Cookbook Giveaway Winner

1
I selected a winner for the Easy Chinese Recipe Cookbook giveaway by RANDOM.ORG and the winner is Ing.
ing said… thanks for the chance. i am a filipino and chimese foods are close to my heart. i would love to learn to cook lots of chinese dishes in the future.

Congratulations! Please send me an email claiming your win.
Have a great rest of the long weekend!

Goat Curry Recipe With 5 Whole Spices: How to Cook it at Home

My friends Rachael and Barb held a cross blog event “Goatrie” a couple months back celebrating all things goat. Many of my friends joined them. I too wanted to support my friends and decided to cook a traditional Indian dish that asked for goat meat (or mutton as we call it) but could just not find the meat to begin with! But I kept looking and finally found it at my local meat market recently. Although my sore throat would barely let me speak that day I promise the moment I saw it I screamed with joy on the inside. That’s how psyched I was!

Goat Curry

Then lovely people at Macy’s approached me and asked if I would be interested in taking part in their mBlog Recipe Showcase where I could share one of my family’s favorite holiday recipes. I knew I wanted to share the recipe for this Indian Goat Curry that my Papa used to make using whole spices. This was not necessarily a holiday recipe but whenever he would cook this one, that day would call for a celebration. He is a fabulous cook, my father, and his Indian goat curry? No-one can beat him on this one! He takes his cooking very seriously and would only use the freshest of ingredients. Then he would spend hours slow cooking his meat until it gets that dark brown color and masala is absorbed well to the core of the meat. The smell of whole spices blends beautifully with sliced onions that melt on being cooked slowly over low heat. That aroma brings back a lot of memories so I decided I’d share those memories through this recipe. Well, that was the plan.

Goat Curry

But unfortunately, bad health kept me from meeting the deadlines for the contest. But guess what, I still have news for you! Doesn’t matter if I missed a deadline, Macy’s is inviting its fans and all you fabulous cooks out there to share a favorite recipe with them at their Facebook fan page for a chance to win a dinner with a renowned Macy’s Culinary Council chef, including Emeril Lagasse, Wolfgang Puck, Cat Cora or Todd English. How cool is that?!
And yes, there’s a giveaway involved in this too. People at Macy’s were kind enough to offer a choice of one of three Martha Stewart Professional Cookware items as a giveaway for you. Now you have to decide if you want a Ceramic Covered Casserole Dish, Hand Anodized Fry Pans (set of 3), or a  Stainless Steel 15” Roaster with Roasting Rack. If any of the items become unavailable, they’ll gladly offer another choice of a Martha Stewart Professional Cookware item (up to $40 in value).

Collage-2

Goat Curry Recipe with Five Whole Spices

This Goat Curry recipe is a speciality of my dad. It’s a simple recipe where the goat is slow cooked with just a few ingredients. The smell of whole spices blends beautifully with sliced onions which melt on being cooked slowly over low heat.
Course Main Course
Cuisine Indian
Prep Time 15 minutes
Total Time 50 minutes
Servings 4
Author Prerna Singh

Ingredients

  • 1.5 lbs goat meat with bone cut into pieces
  • 1.5 cups thinly slices onion preferably red onion
  • 1 tbsp ginger+garlic paste preferably fresh other you can use the bottled one
  • 1 cup tomato one cut into 8
  • 1.5 tbsp coriander powder
  • 1.5 tsp whole peppercorn coarsely crushed
  • 1 stick cinnamon
  • 2 bay leaves
  • 2 whole black cardamom
  • 1 tsp cumin seeds
  • 2 tbsp oil
  • Salt

Instructions

  1. Heat oil in a thick bottom pan. Add all the whole spices. Once its fragrant add ginger garlic paste and sliced onion. Cook until the onions begin to get translucent and turn into light golden brown in color.
  2. Add meat. Cook until meat turn dark in color. Both onion and meat will loose a lot of water but keep stirring occasionally and cook it in medium low flame until meat is half cooked.
  3. Add salt, coriander powder and tomato. You can also add turmeric is wanted.
  4. Give everything a nice stir and cover with a lid. Let it simmer for about 25-30 minutes until meat is completely cooked. You can also pressure cook at this point if you want.
  5. Once the meat is cooked through turn off the heat. This dish is very close to a dry dish so cook off any extra liquid if left in the pan after the meat is cooked.
  6. Serve with steamed rice, any bread or it even tastes wonderful with couscous or quinoa.

Black Bean Sauce Chicken and Easy Chinese Recipes Book Review/Giveaway

IMG_1561

I must have told you about this little farm stand behind my house. That was one of the hidden jewels I discovered when we moved here. Although I do not necessarily like the apartment that we are living in right now but changing it would mean moving farther from my farm stand and that will make me sad! But anyway, the other day I stopped by the place to pick up a few things and found these little cuties. At first I was not sure what they were but when the lady told that they are bell peppers and I was surprised. They sure looked like miniature bell peppers and definitely tasted 10 times better than the gigantic ones I get from the super market.

IMG_1628

Since then I have roasted them, baked them, stir fried them and have used them for several recipes from Bee from Rasa Malaysia’s book Easy Chinese Recipes. Out of all those Homestyle Chow Mein Noodles and Black Bean Sauce Chicken has been our family favorite. And by family favorite I mean the little picky eater in the family cleans up the plate in 15 minutes if that’s for dinner so you can imagine it must be good. Its very easy to cook as well, or maybe its the way Bee has explained everything in the book that it looks super easy.

Growing up in India I was more used to Indo-Chinese food (yes, a cuisine like that exists and I will get to that some other time). The real Chinese food (or that’s what I believe) I ate when we moved to the US. But still it was mostly limited to take outs or once in a while, a nice splurge at this fancy Chinese restaurant that we would go to. Then an year later we went to Hong Kong on a trip and I think that’s when we really got to know more about the whole cuisine and the rich history and culture behind it. Then fast forwarded a few more years and I started food blogging. I remember those were the first couple weeks of me being a blogger that I discovered Rasa Malaysia and I said to myself, “this is how you make a foreign cuisine look not so foreign to everyone!”. In the past year and half I got to know more of Rasa Malayasia and became friends with Bee.

IMG_1593

I don’t think I need to say anything about Rasa Malaysia because the whole world knows that it is one of the most popular Asian food blogs but I sure want to say about Bee as a person. She is warm, always supporting of others and she knows a hell lot about Asian cuisine! Bee recently came out her first cookbook Easy Chinese Recipes. As the name suggests and as Bee’s background tells that with this book she has tried to get the terror out of Chinese cooking.

Collage-2

I like that there’s no seemingly scary recipe with a bucket list of ingredients that atleast scares me away from trying the recipe. All the recipes are very simple, with steps broken down to make them easier to understand and uses some basic Chinese ingredients many of which I could find at a normal grocery store. Some recipes were new to me and had a couple ingredients that I was reluctant to try but when I anyways tried them, really liked them and made again. I specially liked the beginning of the book where Bee in a beautiful way tells her readers about what it is like to grow up in a traditional Chinese family. That is followed by some very useful tips and techniques of cooking which might seem simple to a seasoned cook but can be very helpful to someone starting. She also in a very elaborate way explains things like basic tools and utensils used and also several sauces and spices which are an integral part of Chinese cooking.

IMG_1609

All in all I really liked the book and guess what, almost all the photography in the book is done by Bee as well which again is gorgeous and adds to the whole homey feel of the book. So I can say that she has put in a lot of effort into the book and it clearly shows through its each an every page. If you are someone like me who likes a good Chinese food but tongue twisting and intimidating names of techniques and ingredients kept you from doing so then you should buy this book. It will help you!

Well Bee is helping make it a little easier for you because she is giving away a copy of her book to one lucky Indian Simmer reader. All you have to do is just leave a comment below and share your experience with Chinese food or cooking and get a chance to win a free copy of Easy Chinese Recipes. Entries to the giveaway will be open til next Friday, 25th Nov. and I will announce the winner in my Saturday, Nov. 26th post. Giveaway open to US residents only.

Now the recipe for Black Bean Sauce Chicken: 
Ingredients: Serves 2

8 oz (250gm) skinless, boneless chicken breast, cut into bite-sized cubes
1 tbsp Chinese rice wine or sherry
1 tsp cornstarch
2 1/2 tbsp oil
One 1 inch (2.5cm) piece fresh ginger, peeled and sliced into thin pieces
3 cloves garlic, finely minced
2 tbsp fermented black beans (douchi), rinsed and coarsely chopped
1/2 small green bell pepper, deseeded and cut into pieces
1/2 small red bell pepper, deseeded and cut into pieces
1 red finger- length chili, deseeded and cut into pieces
1/2 small onion, quartered
Salt to taste

Sauce:
2 tsp soy sauce
1 tbsp sugar
1/4 tsp sesame oil
3 dashes white pepper
2 tbsp water
1 tsp cornstarch

Method:
Tenderize chicken according to the tips on “how to tenderize meat’ section in the book. (This works!)
Marinate the chicken with the rice wine or sherry and cornstarch. Set aside for 10 minutes.
Mix all the ingredients for the sauce in a small bowl. Set aside.
Heat 1/2 tbsp of the oil in a wok or skillet over high heat. Add the chicken and stir-fry until half-cooked or the surface turns opaque. Dish out and set aside.
Heat the remaining oil in a wok or skillet over high heat. Add the ginger and garlic, stir fry until they turn light brown. Stir in the fermented black beans, peppers, red chili , and onion. Stir0fry until aromatic, about 1-2 minutes.
Return the chicken to the wok or skillet, stir and blend well with all the ingredients in the wok, about 1 minute. Add the sauce and continue stirring until the chicken is cooked through. Add salt to taste. Dish out and serve immediately with steamed rice.

Gulkand (Rose Petal Jam) Ice Cream

51
Gulkand Icecream

Verma was our live-in house help for all our childhood and probably for all my teenage life. My mother would tell us that he came to live with us when I was 6 months old and was there until I left for college. We would call him Ganga. Ganga is a part of many of mine and my brother’s childhood memories. One of them definitely has to be him picking up a tall stainless steel flask every evening. He would take out his bicycle (or bike as you may call) that my Papa bought for him, would have my brother sit in front, me in the back on top of the carrier and all of us would ride up to the local dairy a couple kilometers from our place. He would hold both of our hands, patiently answering all our stupid questions while waiting in line for our turn. Sometimes the guy who owned that dairy and other times times his wife would milk the cows in front of us. We would get a liter or two, as mummy would have directed Ganga to do and then head back home. We come back home and very soon two glasses of steaming hot milk mixed with a little sugar would be in front of us two. My brother was a milk lover and he would finish his share up in a single breath, me, not so much! “Drink it bhaiya, its good for you”, Ganga would say. Not convincing enough for me. “If you do I might let you ride my bicycle”, he would promise. And I would hold my breath and take biggest gulps as I could and finish the milk.

Rose petal jam icecream

I just never liked the smell of that milk. The smell of warm, organic cream topped milk. Fresh milk from grass fed cows living free out in the farm. That was almost as good as it can get. Now I wish I wouldn’t have held my breath back then and would have appreciated what I had, because today when I go out looking for milk for my daughter I search for that aroma.Then after looking for it for six years here in the US, some 6 months back I finally found a milk which smelled and tasted if not the same, but very close to that milk.

Collage3

I discovered Straus milk at one of my local grocer’s. I ended up buying Straus milk that day because the store had run out of the brand that I would usually buy. In the whole dairy section that milk stood out because it was in glass bottles. I thought of giving it a try mostly because I did not want to drive around looking for my usual brand and I have to say that after that I never went back to my “usual” brand again. Straus Family Creamery is a family owned organic dairy farm located in the north of San Francisco. I did a fair share of research on the company and their believes and practices made me trust them and their product. I will not lecture you on what they are and who they are (you can learn so by visiting their website) but if you do believe in organic and sustainable practices then you might want to check them out.

Collage1

Recently people at Straus found out about my love for their products and asked if I would be willing to develop or share some recipes for them. I happily agreed! I found this as a great opportunity to pull out the ice cream maker that sadly sat in my storage throughout summer and thought of trying this recipe for ice cream… Gulkand (rose petal jam) ice cream.

Collage2

Rose petal jam or gulkand is a sweet preserve that I believe originated from Pakistan and is very popular in North of India. Wild rose petals are layered with sugar and placed in air tight containers and left in sunlight for a few weeks, being stirred after every few days until it turns into a thick and chunky jam like preserve. Its used for many Ayurvedic purposes but very commonly used as a mouth freshener wrapped in paan (betel leaf). I stirred it into an ice cream and a magic happened! It turned into one of the most addictive ice creams I have ever eaten. I taste tested it with a couple blogger friends of mine as well and I hope think they agreed. So lets get to the recipe.

Ingredients:
2 cups whole milk
2 cups heavy whipping cream
4 large egg yolks
5 tablespoons gulkand (rose petal jam)
1/4 cup sugar
1 tsp vanilla extract
1 tsp rose water (optional)
1/2 cup coarsely chopped almonds

Method:
Heat milk and cream in a saucepan for a few minutes just below the boiling point. Set aside.
Whisk together egg yolks, sugar and vanilla extract until its smooth.
Now whisk in the mixture into the mixture of milk and cream stirring continuously so that the eggs don’t scramble.
Turn the heat to low and keep whisking until the mixture thickens.
Turn off the heat and whisk in gulkand and rose water if using. Let it sit for 15- 20 minutes and then transfer it into the refrigerator until it cools completely.
After a couple hours pour the mixture into an ice cream maker (if using) and follow the instructions of the manufacturer. Add almonds close to the last 5 minutes when ice cream is almost done.
If you do not have an ice cream maker pour the batter into a flat 2-3 inches tall dish. Freeze the mixture in your freezer. Keep an eye and after a few hours just before the ice cream is hard, take it out, blend it in your blender and freezer again. Repeat the process again and this time mix almonds before freezing. This process might be a little longer than using an ice cream maker but results are very much the same.
Enjoy!

Indian Simmer Loves- Jenn Cuisine and a giveaway winner

Yes, this post is here again! I am now kinda looking forward to the Indian Simmer loves posts now. There are so many people that I have come to know in the past year and a half while blogging. People who are super talented and are fabulous person too and so I want you to know about them! The person I am featuring today is a friend and a very talented photographer/blogger. Jenn from Jenn Cuisine is an American living in Switzerland with her lovely husband and writes a gluten free blog. If you do not know her yet then trust me you are missing on a LOT of gorgeousness in the blogoshphere! C’mon lets meet Jenn and know a bit about her and the beautiful blog that she writes.

Thanks so much to Prerna for inviting me to guest post here on Indian Simmer!  We’ve become lovely internet friends through sharing our passion for food, cooking, and photography, and it is an absolute honor to be able to share with you all 🙂

Tell us about yourself and what you would say is your food philosophy?
I am a scientist and share a passion for food and cooking with my gluten free husband – our philosophy has always been to use ingredients that capture and highlight the flavors of a dish – we’ve had a lot of fun over the years learning and experimenting together in the kitchen as we learn how to cook flavorful beautiful and tasty GF dishes.

What led you to starting a food blog?
I originally started a food blog to document my cooking, so no matter where I was I could go back and see what I made, what worked, and what didn’t – then a community began to evolve as I got to know some of the lovely people in the food blogging community, and now it is as much for those I share with as it is for myself.

Please share a recipe that best describes your blog?
One of my favorite things about the upcoming holidays is that essentially from now until the New Year for my family it is all about tradition.  Favorited treasured recipes that only get made once a year, as everyone eagerly awaits the familiar aromas wafting throughout the kitchen.  There’s always such a buzz of energy and excitement in the air, no matter what crazy weather/fallen trees/power outages Mother Nature decides to bring on my family’s New England home over the past Halloween.

Every year that we’ve celebrated Christmas with my grandparents, Christmas dinner has involved baked chicken and noodles as the highlight of the meal.  It’s not so fancy, it’s not extravagant, a dish that would probably never be found in a high-end restaurant, but my grandparents have been making it for decades on Christmas, and it’s 100% pure happiness on the plate.  Seriously, comfort food doesn’t get any more satisfying than this.  But with every tradition comes the natural evolution of recipes, and while there may be a little pressure to keep a dish exactly how everyone remembers it, I cannot help but play.  This year, I’m taking our family Christmas dinner tradition and bringing it to Thanksgiving.

Changing the holiday isn’t the only dramatic switch I did with this tradition – I added in a little Thanksgiving essence by incorporating pumpkin, but I also made it completely gluten free so that this year, my husband would be able to enjoy it too.  There were two main alterations that were necessary to make this dish gluten free, but the good news is that with either any all purpose GF mix will do.  The first is making the pasta, and the second, the roux for the sauce.  I thought I would share a few tips on each, in case you have gluten free friends or family that you also would like to accommodate holiday traditions for.

Gluten free pasta from scratch is not so different from conventional pasta, and is a lot simpler to make than it sounds.  The key is to make sure to substitute your ingredients by weight rather than volume so that the ratios remain the same – many gluten free flours have different densities than wheat based flour, and so cup measurements are not necessarily equal. Else, the basic process is the same – add all the flour to a bowl, make a well in the center to add the eggs, and gradually with your hands bring in the flour to the eggs until you have a ball of dough.  The differences after this mainly have to do with handling the dough – it tends to be a bit more fragile than regular pasta dough, and I’ve noticed can dry out more quickly – so I wrap up the dough with plastic wrap when I’m not ready to use it yet, and work in batches.  I roll it out with a rolling pin between two pieces of parchment paper, and dust often and liberally with GF flour to make sure it doesn’t stick too much, and then cut the noodles using my longest chef’s knife.  No fancy rollers or machines needed, just a decent working space on a kitchen counter.  It makes for a good methods for thicker eggy noodles, perfect in a baked casserole like this one 🙂

Roux is the basis of many sauces, essentially an equal parts fat to flour whisked constantly while cooked until a desired color – only a few minutes for white cream based sauces, or several minutes for the dark colored roux that characterizes rich thick stews like gumbo.  And again, any old all purpose GF flour mix will do, making for a super easy substitution.

Add in a little pumpkin and thyme and sprinkle some grated parmesan on top, and this humble Christmas family tradition has been effectively transformed into an Autumnal celebration, perfect for the coming Thanksgiving, and easily made gluten free so that everyone in our family can take part and enjoy – some traditions are meant to stay around forever unchanged, and some are meant to evolve – will this dish find a new home in the coming years on my family’s Thanksgiving table? Only time will tell, but so far this holiday season it’s off to a good start 🙂

Baked Chicken and Noodles (makes about 8 servings)

Ingredients:
For the Pasta:
250 g (1/2 lb) all purpose GF flour mix*
pinch salt
175g eggs (about 3 – 4 eggs), beaten
olive oil
For the Casserole:
1 chicken, roasted, or 1 kg (2 lbs) of your favorite poultry cuts, cooked how you like, chopped into bite size pieces
50 g (2 oz.) butter
50 g (2 oz.) all purpose GF flour mix*
1 onion, diced
1 clove garlic, minced
a couple spoonfuls of pumpkin puree
salt & pepper
2 cups (500 mL) chicken broth, room temp or slightly heated (not chilled)
4 oz. parmesan, grated
fresh thyme

*Note – if you do not need to make this gluten free, feel free to use your usual all purpose flour

Method:
In a large bowl combine flour and salt and make a well in the center with your hands.  Add the eggs into the well and slowly combine in the flour until it is incorporated and comes into a ball of dough.  Depending on the flours you choose, you may need a little more flour, or a little less, so just watch the consistency and moisture content of your dough.  You want it to not be so sticky, but not cracking either.
Fold it over a couple of times, and then wrap in plastic wrap and let rest in the fridge for an hour. (This is also a great time to start cooking your chicken if you haven’t already).
After the dough has rested, take it out of the fridge and cut it into 2 equal sections, and wrap each of them in plastic wrap to keep their moisture locked in.  Take one and pat out with your hands onto well floured parchment paper (using the same GF flour mix is fine, I typically will use tapioca starch).  Flour the dough and place another sheet of parchment paper on top.  Roll out with a rolling pin, flipping occasionally and adding more flour as needed to ensure it doesn’t stick. Roll out to desired thickness, about 1/8″.  Then cut into long strips for your noodles about 1/3″ wide, and separate them a little bit from each other so that they do not clump together.
Bring a pot of salted water to a low boil and cook the pasta in batches, for a couple minutes at a time until tender.  Rinse with cold water, and then add to a large bowl and toss with a couple drizzles of olive oil to keep them from sticking to each other.
Add the prepared chicken to the noodles, and preheat the oven to 180C (350F).
Melt the butter in a medium saucepan to start the roux – once the butter has melted and is hot, whisk in the flour. On medium heat whisk for 2-3 minutes until the flour has had a chance to cook but not to starch coloring.  Add in the onions, garlic, and pumpkin and some salt & pepper and continue to whisk for another couple minutes.
At this point add in the broth to the roux, about half a cup at a time, stirring so that the roux mixes completely with the broth – this will help ensure that the sauce stays smooth.  Bring to a simmer and then cook until smooth and thickened, stirring frequently.  If much volume was lost feel free to add in a little more water or even some milk to make up the difference.
Pour the sauce over the chicken and noodles and transfer to a casserole dish, and sprinkle parmesan on top. Bake for about an hour (depending on the thickness of the casserole/size of the dish).  Garnish with fresh thyme, serve and enjoy.

Winner of the “400 Best Sandwich Recipes cookbook is Maneet Jassal Gupta.
Congratulations Maneet! Please get in touch with me via email.

400 Best Sandwich Recipes Book Giveaway and Winners

Before I say anything else I first owe you a huge apology. This post should have come on Saturday but I never realized before how busy festivals, specially a festival like Halloween gets with a toddler at home. Driving her to a party, then driving back from the party, picking costumes for her and for the rest of us “not so important people”, trick or treating and then after party- those were some busy busy past three days. I am still sleep deprived and heavily caffeinated but its fun to be running around with a camera even though your lady bug couldn’t see anything beyond candies and pumpkins. So moral of the story is that I got very busy and couldn’t come to you with the post that I had promised and I apologize. But I am hoping that the giveaway I have come with today will be able to make up for that.

IMG_1385

I have said this before and I am sure many of you bloggers out there share the same feeling, that the best part of blogging is the people you come in touch with through it. You get to know people whom you never would have known before if it was not because of the blog that you write. There are some bloggers who even though live oceans apart from me and I have never met before but still have become such close friends of mine. Then there are some people who I first met face to face before even knowing that we belonged to the same blogging community.

IMG_1270

Californian Sandwich

Alison Lewis is one such friend. I met Alison a little over an year back while I was attending my first food conference. I had recently started as a food blogger and did not know a thing about it. No one knew Indian Simmer, let alone Prerna Singh. That conference was my first introduction to the blogging community. I remember sitting at a table having lunch with a few fellow bloggers and in came Alison looking for a friend sitting with us. We started talking and slowly I got to know more about her career as a recipe developer, magazine and internet journalist and the owner of Ingredients, Inc. At the time she was working on her first cookbook and that really intrigued me because she was the first cookbook author I was talking to. When you talk to her you will agree that she is one of the most down to earth, true to herself and simple woman. It has been more than a year and Alison has reached greater heights since then but she is still the same simple, easy going and my “go-to” person for any food writing/blogging advice.

IMG_1245

Strawberry and Mascarpone Sandwich

Her first book 400 Best Sandwich Recipes- From Classics & Burgers to Wraps & Condiments was launched a few months back. I was in the middle of a move and settling down at a new place when I got my copy in mail. That UPS delivery that day made me very happy, not just because this was my friend’s first cookbook but because I could see Alison Lewis in the book. She is all about developing simple yet exotic and healthy yet likeable recipes that all of us can make in our kitchen with easily accessible ingredients. 400 Best Sandwich Recipes makes that possible for you.

IMG_1452

Prepping to make Mu Shu Chicken Sandwich

If you like sandwiches then you HAVE to have this book and if you do not then beware because after this you might start liking them! This cookbook has recipes for all kinds of sandwiches from breakfast sandwich to lunch boxes, classics to regional and from wraps to international sandwiches like Steak Chimichurri Sandwich & Mu Shu Chicken sandwich which has become my latest obsession. You can find more than 20 ways to make a cheese sandwich and the dessert section is outrageously yummy. I just wish there were more photos in the book too but that is just the visual person in me speaking! All in all its a great book and I have been cooking a lot with it lately.
You should definitely add this one to your cookbook collection and to make that a little easier I have a copy for you today. I am giving away a copy of 400 Best sandwich Recipes on my blog. All you have to do is post a comment below and tell me about your favorite kind of sandwich.
Entries to this giveaway are open till Sunday, November 6th. Winners will be announced on my Monday, November 7th post. This giveaway is open to only the residents of USA.

Now winners of the Shutterfly giveaway are-
San
Seema
Sarah L
Congratulations guys! Please send me an email at indiansimmer[at]gmail[dot]com so that I can send you your free coupons.

Kaju Katli Revisited (Vegan and Glutenfree Cashew thins and truffles) for Diwali

IMG_1316-2

This post was supposed to come on Monday before Diwali and for the Food Day. I support Meatless Monday so this was going to be my contribution to the website for the Food Day celebration. But then I pulled a back muscle real nice and landed on the bed. Well, this recipe was kind of the culprit in that too but hey I cannot complain! That’s what festivals are all about, isn’t it? Unless you have a few pulled muscles, a couple cuts and burns here and there, a few broken dishes and a lot of chaos, how can you make memories? Isn’t that the best part about celebrations? In spite of all such small mishaps and those family dramas which I am sure every family has (at least mine did and still does), all we remember later is that everyone got together, had a few laughs, enjoyed a meal and celebrated each other. Yes, that is what a festival is all about. Its about telling them that you care and you cherish them!

IMG_1323-2

While I am sitting here on my couch next to a big pile of unfolded laundry and two empty coffee mugs writing this, miles away my mummy, papa, my kid brother and a lot of people I care about must be busy celebrating one of the biggest festivals of India. Its Diwali in India today and the whole country will be dressed up like a new bride. There must be colored luminescent lights hanging on every balcony and yard. Mithaiwalas (sweet shop owners) would be up before sunrise prepping for the big day – as soon as they open the shop, they will not have a second to catch a breath. Mummy and all my aunties will get together to cook some Diwali treats. But mainly they would want to know who is wearing what and mentally plan how to outdo each other. The male members couldn’t care less and must be sitting together sipping on some hot chai that ladies will be sending out every hour with those treats, perfuming the entire house.

IMG_1327-3

In the evening everyone dresses up in a traditional attire, meet at someone’s place (usually the eldest one) and do Diwali pooja (prayers). As soon as they will be done with pooja and step out of the house, there will be diwali lights everywhere. Every nook and corner of the city will be illuminated and so will every face. There will be fireworks, old stories, some tears and a lot of laughter. That is Diwali, the festival of lights as they say.

IMG_1312-2

When Lord Rama, after freeing his wife Sita from the hands of evil Ravana, came back home along with his beloved brother Lakshmana after 14 years of banishment, he was welcomed home with diyas (ghee lamps). The entire city lit ghee lamps to show how much they loved him and were happy to have him back. Ever since, the day is celebrated as Deepavali which literally means “row of lamps”. The main essence of this festival is to celebrate your inner light and take pleasure in simple things in life that have the most meaning after all.

IMG_1320-2

Now if you would excuse me, I should go get the house ready so that when the little one wakes up in the morning, we are all ready to make our own memories of Diwali. Leaving you with a traditional Indian sweet recipe which happens to be my all time favorite. This one again counts as one of my recipes with the smallest ingredient list. I tried to give an old favorite Kaju Katli (sweet cashew thins) a new modern face but the essence and taste is still the same. Check out the recipe!

Ingredients: (Makes approx. 35 kaju katli and 10 truffles)

1/2 pounds dried cashews (soaked in water overnight)
1 cup sugar (I like it mildly sweet, you can increase the amount of sugar if you like it sweeter)
1 tbsp ghee (clarified butter) (add a vegan substitute for ghee like margarine for a vegan version)
Powdered sugar for dusting (optional)

Method:
Soak cashews in water overnight (or atleast 6-8 hours). They will look puffed up and should have lost oil which should float in water.
Drain out the water and wash the cashews thoroughly.
Now grind them in a blender using very little oil. Just enough to let the blades move, making a smooth paste. Paste should be very thick.
Mix sugar to the cashew paste and transfer it to a wide pan and my friends brace yourself for some hard work. And when I say hard work then I REALLY mean hard work because I have to admit I underestimated the fact when I took up this task, I ended up pulling a muscle. But again laying on the bed when I was munching on those Kaju Katli truffles, I couldn’t feel any pain!
So transfer the contents to a wide pan and turn on the heat and keep it to medium low.
Two things stay constant in the cooking of Kaju Katli paste- medium low heat and constant stirring. If you increase heat a little it will start burning and if you stop stirring  for long then also it starts sticking to the pan.
When starting the process of cooking the mixture of cashew paste and sugar the mixture will be very loose and easy to stir. Using a rubber spatula or a whisk (if you are not using a non stick pan) should make the process easier.
After cooking for a few minutes the mixture starts getting thicker and darkens in color. Continue the process for 15-20 minutes and a point will come when the paste starts to become very thick and sticky almost like a dough. Add ghee/butter at this point. You will be losing energy by this time but keep going because you are now very close to the end.
By adding ghee, the paste will again start getting lighter and will be sticking to the spatula (add a vegan substitute for ghee like margarine for a vegan version or can omit completely if you want) Keep stirring until it starts to turn into a ball. When you press it with a finger or back of a spoon it should not stick to your finger. The paste is now ready.
Take it out and place it over a greased surface (baking sheet or kitchen counter). Let it cool for 10-15 minutes until its easy to handle.
Using your hands, make a big ball off of the dough.
You can either place it between two sheets of a plastic wrap or lay it on a greased work station and roll it out using a greased rolling pin or you can make small balls off of it.
Roll it out to the thickness of a thin pizza crust. Using a pizza cutter or knife, cut the rolled out sheet into squares or diamond shapes. Dust them with powdered sugar if you want. Enjoy them right away or store them in refrigerator.

Wishing you all a Very Happy and Prosperous Diwali!

Starting a Holiday Giveaway Series – Shutterfly Holiday Cards Giveaway

It’s no secret that holiday season is here. We are taking notes of the stuff that we “like” in order to send hints to people about what we want as holiday gifts. Retail stores are putting on the holiday songs and red, green and yellow decorations are appearing on the display racks. Right now its all about pumpkins then slowly chocolate and peppermint will come into picture. Even for us Indians we are right in the prime of the holiday season. We celebrated Eid and Dussehra a little while back, Diwali is right around the corner and also warming up for Christmas and Lohri.

What do you do when holiday season arrives? Well, apart from cooking and eating! Shop. Decorate the house, prepare invitations and buy gifts for the loved ones. Doesn’t it make sense that I send you, my loved ones some gifts too? So I thought of organizing this small series of giveaways (of course with the help of some of the brands that I love) where I can share some love with you. Every week, for the next few weeks you will have a chance at winning a gift which is sponsored by a company of my choice.

To kick start the event today I have giveaway sponsored by the fine people at Shutterfly. I don’t think Shutterfly needs an introduction but just in case you did not know, this is a one stop shop for you to take your memories from a digital camera straight in your hands. They help you store those countless photos in your hard disk at a safe online storage, they print them for you, help you share them with your loved ones and deliver them at your doorsteps if you want.

I love it that you can turn your favorite family photo into an invitation or holiday card and send it to friends and family, create a custom address label for the invitations or greetings. And if you are like me who cannot decide which one to pick out of the whole bunch of your favorite photos of the little munchkin or snaps from a trip, worry not, they can turn them all into a photo book.

I recently ordered a beautiful photo book with my little monster’s photographs from birth to till date and a batch of holiday cards. You can do that too. The folks at Shutterfly were kind enough to giveaway three lucky readers of Indian Simmer 25 free holiday cards each. You can customize them in whatever way you want and use it this holiday season to show much you love someone. Just leave a comment below in the comment section. And if you are a blogger, you have another chance to get 25 free holiday cards, just register here.

Entries for this giveaway are open till 28th of October and its open for the residents of USA only. Results will be announced on 29th October.

Disclaimer: This giveaway is sponsored by Shutterfly but the views in the post are my own.

Phirni (Ground Rice Pudding) with Pomegranate Seeds and Karwa Chauth

Phirni with pomegranate seeds

Sitting in the balcony I would look at all those women wrapped in beautiful red sarees, sparkling their gold jewellery, with the best makeup on, holding pooja ki thali (a big plate with all necessities for pooja) with both their hands heading towards the shiva temple right behind my hostel. I was young at that time but old enough to dream that one day when I will really fall in love with someone and do what women in India have been doing for ages – pray to god for their husband’s, better half’s, significant other’s long and healthy lives. I found it such a romantic and selfless way to show how much you love someone – fasting for an entire day with no food, or even a single drop of water and watching the moon come up with the person you love and then eating from his hand. That is what Karwa Chauth was to me and I always waited for the day when I will have someone to do that for.

Traditional Indian attire

Then came my turn, I married the person I loved and it was time to follow the same rituals. But I lived so far from home and my own country, where mothers send a huge basket with clothes and jewellery to be worn that day. Where mothers-in-law take you shopping and buy you everything you need for the pooja and very carefully direct new bride through the rituals. I thought I lived too far for all that to happen with me! Until the phone kept ringing every few hours with my mother checking if I received the packet with the red saree she had sent to me all the way from India. And my mother-in-law checking on how I was doing with no food or water for the first time in my life. I did fine and followed all the steps for rituals that my mother in law made my husband write on a sheet of paper, very diligently.

Phirni1

Then it was dusk. I pulled out the red saree that my mother had sent, its silver crystals glittering all along the border and tried my best to wrap it around me, and failing every time. This was the first time I was trying to put one on with no help whatsoever. Then the husband came to rescue. No, he did not try to wrap it himself but came with a youtube tutorial “how to wrap a saree – for dummies!”. That helped because after 20 more minutes I was wrapped beautifully in a saree just like a new bride with bangles on and a big bindi on my forehead. And then began the waiting game. The moon somehow decides to show up a little late than usual on every Karwa Chauth. This one was no different. Again the mothers kept calling asking me to eat if the moon rise was late but I wanted a long life for my husband and hence waited. Waiting paid off and the moon showed up with its full beauty. We, the new couple cried with joy, thanked god for our togetherness and he raised a glass of water and I took a big gulp from it. He took a spoonful of firni and I ate. We hugged, kissed and ran straight to the dinner table where food was ready to be served.

Pomegranate

That was my first karwa chauth with him, today it is sixth. It has been six years and today I love him more than I did on my first karwa chauth. I made some firni today just like I did on my first karwa chauth. Firni is very much like kheer (rice pudding) where you cook rice with milk reducing it to a creamy rich texture. Only that for Firni, a thick paste of ground rice and cashews is used instead of whole rice. Sugar is used as a sweetener and saffron and/or crushed cardamom seeds are used for aroma. You can garnish it with dry fruits of your choice. Almonds, pistachio or cashews are some common nuts people use in Indian rice pudding. I thought of fall and the vibrant colors of pomegranate. Felt like giving it a try and realized the tartness of pomegranate seeds go very well with the sweet and rich flavors of phirni.

Phirni 2

I have seen my aunts and mom serving the dessert in little clay pots. Once the cooking process would finish they would pour the pudding using a big ladle into these clay pots and store them in a cold place. After a few hours clay would absorb all the extra water in the pudding making it thick and creamy. Unfortunately I did not have the luxury of those clay pots but if you do then I’d suggest use this method and you will know the difference.

Phirni 3

Ingredients:  Serves 8-10
1/2 gallon whole milk
1/2 cup uncooked rice
1/2 cashew nuts
1 tsp cardamom seeds (crushed)
1-2 pinches of saffron
1 cup half n half
1 cup sugar
1 cup pomegranate seeds

Method:
Thoroughly clean rice with water. Mix cashews and rice together and soak in water for a couple hours.
Strain all the excess water and using a food processor or blender make a paste of rice and cashews. (Paste should not be very smooth but granular so that you can feel the texture when rubbed with fingers). Set aside.
Heat milk in a thick bottom pan or deep dish. Bring it to boil and reduce temperature once milk starts bubbling.
Cook milk at low temperature stirring frequently until the milk reduces to its 3/4th quantity.
Now add the rice and cashew paste, saffron and half n half. Stir frequently until the pudding starts to thicken which will not take long after you add rice mixture to milk.
Once the thickening process starts, add sugar and cardamom seeds. Keep stirring.
Once all the sugar is dissolved and rice and cashews are cooked, the pudding is ready.
Now you can choose the consistency of your pudding. If you like it a little loose and flowing then turn off the heat. If like it thicker like I do then cook a little further.
Once you turn of the heat, let it cool a little. Stir it every once in a while preventing it from forming a thick layer on top.
Once the pudding has cooled down a little but is still warm, transfer it to serving dishes and either let it chill before serving or you can also serve it warm garnished with pomegranate seeds.