Cherry Ginger Chutney

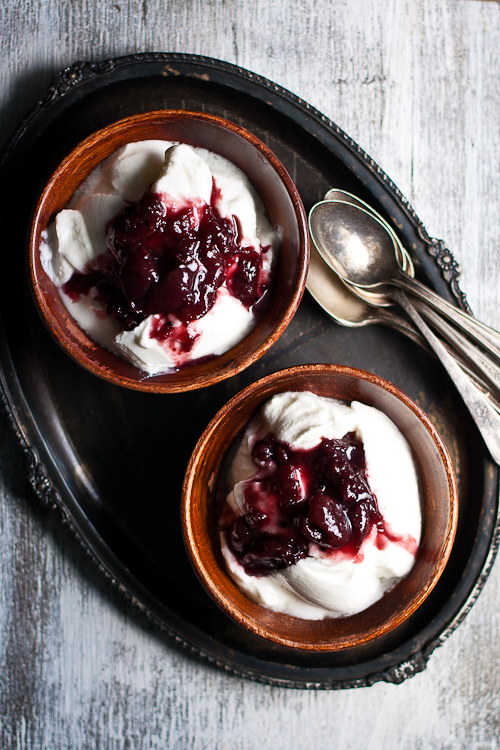
Chutney over thick hung yogurt

This post is long overdue. Ever since summer knocked on our doors and red plum cherries loaded the trees this post was supposed to come. Like every year, sometime in May we took a trip to the cherry farms with some close friends. These farm picnics are always fun. Kids get to be kids, goofing around, chasing each other, climbing trees and for some time us “grown ups” get to do the same.

Fresh plum cherries

We picked a lot of cherries, ate them to our heart’s content and still had pounds to bring back home. When I was paying for 10 pounds of cherries that day I knew what I was going to do and had also planned to blog about it. But then life, health and general “stuff” took a toll on me and this recipe never ended up on this blog. Thank god I had cooked up those cherries before all craziness happened. Now that my health is in my favor and I felt like blogging again I thought I’d start with this recipe.

Jaggery- secret ingredient

So I used up the cherries to make Cherry Ginger Chutney. Sweet and tangy cherries married really well with the light spiciness of ginger. I used a couple more spices to spruce it up. Mummy always adds fennel seeds to her chutney. She says its great for the digestion and I just generally love the way flavors dance with the touch of fennel seeds.

Cherry Ginger Chutney

In traditional Indian cooking jaggery is used a lot for the sweetness. Gur, or jaggery is the raw unrefined form of cane sugar or sometimes date sugar. Its formed from cane or date juice with extracting molasses from it. Its golden or dark brown in color which brings an earthiness to the dish and is definitely a healthier and better option to white cane sugar. They usually come in blocks which can be easily broken down to powder or you can even find jaggery powder in the market. Its used a lot in Indian desserts and also in cooked chutneys like this one.

Ingredients
2 lb pitted cherries
1/4 lb jaggery – I buy dark jaggery powder from Indian store. Powder dissolves easily than blocks. You can also use raw cane sugar or white granulated one if you want. You can add upto 1/2 lbs of sugar if you like your chutney sweet.
1/3 cup grated fresh ginger
1/2 teaspoon fennel seeds
1/2 teaspoon cumin seeds
1/2 teaspoon nigella or onion seeds
2 bay leaves
1 1/2 tablespoon olive oil

Method:
Heat oil in a thick bottom pan or pot. Oil should be smoking hot. Add bay leaves followed by fennel seeds, cumin and nigella. Cook the spices until they are brown. Should take about 10 seconds.
Add cherry, jaggery and ginger. Mix everything well together.
For the first 15-20 minutes cook on medium high heat. Stir every 3-4 minutes to keep it from sticking to the bottom. Once you get a feeling that cherry is now beginning to soften, turn the heat to low, cover with a lid and let it simmer. Stir occasionally every 20-25 minutes.
Let the chutney simmer until the cherries are softened and cooked well to the extent that it looses its shape. To test if your chutney is done, take some in the back of your spoon and let it stay out in the air for about 10-15 seconds then run a finger through it. If it wrinkles then its done.The whole process should take 1- 1 1/2 hours.
Turn the heat off and let it cool completely before storing in clean, dry and air tight containers. The chutney stays good in the refrigerator upto 2-3 weeks.

Simple Stir Fried Red Potatoes and “Lunch”

IMG_2645

We had one permanent sabji wala (vegetable and fruit seller) who would make rounds every other day and bring fresh produce from his garden. He had this huge basket made out of bamboo which he would carry on his head and would make rounds around the neighborhood. Mummy would select things that interested her most out of that basket and that would decide what we will be eating for the next couple days until the sabji wala comes back again. We knew what to expect in that basket depending on the season. He would bring lots of dark green and crunchy cucumbers in summer along with some juicy yellow and red mangoes. Winters would be mostly about root vegetables, mustard greens and beans while monsoon brought carrots. So if he brought carrots in summers or cucumbers in winter, mummy would teach him a lesson or two about organic farming and return back everything. This is how we grew up and still never realized how lucky we were.
collage2-3
When I was little, we were lucky enough to have access to local small farmers who would drop organic produce from their garden, at our doorstep. We were lucky to know the real taste of mangoes and we knew why some vegetables took longer to cook than others. We were taught that its better to eat your potatoes with skin on and crunchier the beans, the better. Those little lessons and those bits of knowledge fed to us at the dinner tables, in and around the kitchen and out in the backyard while getting our hands dirty, always stuck with me. Although, the true realization didn’t come until I had a child of my own and I relived those experiences with her.
Collage1-2
She is almost three now and curiously observes things around her which amaze her a lot. She tries to find a reason behind everything we do. She doesn’t like to be told what to do but likes to watch us and does what we do because she thinks whatever Maa and Papa do is right. Her big eyes get even bigger when told that we can make a birdhouse out of a milk carton and then sits with me the whole afternoon painting the carton, hoping it would turn into a birdhouse and then her favorite humming bird will never leave the house after that. She goes speechless when her Papa shows her how seven stars can come together to make a big spoon and wishes she could use it to eat her cereal every morning. Everything amazes them and everything makes them more curious.
collage3-2
She is equally amazed to see that the tomatoes that she ate till now were green before they actually turned red and juicy. Carrots actually come out of the soil and not from a plastic box at a grocery store and it takes way too much time for the strawberries and cherries to be good enough for her to pick off the tree. I have seen that when she gets an answer to all her why, how and whats she eats her food better. She prefers to pick carrots and broccoli over french fries and hamburgers when she understands what will make her healthier and stronger.
That’s how the kids are. If they are helping in the garden and are involved in the preparation of the food then they are more likely to try that food than just setting it on the table and asked to eat. They want an adventure out of everything and at the same time they thrive to learn. So all we need to do is educate them and let them get their hands dirty. Teach them where their food comes from and how the whole life is interconnected. Teach them the importance of locally grown and organic food. We sometimes really underestimate our kids about what they would and wouldn’t like. I am guilty of that too! But slowly and gradually I am trying to teach her and learning a lot myself along way. Not only about the food that we eat but also about my child and how her likes and dislikes change depending on my habits.

IMG_2630

Its no secret how in America we are struggling with teaching our kids about healthy eating habits. Although I do not think its just a national issue but has become a global crisis or else famous and influential people like Mrs. Michele Obama and Prince Charles of Wales would not work so hard everyday to make their voices heard. Lunch, a small yet powerful documentary is trying to do the same. Lunch, a movie directed by Avis Richards, founder and CEO of Birds Nest Foundation is a documentary that shines a light on school lunch programs and teaches kids about healthy habits, gardening, fresh foods and more. I was invited by the wonderful people behind Lunch to watch the movie and if I believed in what they say, then tell you about it. I strongly support the message Lunch conveys and would encourage you to buy the movie or first watch the trailer and then decide. Its about time we stop feeding into all the politics and petty things that go behind the food that we eat and start thinking of our young people, our kids.

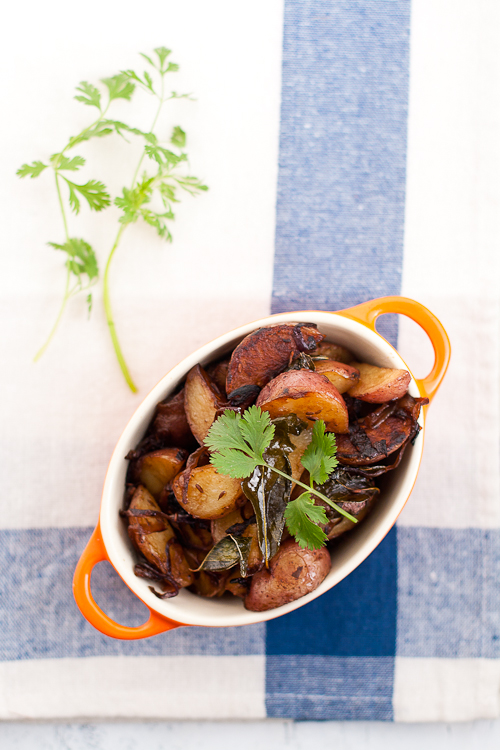
Today I am sharing a very simple recipe using a few basic ingredients. Some stir fried red potatoes from a local farm and I spiced them with cumin and curry leaves.

IMG_2637

 Ingredients:
1 pound small red potatoes
1 cup thinly sliced red onion
1 teaspoon cumin seeds
12-15 curry leaves
2 1/2 tablespoon ghee *Can substitute it with an cooking oil of choice
Salt to taste

Method:
Cut the potatoes into quarters. Wash them with water. Drain water. Set aside. I used small potatoes. If you think yours are a little bigger, cut them to 1 approx. 1 1/2″ size.
Heat ghee/oil in a thick bottom pan. Add cumin seeds. As they sputter add curry leaves. Step aside for a few seconds because curry leaves sputter a lot because of the water content in the leaves.
Add sliced onion. Cook them on medium high heat for 3-5 minutes until they are slightly golden brown in color.
Add potatoes. Stir fry over medium high heat for approx. 5 minutes. Add salt. Stir well. Cover with a lid and let it cook over a medium low heat for 5-8 minutes or until the potatoes are cooked through.
Uncover and over medium high heat, cook off extra liquid if any. Serve hot as a side.

Sweet and Savory Orange Cumin Shortbread Cookies

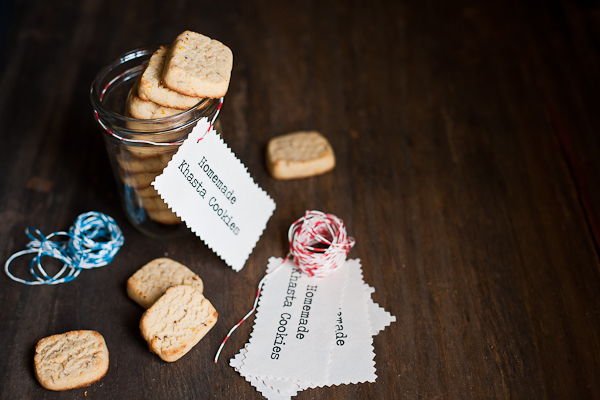
Homemade Khasta Cookies

Papa worked for the government so we lived in a small government quarter as kids. It had one bedroom. Well, two, but one of them was Papa’s office and it was filled with files and more files. We were never allowed to enter his office and back then we never understood why. But now that I have a curious little butterfly of my own who has the ability of turning the whole house upside down in seconds, I know exactly why he did that.

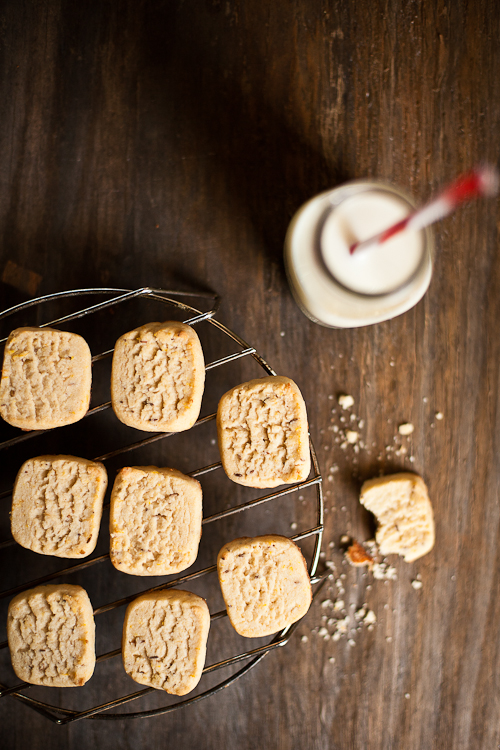
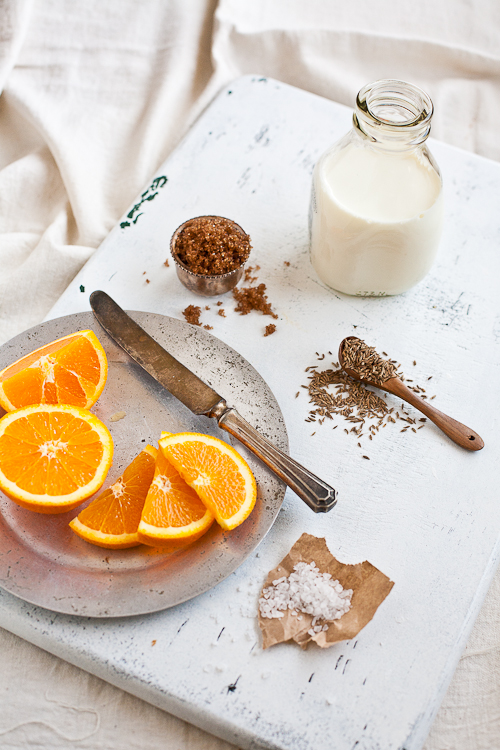
Shortbread cookies with milk

Next to his office was a veranda which was our dining cum entertainment room and attached to that was mummy’s tiny kitchen. The size of that room was exactly what the word tiny means! It was just about enough to accommodate almost one and a half person in it. Mummy did most of her prep work sitting on the doorstep of that kitchen. She would sit rolling mathri (Indian crackers) and filling samosas right there on the doorstep of that kitchen. That was the tiniest kitchen I have ever stepped into but the fondest food memories of my life came out of that kitchen.

IMG_8264

She had this funny looking tabletop oven which I guess she owned even before we were born. It would be neatly packed and tucked in to the top shelf of her kitchen. She would pull it out only when it was our birthday. That’s when she would make fruit cakes for the party. Strawberry icing for my birthday and chocolate for my brother’s or when she would make khasta biscuit, sweet and savory shortbread cookies with some whole spices. The ghee in them would make them crumble if held too hard and they would melt in the mouth in seconds.

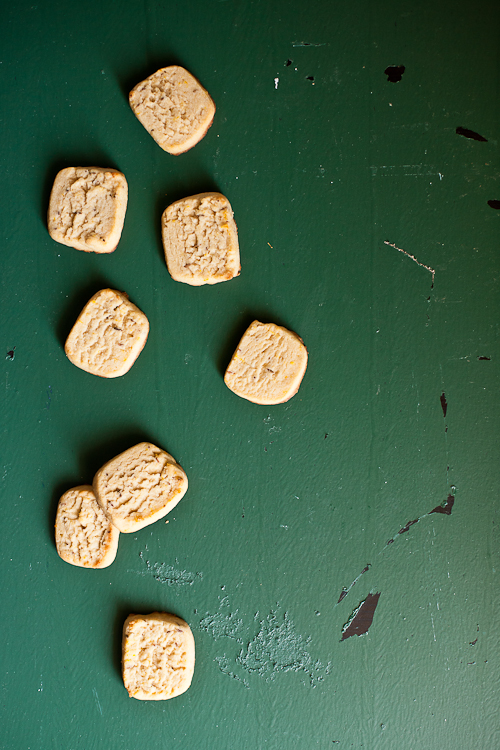
Sweet and Savory Shortbread Cookies

The ones with cumin and black pepper were her favorite and also my dadi’s (grandma). So when we visited dadi, the oven would come out and mummy would make those cookies. The tiny oven would take not more than a dozen at a time so the process of making 50 of those would take the whole day. I have eaten those shortbread cookies a million times in my life but every time they taste exactly the same, lightly sweetened, just a tad bit of salt and cumin just enough to command its presence.

Ingredients

I tried to do something similar recently. Well, not recently but a few weeks back before this thing called “writer’s block” hit me and I started running away from anything that involved typing words on a blank screen of my computer! But now that I forced myself out of that condition, I thought it would be right to share with you the recipe for these orange flavored khasta biscuits which I tried to make, inspired by the recipe of my mother. So here’s the recipe for Sweet and Savory Orange Cumin Shortbread Cookies.

Cookies in a jar.

Ingredients: Makes 3 dozen
3 1/2 cups all purpose flour
1 cup ghee (clarified butter) *Can substitute it with softened butter
3/4 cup dark brown sugar (loosely packed)
1 teaspoon salt
Zest of two large oranges- almost 2 1/2 tablespoon
1 1/2 teaspoon cumin seeds
2-3 tablespoon orange juice ** Can substitute with milk.
1/2 teaspoon baking powder

Method:
Preheat the oven to 350 deg. F.
In a large bowl, sift together salt, all-purpose flour and baking powder. Set aside.
In a large mixing bowl, whisk together sugar and ghee (or butter if using that) until they are just combined. Add orange zest and cumin seeds. Slowly add the flour and mix on low speed until the dough starts to come together. Add orange juice to make the dough smooth.
Take the combined dough out of the mixer and knead with your hands over a clean counter top lightly dusted with flour. Divide the dough into two equal parts and roll them into logs. Cover with a plastic wrap. At this stage I just smoothed out the longer sides of the log giving it a square shape. Put it in the refrigerator for 15-20 minutes to firm.
Pull the dough out and cut into squares about 1/4″- 1/2″ thick. Place them on a cookie sheet lined with parchment paper, an inch apart from each other.
Bake them for 10-12 minutes or until the bottom is golden brown in color. Take it out of the oven and cool on a cooling rack before serving with hot milk, coffee or chai.

One Fine Day And Some Roasted Carrots & Spring Onions With Chaat Masala

Roasted Root Vegetables with Tangy Indian Masala

Today I have way more photos to share with you than I have words. Photos from one fine day under the sun with some dear friends close by, the little one’s soft chubby palm wrapped around my finger and a camera held in the other hand.

collage5

Untitled

It was a nice change to walk by people grabbing their coffee mugs rushing to work while me pausing after every two minutes taking pictures or following the little one running after pigeons.

Untitled

After a long time I finally got a much needed break from a hectic schedule. A few of us friends (Rose, Vijitha and Kankana) planned to drop whatever we were busy doing and just took a day off to unwind.

Miette 

As an added bonus, we also shared some common interests which, lets just say, involves camera and eating! So for one full day we ate, took photos, and then ate some more.

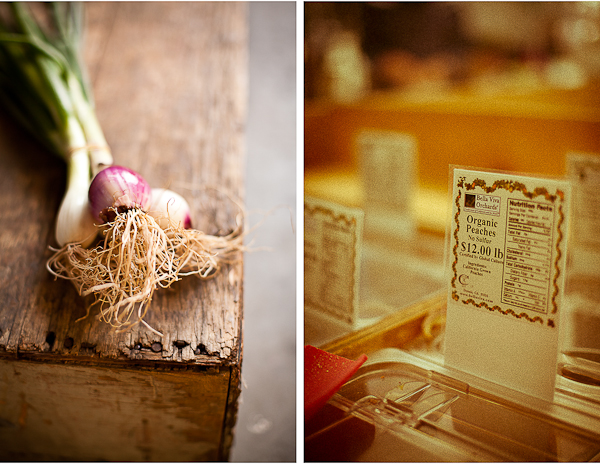
produce at the farmer's market Farmer's Market

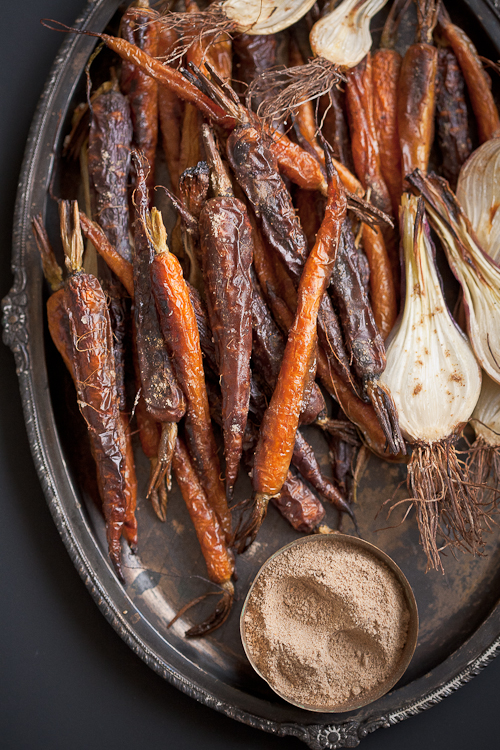
The same day at the farmer’s market I picked some gorgeous root vegetables so I am sharing with you a quick recipe for some Roasted Heirloom Carrots and Spring Onions. These tender and vibrant little sweet treats demand no adulteration. Less does the trick with them. So I just tossed them in olive oil, threw them in the oven for a few minutes, sprinkled a dash of chaat masala and served with our evening chai. They went faster than you can imagine!

collage 9  

Ingredients:
2 bunches of purple, yellow and orange heirloom carrots
1 bunch spring onions
1 tablespoon good quality extra virgin olive oil
1/2 teaspoon chaat masala

Method:
Wash the root vegetables thoroughly under water. Wipe off any dirt. Chop of the green, leafy part and save then for other recipes. I chop them and mix with flour to make parathas, poori, roti or can use then in veggie burgers or rice pilaf.

Cut the onions from the middle into two. Toss the vegetables with olive oil and bake them at 400 deg. for approximately 12-15 minutes.

Once baked, pull the vegetables out, sprinkle chaat masala on top and serve with a cooler or chai. 

On a side note, I am excited to be interviewing with the fabulous Neel of Learn Food Photography next week! If you have any food photography questions that you would want to ask me then submit your questions to Neel here.

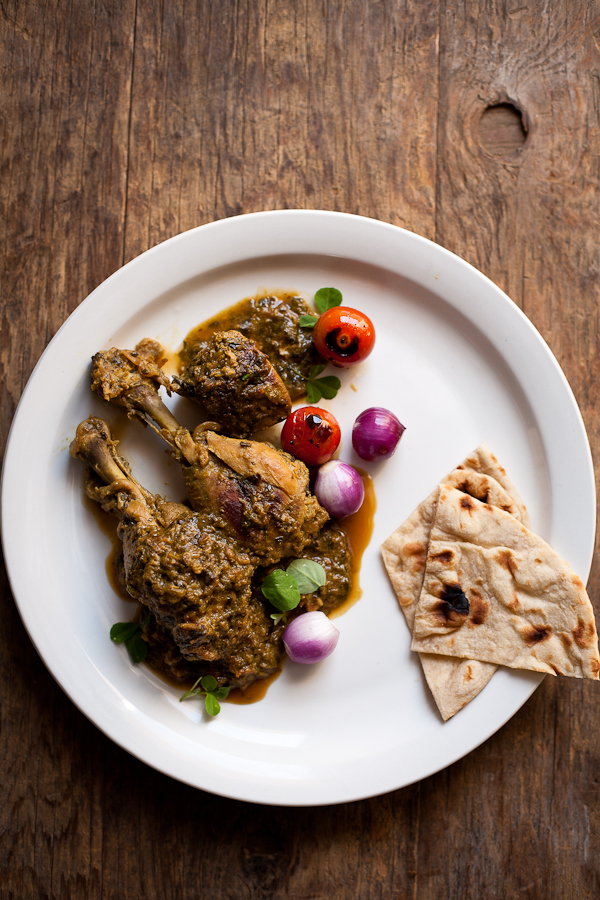
Methi Murgh

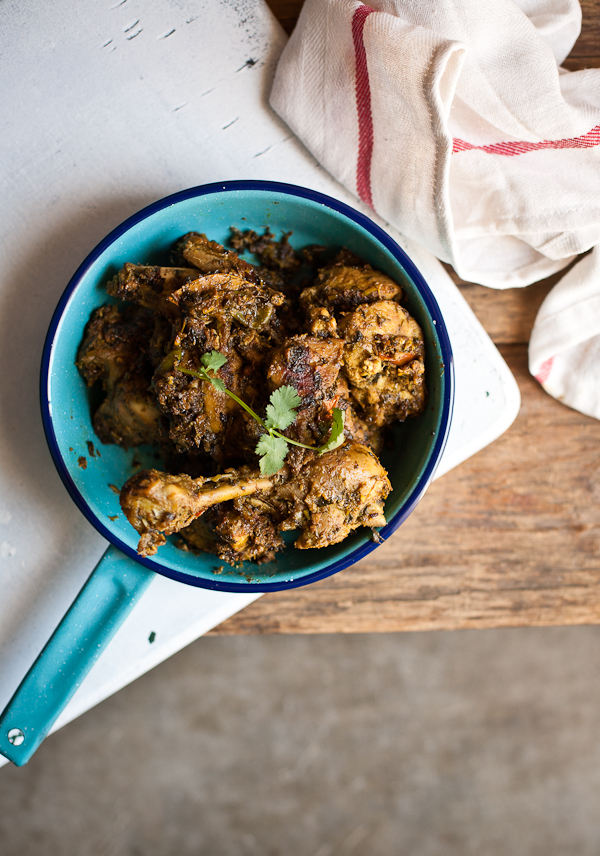
Methi Murgh

Through out the warmer part of the year, everyday after school he would have us help him out in the garden. Papa would work hard and set up a kitchen garden, by the house every year. Would work up the soil, go buy some new seeds and plants, pull out the older seeds saved from last year and sow them neatly under the soil. Tomatoes big and small, lauki (botte gaurd), squashes of several variety, onion, potatoes, karela (bitter gourd), eggplants and many more. He would have me and my brother help him out, water the plants, pick weeds and make sure Polley, our pet dog doesn’t make that garden her personal bathroom.

In the garden

There were parts of that chore that I liked, like throwing dirt and sneaking in small worms inside of my brother’s shirt but then there were some that I hated. I would rather be watching MTv or chatting with my friends over the phone than talking to the plants at that age. But it was a chore and I had to do it!

Fenugreek Chicken

I would ask Papa why he even bothers to work so hard over those vegetable plants which gave us produce barely enough to feed us a few meals through out the season. Why to sweat so much over those 14 little okras when mummy could buy a kilo for a rupee. He would smile and in his heavy deep voice would reply, “that’s because I love you!”. I never understood that answer and that expression of love.

Fenugreek leaves from the garden.

But now after 20 years when I reap the first crop of methi (fenugreek) leaves off of my kitchen garden. A garden that I prepped up following each step Papa followed 20 years back and parts of which were a “chore” back then. When I carefully wash the dirt off of each leaf, chop them make and religiously brown each methi paratha on the skillet smothering some homemade ghee on it and secretly hoping that the picky eater in the family would like it. And when my daughter finishes it up in minutes and asks for a second helping, I know exactly what he meant back then. Now I understand how something as simple as working to provide a good wholesome meal can show your immense love for a person. I am not sure if my daughter realizes this expression of love yet but I am sure in another 20 years she will and hopefully will spread the same.

Tomatoes from the backyard

After a long few busy weeks and no blogging at all something like this of a realization could only have brought me back to the blogging world again. I am glad to be back and to be able to speak with you again. Hope you are keeping well, I am too. Today sharing with you a recipe for Methi Chicken, (chicken cooked with fresh fenugreek leaves). Its one of my dad’s recipes which I absolutely love and is so simple to make. As long as you have fenugreek leaves and some chicken you will not have to run to the grocery store, I promise you that. And for those who are not familiar with fenugreek, here’s a little info. So enjoy, till I see you again!

Methi Murgh  
Ingredients:

1 1/2 pounds chicken (I used cut whole chicken, with bones but you can use any part and adjust the cooking time accordingly.
1 1/2 cup fresh fenugreek leaves, chopped (1 cup fenugreek leaves for 1 lb of chicken)
1 teaspoon fenugreek seeds (omit if not available)
1 tablespoon ginger (grated)
1 tablespoon garlic (grated) or use 2 tablespoon ginger garlic paste, though fresh tastes better.
2-3 thai green chili (slit from middle)
1 1/2 tablespoon coriander powder
1/2 teaspoon turmeric
1/2 cup tomato
1 tablespoon ghee (optional)
2 tablespoon cooking oil
Salt to taste

Method:

Wash the chicken thoroughly. Set aside.
In a mixing bowl, mix together ginger, garlic, turmeric, fenugreek seeds, coriander powder, chili and salt. Add chicken. Rub everything well together. Cover and let it marinate for atleast 2 hours or better overnight.
Heat ghee and oil in a heavy bottom pan with a cover. Add chicken. Saute the chicken and cook it under medium heat until its cooked half way through.
Add fenugreek leaves. Mix well, cover and cook on medium heat until the chicken is cooked. Stir occasionally, scraping the sides if they stick.
Towards the last 5 minutes add tomato. Adjust salt if required and upto 1/2 cup water if the curry is too thick. Cook uncovered, stirring occasionally, on a medium high heat.
Once the tomatoes melt and the chicken is cooked and slightly browned on the sides, its ready to eat.
Serve hot with Naan, Roti or simple pulav

Indian Simmer Loves- The Spice Spoon

30
Its been quite an experience this past few months. Life couldn’t be crazier (or so do I think!) with the day packed with a never ending list of “things” needed to be done. Trying to juggle work, family and my sanity together. I do not say that I am doing a good job with it or have reached the goal, but I am getting there. Hopefully life will get back to normal soon and I will get to do things that I haven’t been able to do in months, like sleeping or sitting and wondering what to do next? And I could not thank you enough for your support and my friends who always have my back. One such dear friend I am featuring today as a part of Indian Simmer Loves is Shayma Saadat, the beautiful face behind lovely blog The Spice Spoon. If you want to read some good writing and some nostalgic stories which would take you back to your childhood and relive those forgotten moments, then you should read Shayma’s food blog. I for one am a great fan of her as a person and food writer. I am proud that she agreed to be a part of this series on my blog today. Please welcome Shayma Saadat!

chicken sliders image4

Tell us about yourself and what you would say is your food philosophy?
I am a Pakistani-Afghan with Irani ancestry. I was born in Lahore, Pakistan and grew up in Pakistan, the US, Nigeria, Kenya, Bangladesh and the UK. I lived and worked in Rome, Italy for several years after which my husband and I, true to our nomadic expat lifestyle, made Toronto, Canada our new home.
My cookery style is reminiscent of the comfort food I grew up eating in my home- clove and cumin fragranced basmati pilafs; slow-braised spicy mutton stews, laced with ginger and garlic; and cardamom-infused milky rice puddings. The dishes I prepare are a reflection of my heritage; the food prepared by the women in my family.

chicken sliders image5

What led you to start a food blog?
I had just moved to Toronto from Rome and wanted to recreate those dishes which reminded me of my childhood in an attempt to feel rooted in a place I felt lost. Since recipes are passed down through an oral tradition in my part of the world, I decided to put pencil to paper and document the recipes created by the women in my family – from my Afghan, Irani and Pakistani heritage.

chicken sliders image7 What would you say “The Spice Spoon” is all about and please share a recipe that best describes your blog?
My blog, based on heritage cookery, reads like a food memoir. I relate each recipe to a memory- often from my childhood- of loved ones and of the places I have lived in. When I write a vignette, I want my readers to feel that they can relate to it on a nostalgic level. I want it to remind them of the place and time they tasted a dish their mother prepared for them as a child.
Through my stories, I also want people to see my part of the world- Pakistan, Afghanistan and Iran through a different optic- with a more human face, rather than in a negative light, as is often depicted in the media.

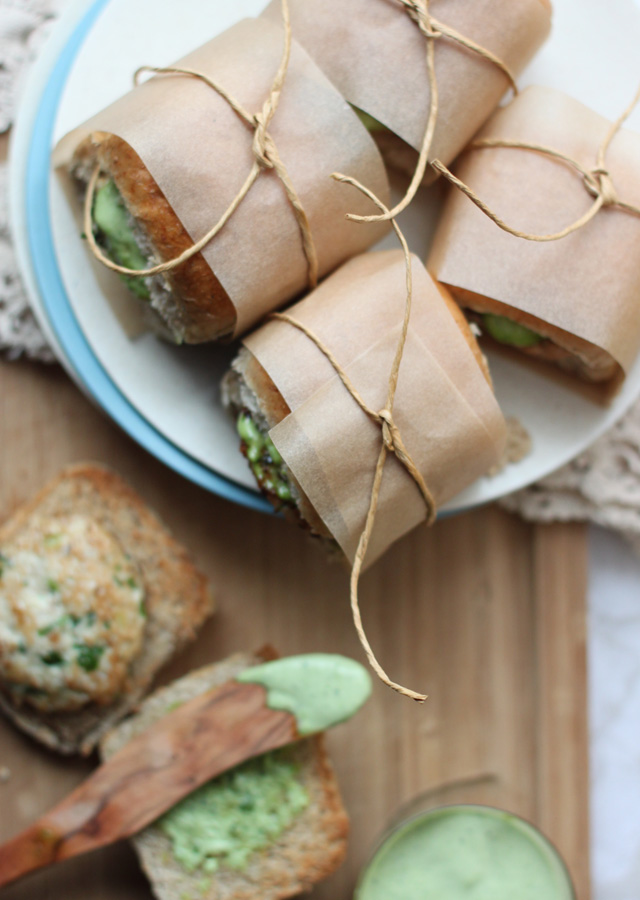
chicken sliders image10 The recipe I am sharing with you today, Chicken Sliders in the Pakistani Manner with Mint Aïoli, is based on my Ami’s (mother) love for green chilies, ginger and fresh, verdant cilantro. Ami and I often have these kebabs with our afternoon tea, as most Pakistanis like to enjoy something savory during tea time. We dip them in a mint-yoghurt sauce, which inspired me to create a mint aïoli for the sliders.

Chicken Sliders with Mint Aïoli
You will need 8-10 slider rolls
Serves 8-10

Ingredients:
*1 slice whole wheat bread, toasted
*1 pound minced chicken (my butcher uses chicken breast)
* ½ a small onion, sliced very thinly
*1 small thumb ginger, julienned
*2 cups coarsely chopped fresh cilantro, stems and leaves
*2-3 Thai bird chilies, sliced straight into the mixture with kitchen shears
*1 egg
*2 tsp salt
*Any neutral oil (grape seed, for e.g.) for shallow frying
*Large frying pan

Preparation:
*Toast sliced bread till crisp. Allow to cool, then pulverize in a blender or food processor till it transforms into crumbs. Place in large mixing bowl.
*Add minced chicken, onion, ginger, cilantro, chilies, egg, salt and mix to combine. Use a spatula or gloves as the chilies can burn your fingers.
*For a salt-taste test, place frying pan on medium-high heat and add 1 teaspoon oil
*Take ½  a teaspoon of the mixture and drop into the hot oil. Flip on other side till done. Taste for salt. Add more salt to chicken mixture if necessary.
*Apply oil to your hands (or use gloves) and form meat into 2-inch round flat patties, about ½ -inch thick. Set aside on parchment / wax paper.
*Heat ¼ inch of oil in a pan over medium heat. Working in batches, add patties to oil and fry for 60-90 seconds per side or until golden brown and cooked through, adding more oil as needed (you may need to change the oil as it darkens)
*Transfer to a newspaper or paper towels to absorb excess oil

chicken sliders image2Mint Aïoli   

Ingredients:
*2 fresh egg yolks (or pasteurized yolks)
*1 teaspoon minced garlic
* ½ cup fresh mint
*1½ cups olive oil
*1 tablespoon fresh lemon juice
*Sea salt to taste

Preparation:
*In a blender, blitz yolks. garlic and mint till well incorporated
*While the blender is running, add oil in very slowly, in a thin stream
*Add lemon juice
*Add sea salt to taste

Assemble:
You will need olive oil
Slice the slider rolls in half, and brush the insides with olive oil. Place under your broiler till golden. Sandwich chicken kebab between slider roll after you slather it with mint aïoli. Serve with an arugula and cherry tomato salad, dressed with balsamic vinegar, olive oil, salt and pepper.
Enjoy with family and friends on a lovely spring afternoon. And if you so please, pop open a bottle of a chilled Italian Falanghina.

Winners- Indian Food Palooza

First of all I am so sorry for this delayed post. As I must have ranted at many other occasions, time is really something I am running short of lately. Its been- all work and no play, kind of a scenario these days. But all this, so that I finish all the boring stuff soon and get back to fun ASAP! So please bear with me and I will be back to you and my blog real soon.

Leaves
Other than this, something that really pushed me off the hook yesterday was this post which I worked on putting up for you guys. I scheduled a timed post so that you can see it on time even if I get busy and can’t attend to it. This morning I woke up hoping to see emails from the winners and the other participants but all I found was a no show! Not only was the post not published but it was no where to be found in my drafts. So blogger.com, PLEASE pull your stuff together and step up your game!

Stones in my backyard

Alright, so now that the rant part if over lets get to the good news shall we? When I, Kathy and Barbara were planning this event Indian Food Palooza, we never imagined that you will welcome it with such open arms. You and your recipes proved the event to be a great success and all of us want to thank you from the bottom of our hearts. You are inspiring me to bring a bigger and grander event next time, so stay tuned!

IMG_7399

Entries to Indian Food Palooza were closed on March 31st and then on April 1st we chose five lucky winners via random.org. The list below in no chronological order and is not on the basis of any merit but purely random. And the winners are…

Madhur Recipe’s – Mixed Vegetable Curry in Coconut Milk Sauce- Tropical Traditions Coconut Flour

Kitchen Kemistry– Tangdi Kabab- Tropical Traditions Coconut Flakes

Spices And Aroma– Omelet Kozhambhu- Tropical Traditions Coconut Oil

Sunshine And Smile– Khandvi- Set of Indian Spices from My Spice Sage.

50 Recipes in 2012– Stuffed Eggplant-  J.K. Adams artisan maple cutting board from Creative Culinary

Congratulations you guys! Please contact either me, Kathy or Barbara via email with your postal addresses and then we can go from there.

Indian Simmer Loves- Journey Kitchen

Last one week was a bit of an emotional roller coaster for me and my friends and family. Some fabulous highs and then some sudden lows. I was confused how to take it all in and then I met Kulsum online and we started talking. As usual she knew how to say the right things and bring me back to smile. Has it ever happened to you that someone makes you feel so comfortable and slowly sneaks into your life and you do not even know how he or she looks like? Like a pen friend you have never had as a child. That’s what Kulsum and I have become during the course of this one year that we’ve known each other. We started our food blogs almost around the same time. She writes a lovely food blog Journey Kitchen where she shares her recipes, beautifully blending the modern and traditional Indian cooking. She is funny, spontaneous and LOVELY to talk to and it shows clearly in her writing. With her sweet stories she can easily become a part of you and with her approachable recipes she will make you cook India food. Don’t even make me start on her photography skills, her photographs are nothing less than an eye candy. So let’s meet Kulsum Kunwa of Journey Kitchen!

Tell us about yourself and what you would say is your food philosophy?
To start with, my name is Kulsum and I’m the blogger behind the blog Journey Kitchen. I’m an Indian expat born and brought up in a small Middle Eastern country of Kuwait. Then, life took a turn and my family shifted back to India for good. But as luck had it, I got married and moved back to Kuwait to live with my husband! Growing up, I was clearly the most enthusiastic foodie in the house. I criticized, demanded and talked about food with my mom all the time, but it was not until I got married, I truly understood the value of those conversations. My mom has always been a modern cook whereas my mother in law is a traditional one, my understanding of traditional food and its modern interpretation stems from these two fabulous ladies in my life.

My food philosophy is quite simple- wholesome and flavorful food and spice plays an important role in creating that food.

Let's Eat

What led you to starting a food blog?
When I started I didn’t know what ‘blogging’ was. For me, it was an online journal so that I could share recipe links with my friends. I love talking about food, where it comes from, how it  should be cooked, how it affects our lives, how it is related to our past and my friends as I soon realized where not very keen on all that talking. The blog helped me talk to myself and save the pain for my friends I guess. Eventually, I found people online who were passionate about food as much as I’m. Today, Journey Kitchen is my creative outlet, from recipes to photography, it is my happy place.

IMG_7269

What would you say “Journey Kitchen” is all about and please share a recipe that best describes your blog?
Journey Kitchen is a modern Indian cooking blog. But unlike what many think, modern cooking is not about moving away from the traditional roots instead it’s about going back to the traditional ingredients and cooking method and recreating them using latest techniques. Journey Kitchen is about food that has reassurance and comfort of the past but is also exciting enough to enjoy it today. It’s my humble attempt to change the way Indian food is perceived.  My husband’s love for traditional food and my love for modern make sure we always have great food and humorous arguments on the table which I often share on the blog.

IMG_7360

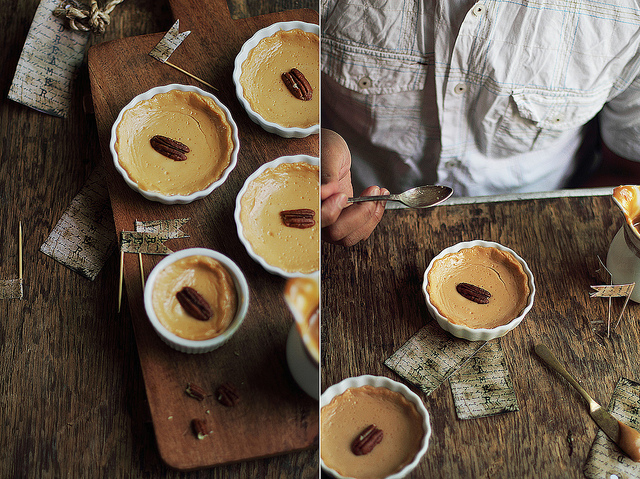
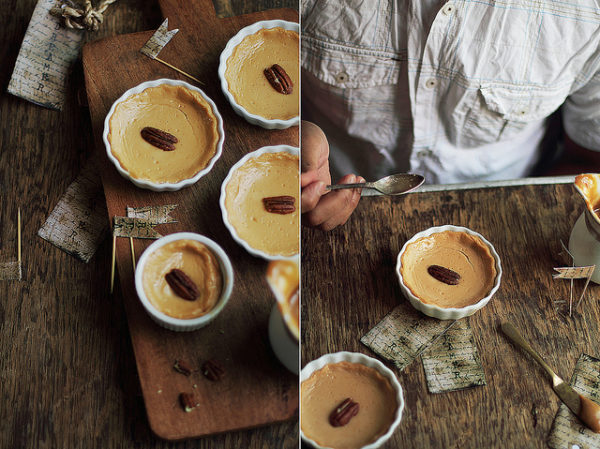
Today’s recipe is inspired from a traditional sweet yogurt recipe from the city of Kolkatta called Mishti Doi (Mishti meaning sweet and doi meaning yogurt) , which my husband has childhood memories of. Mishti Doi is also called Lal doi meaning red yogurt due to it characteristic reddish color. It is made by caramelizing milk and then setting fresh yogurt in earthen pots. Considering I always have dulce de leche on hand, sweetening my hot chocolate and drizzle it over everything I bake, I figured it will work great for adding that caramelized flavor for Mishti doi.

Hot Cocoa

Dulce de leche is a Latin American spread, made by slowly converting the sugar in sweetened condensed milk until it caramelizes. After hours of cooking what you get is creamy, caramel flavored sweet milk, almost like a jam. I always make my own but you could easily use store bought.

Untitled-1

Baked Dulce de leche Yogurt – Mishti Doi
Serves: 6-7

Ingredients

2 cups yogurt
1 can (395g)  dulce de leche
100 ml heavy cream
1/2 tsp rose water (optional)

Method

Preheat the oven at 170 C. Whisk all the ingredients together for 2-3 minutes.

You can use individual ramekins or a large oven safe bowl to bake it. The baking time with differ according to what you use, but it generally ready when it’s thick and set in the middle. For the small ramekins I used, I baked them for only 15 minutes. Baking in larger bowl can take up to 30 -40 minutes. When I recently made it again, I thought of covering the ramekins with aluminum foil which helped in reducing the little drying you see at the edges when you bake in small ramekins.

Once baked, let it come to room temperature and chill for at least 5 hours before serving. Garnish with pecans.

Jalebi Recipe & Announcing #IndianFoodPalooza

I was putting her to bed and as usual she says Maa, kahani (Mom, story). My already tiny, box of stories was almost empty this time. I couldn’t think of any new friendly dragon or a lion king’s story. But then somehow I ended up telling her about this bus ride I would take with my Papa as a kid. We would go visit my grand mother who lived in another city, a few hour drive away. The bus would go through a jungle, over the mountain, across two rivers and would pass a hanuman temple. I would always looks for real monkeys outside of the temple, but could never see one. It looked like she was starting to like the story, her eyes can tell everything very easily. And then those eyes widened a little more when I told her about this bus stop and the mithai shops (sweet shops) around it. Jalebi? She asked, when I told her about the several sweets in those mithai shops. Maa, I like Jalebi. You never make jalebi, she complained. I think you should make it one day, she suggested. I will, I promised. Pakka (sure), she asked. Yes, I smiled and carried on with the bus ride and jungle.

IMG_7255

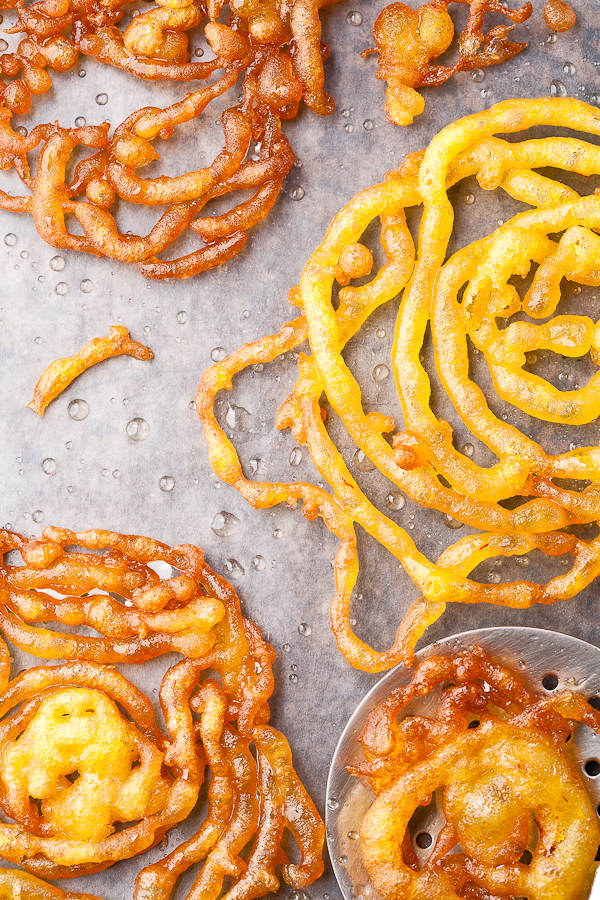
But after that conversation only a heartless or a fool would wake up next morning and not make jalebis! I had different plans for my first recipe, kick starting this Indian food event Indian Food Palooza but plans are meant to change, right? I had never made jalebi before in my life and although these crunchy little sweet treats were greatly missed after moving to the US, they always intimidated me. But then I thought if I really wanted to have you get out of your comfort zone and try cooking Indian food, then I should get over my intimidation too. So I made some jalebis for my little monster and also for this fun event that today I am starting with two very dear friends of mine and Indian food enthusiasts Kathy and Barbara. Well, the jalebis did not turn out to be the prettiest ones but they sure were crispy, light, sweet and absolutely nostalgic!

IMG_7277

The day I announced my book, I, Kathy and Barbara were chatting on twitter. Somehow the conversation turned to Indian food and how some people find it a little intimidating. And then somehow we got this crazy idea for an event where we could motivate people to cook some Indian food and learn a few things about it and maybe along the way can teach us a thing or two as well. And the next thing we know, we were planning Indian Food Palooza (credit for the name goes to Barbara by the way!). Some friends were gracious enough to giveaway some prizes too.

IMG_7257

We are very happy to announce a month long event Indian Food Palooza,  celebrating Indian food and cooks like you. We would love for you to join us and cook some Indian food this month. Whether you are experienced with cooking Indian cuisine or a little new to it, we encourage you to try something this month and let us know about it. Towards the end of this post I have listed out how you can join us with this event and also the details for some fabulous giveaways we have for you. But before that how about you take a look at the recipe for jalebi?

Recipe

Recipe in detail:

INGREDIENTS: Makes about 8-10 jalebis
1 cup all purpose flour
2 ½ tablespoon rice flour
1 teaspoon yeast or 3 tablespoon sour yogurt
¼ teaspoon saffron
¼ teaspoon turmeric
For Sugar Syrup-
2 cups water
2 cups sugar
½ teaspoon rose water (optional)
Oil (for deep frying)

METHOD:In 2-3 tablespoon hot water dissolve yeast. Cover and let it sit for 5 minutes.
Now combine flour and spices in a large mixing bowl. Add yeast and adding water, little at a time make a thick batter. Cover and let it ferment for an 1-2 hours.
If using yogurt instead of yeast then repeat the same process just the batter would be thinner in this case. Exactly like a pancake batter. Cover and ferment for 6-8 hours or overnight.
In the meantime make a one strand sugar syrup cooking sugar and water for 15-20 minutes on medium heat.
After fermentation the batter should be light and flowy. Add extra water if needed.
Heat oil for deep frying. Using a funnel, piping bag (with tip number 12), a Ziploc bag (cut a small opening), a jalebi maker of a plastic ketchup bottle with a nizzle like opening, pipe the batter into the oil in circular motion.
Fry until the jalebi is golden on both sides. Take it out of the fryer and drop into the hot syrup for 5-7 seconds. Strain the extra syrup out and take the jalebis out. Serve with yogurt, rabdi or just as it is.

To be eligible to win a prize you must:

  • Post an Indian dish on your blog between March 1, 2012 and March 31, 2012.
  • Link your dish up using the linking tool at the bottom of the post; only one entry per person please. Entering your dish on any of our sites will have it display on all three.
  • Put a link in your post to this post so that your readers can join us too!
  • Prize winners will be chosen and winners notified March 31, 2012 using the email included on the link created. Winners will have until April 4, 2012 to respond with shipping information or another winner will be chosen.

Please note:  We want to encourage everyone to join us and share their experience but our
sponsors are shipping prizes directly and have requested that we limit the shipping area to the
Continental USA.
Prizes to be awarded include:

My other two partners in crime:
Kathy of The Colors of Indian Cooking is making Aviyal
Barbara of Creative Culinary is making Mumbai Sandwich

Some other useful links which might help you with Indian cooking.
KO Rasoi by Sanjana
Chef In You
eCurry by Soma Rathore
Journey Kitchen by Kulsum
Cook In a Curry by Maunika Gowardhan
Tongue Ticklers by Harini Prakash
Lite Bite by Sanjeeta
Veggie Belly by Sala Kanan
Kothiyavunu which is a great source for Kerala recipes
Sandhyas Kitchen
Cookbooks by Suvir Saran and Madhur Jaffery

Chocolate Surprise Cookies

IMG_7218

She has a mouth full of teeth now and she can brush them herself too. Then standing on the tip of her toes on top of the step stool, leaning towards the mirror she counts them every night before going to bed, in case there’s one missing. She is embarrassed beyond belief if I ask her in front of “people” whether she wants to go pee pee. She has opinions when it comes to dressing her up or dressing me up for that matter. And she wants to “create food” in the kitchen (yes, that’s what she calls it) just like maa does. “I do not want to watch, I want to HELP” she would demand when asked to stay away from the burner. Just letting her drop a couple spoonfuls of sugar or having her stir the pot doesn’t work anymore. She wants to “create the food” from start to finish wearing an apron like maa. I wonder who she gets this from! *smirk*

Collage 2.1-2

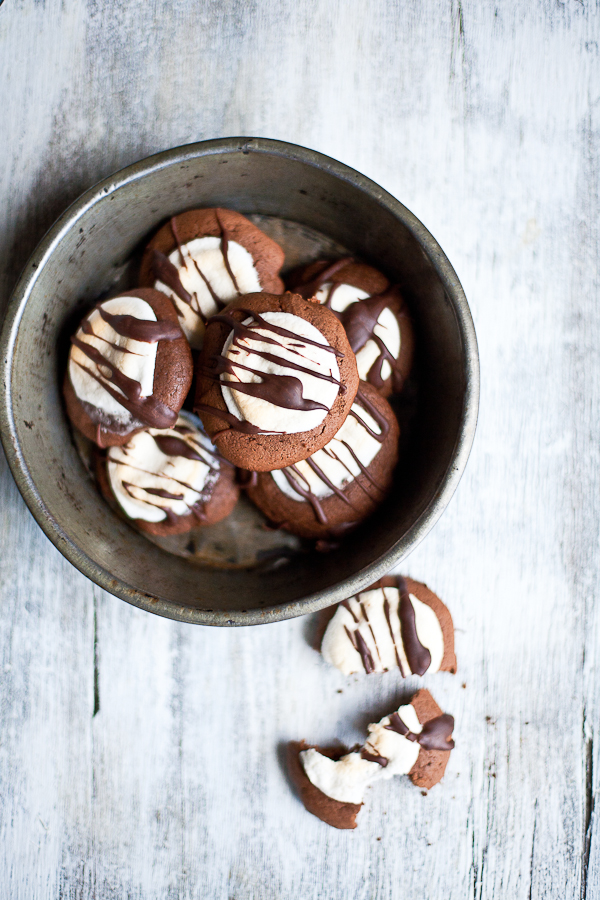
So we decided to spend some good time in the kitchen together (which we are not getting a lot lately!) and create some food. On being asked what she wants to create the answer was “marshmallows.. No No..egg. No wait, marshmallows is fine!” Now creating marshmallows with a two year old might be little tricky so we decided to take the easy route and baked some cookies with marshmallows on them.  I had this recipe bookmarked in my computer which was very easy to put together and perfect to make while having fun, so I chose that. I made a few variations so that it gets easier for the two year old and also exciting to see what she could do all by herself.

IMG_7194

I was surprised to see how well she measured the flour and broke the eggs. Well, when it came to measuring sugar and melting chocolate I could understand why she was a little sneaky but I was surprised to see how well she did. She patiently cut each marshmallow and waited in front of oven with arms closed and tapping her toes while the cookies were baking. And when the time came to drizzle molten chocolate on top of the cookies, the sparkle in her eyes and that smile on her face could tell how important it was for her to “create that food” all by herself. They came out perfect, soft chocolate cookies with gooey marshmallows and rich chocolate worked well together. Later, all three of us sat down to enjoy those warm cookies with a warm heart!

Collage 1-2

The recipe I used for these cookies was from the MarthaStewart.com. I tweaked it a little to make it easier for the little one to manage (under my constant supervision and with a little help of course). I omitted the whole frosting part completely and instead just melted some dark chocolate with some heavy cream and the little one drizzled it on top of the cookies when they cooled down.

Ingredients:  (Adapted from marthastewart.com)
Makes a little over 2 dozen (I made 28)

1 3/4 cups all purpose flour (I used 3/4 cup whole wheat with 1 cup APF)
3/4 cup cocoa powder
1/2 teaspoon baking soda
1/2 teaspoon salt
1 stick (1/2 cup) butter (room temperature softened)
1 cup sugar
1 large egg
1/2 cup milk
1 teaspoon vanilla extract
12-15 marshmallows
1/2 cup semisweet/dark chocolate chips
2 tablespoon heavy cream

Method:

Preheat the oven at 375 deg. F (Mine burnt at 375 so baked the second batch at 350 for sharp 10 min.)
In a mixing bowl whisk together flour, cocoa powder, baking soda, and salt. Set aside.
In an electric mixer cream butter and sugar together until they turn light and fluffy. Add egg, milk and vanilla. Beat together until they are well combined. Add flour slowly on low setting until they are combined.
Line a baking sheet with parchment paper and then using a spoon or ice cream scoop drop batter on the baking sheet about a couple inches apart from each other or when you bake the butter melts, cookie spreads and they stick to the ones next to them.
Let them bake for 10 minutes. They bake up fast so keep an eye. Mine burnt on the bottom when I baked them for 12 minutes at 375 deg. F.
In the meantime cut marshmallows horizontally into halves.
Take the cookies out of the oven, place one marshmallow half (cut side down) over each cookie. Put them back in the oven and bake for 3-4 minutes. Transfer them to a cooling rack and let them cool before frosting.
While the cookies cool melt chocolate chip cookies with cream in a double boiler. Once the chocolate melts whisk it thoroughly mixing cream and chocolate together making a think paste.
Now you can either transfer this ganache into a piping bag or using a spoon drizzle it over the cookies.
Enjoy!

Indian Simmer Loves- Family Fresh Cooking

A dear friend came over to spend the night with us while her husband was away on a trip. Little A was so excited to see her maasi (aunt in hindi) entering the door that she practically jumped off her high chair with a mouth full of rajma chawal. She was a “husband’s close friend’s wife” 5 years back when we first met and I don’t even remember us acknowledging each other for the first time. But now she is one of the closer than the closest. That’s what happens when you spend time with the right person. One such friend that I am proud to know and love, thanks to my blog, is Marla from Family Fresh Cooking. We were virtual friends for quite sometime before we met for the first time face to face at a blogger conference. The moment I met her the first thing that came to my mind was- fire cracker, because that’s what she is! She is always bursting with energy, wearing a smile on her face she loves to listen to what you have to say and is one of the wittiest people I know. The only thing you need to do to love her is to meet her or in our case, read her blog. Family Fresh Cooking is all what Marla is- colorful, fun and informative. So let me present to you Marla Meredith and her beautiful blog because Indian Simmer loves Family Fresh Cooking.

Pear Muffins Marla Meridith-IMG_5612

Hi there! I am beyond thrilled to be guest posting here on Indian Simmer today! I’m Marla Meridith & I publish the blog Family Fresh Cooking. Some of us might all ready know each other and I hope others of you might become new friends. I love making new friends around the web! When I was contacted by Prerna about the wonderful opportunity to guest post on her beautiful blog I leapt at the chance. Today i’ll tell you a little bit about myself and share a few of our favorite recipes.

Pear Muffins Marla Meridith-IMG_5630

Tell us about yourself and what you would say is your food philosophy? I grew up in NY and spent my life there until my mid 20’s. NY is such a vibrant place. People take each and every meal very seriously. We always poke fun at my dad because he is always planning the next meal….I realize I have become the exact same way! We also spent a good part of my youth at my family’s organic dairy farm in Devon, England. It was in the UK and my mother’s passion for cooking that built the awareness and passion that I have for food today. I am all about using whole food ingredients in my cooking and participating in mindful eating behaviors.

Mindful to me means savoring each and every bite. Sitting down and really enjoying a meal. Spending time together with loved ones and friends over great food. Completely nourishing the mind, body and spirit with each and every bite. For myself and my family food should taste wonderful, but it should also make us feel our best. This is why I steer away from refined, processed ingredients. For us the benefits from eating whole food ingredients is the most mindful practice we can do. I select organic, sustainable ingredients when available.

Carrot Pear Sauce Parfait Recipe-collage1

Thankfully in our house we do not have food allergies, but I do however post many vegan and gluten free recipes. I like to mix things up in our kitchen and share my colorful recipes with all of you!

What led you to starting a food blog? At 26 I moved to Southern California and worked as a freelance textile and graphic designer for the likes of Walt Disney, Warner Bros. and many other fun kids based brands. In 2003 I had my daughter and then in 2006 my son. Being a mom is the most gratifying job I have ever had. My creative passions took a back seat for a while and then I realized how much I missed that part of my life.

Carrot Pear Sauce Parfait Recipe-IMG_5511

I launched FamilyFreshCooking.com in 2009 as a fun little space to share healthy, creative recipes for active families and for all people no matter what stage of their life they are in. When I started out, my photos were taken with my iPhone and I had really had no idea what Twitter, Facebook or blogging were really about. I never would have thought in my wildest dreams that my blog would become more than a full time job and the most amazing portal for creative expression.

These days food, travel and lifestyle photography has become a giant passion. Along with sharing my creative recipes with all of you.

Carrot Pear Muffins Marla Meridith Photography-IMG_5579 collage

What would you say “Family Fresh Cooking” is all about and please share a recipe that best describes your blog? Family Fresh Cooking is all about embracing all of the colors of life through delicious, healthy food and a vibrant active lifestyle. Lately my readers have been very engaged in Project Lunch Box. An online event I created to get people packing their own homemade meals for work, school and travel.

Pear Sauce Marla Meridith Photography-IMG_5526-2

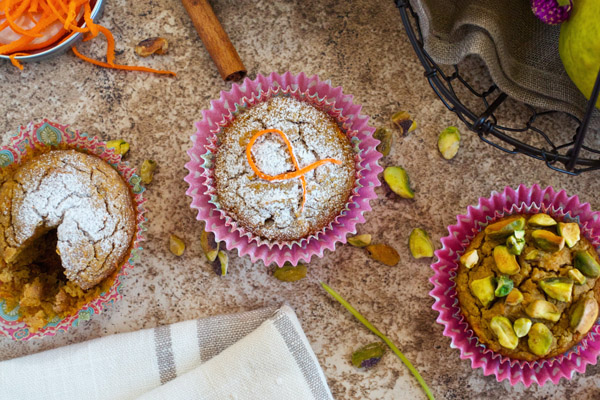
The recipe I am sharing today is for Chai Carrot Pear Muffins. These are based off a delightful Chai Carrot Pear Sauce I came up with. The sauce is wonderful on it’s own or in a yogurt parfait. It is also great to use in baking, as it is used in these muffins. This sauce can be integrated as you would applesauce in baked goods. It adds a nice sweetness, subtle flavor and allows you to reduce the amount of fat you use. These recipes keeps us fueled for a busy day at school, hiking with camera gear or skiing the slopes of Telluride. It is tasty for breakfast, brunch or snacks throughout the day. Also great tucked inside your lunchbox.

Pear Muffins Marla Meridith-IMG_5617

Here is the recipe for the Chai Pear Carrot Muffins and you can dash on over to my blog for the Chai Pear Carrot Sauce recipe:

Ingredients

Yield: 12 standard sized Muffins

  • 1 cup Gluten Free Oat Flour or Quinoa Flour
  • 1 cup blanched Almond Flour
  • 3/4 teaspoon Baking Soda
  • 3/4 teaspoon fine Sea Salt
  • 1/8 teaspoon ground Cardamom
  • 1/2 teaspoon ground Cinnamon
  • 1 cup Chai Pear Carrot Sauce
  • 1 cup light Unsweetened Coconut Milk
  • 2 tablespoons unrefined Coconut Oil, melted
  • 1 teaspoon Almond or Vanilla Extract
  • 3-4 droppers full of Vanilla Stevia Drops Adjust to taste
  • 1 large Carrot, peeled and finely shredded
Optional Toppings
  • Your favorite nuts
  • Raisins
  • unsweetened Coconut Flake
Method
  • Pre heat oven to 350 degrees F with the rack in the middle. Prepare standard sized muffin tins with liners or cooking spray. Whisk together dry ingredients in a bowl. Stir together wet ingredients in a separate bowl. Combine the wet and dry ingredients, stirring well. Fold in the shredded carrots last. Adjust spices and sweetness if desired.
  • Fill muffin cups evenly with batter. Top with pistachios or other nuts if desired. Bake for 26-30 minutes or until a toothpick comes out virtually crumb free.
  • Enjoy with whipped cream, thick yogurt and/or coconut flake.

Notes
  • You can also use homemade or store bought pear or applesauce in this recipe. The spices add the chai flavor.

Let’s stay in touch! Visit me at Family Fresh Cooking and I am all over the web: on Pinterest, Twitter, Facebook, StumbleUpon & Instagram too!

Palak Kachori and What Took Me So Long

Spinach Kachori 2

We  spent the New Year’s eve with some of our closest friends. We did nothing but chatted, ate some simple home cooked meal, shared stories while cardamom tea was simmering on the stovetop, laughed with each other and quietly ate some sitafal ice-cream while baby monitor in the background could tell that the kids are asleep. Next morning over breakfast we were discussing our new year’s resolution. Answering the question I realized how important this blog has become to me and how important all my readers have become to me. In the past few months a lot of things happened (and still happening) in my personal and “professional” life as a food writer. Those things have been keeping me so busy that the time I spend here on my blog and in connecting with you has suffered. Irrespective of that, you have been very patient and supportive of me, but you might have to bear with me for a little more. Why? Well, let me tell you the story then!

IMG_2087

So one fine morning the publishers came knocking on the door. I opened the door and asked how I can help them. They asked, “can you write a book for us”? I looked behind, left and right and checked if they were actually talking to me. After a lot of affirmation when I finally believed that it was actually a real proposal I was ecstatic. I might have screamed a little harder, but who cares! The next thing I know I am testing recipes and writing a proposal. Proposal for a BOOK that I am going to WRITE! I can’t believe that I just wrote those three words together. Its been sometime since I said yes and I still cannot believe that its happening. You have no idea how tough it was to keep all of this from you. But now that its out of my chest I can sleep soundly today. So my friends, that is what kept me busy and away from Indian Simmer all this time and the move (yes, I moved again!) and a vacation and a mad family! Well, story behind that might ask for another post(s).

IMG_2023

But before anything else, today I just want to take a moment and say Thank You to each and everyone of you who have always supported me. Thanks for taking some valuable minutes of your day to come and read my blog. Thanks for being appreciative and for your constructive criticism of whatever I put forward on Indian Simmer. Two years ago I would not have thought in my wildest dreams that one day I will be a cookbook author and it has all happened just because of You so thanks so much for being there for me. And I really hope that you will be by my side all along this ride!

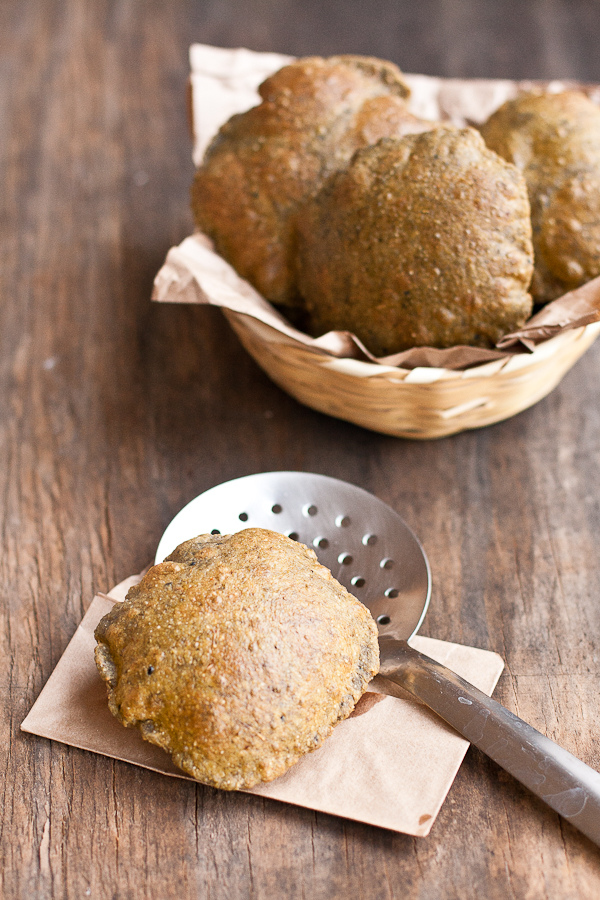
Now lets put the mushy talk aside and talk food, shall we? A lovely blogger friend reached out to me sometime back and asked if I would be able to contribute something to her beautiful blog. After much long email exchanges, we finally decided to dig back again to my childhood and bring back something with which will tag along a lot of memories. So I chose Palak (Spinach) ki Kachori, a simple crispy deep fried bread but packed with love and healthy goodness.

Spinach Kachori

My mom used to make them when we were little and me and my brother ate them so much that I promise we still have some spinach stuck in our teeth. They are easy to make and just ask for a few basic ingredients like water, flour, salt.. Oh, and spinach. You can either make them plain or stuff something inside and fry them. Trust me however hard you try you will not be able to mess them up! So please hop over to Sandhya’s Kitchen for the recipe.