(Not so) Wordless Wednesday

I know it’s Wordless Wednesday and I’m supposed to stay quiet today and let the photo talk. But I had to share a little something with you.

12262009-4

I know I have said this before but I am truly overwhelmed by the great feedback and outpouring of emails about your love for what I am doing here. I also appreciate all the suggestions I have been getting on how I can make Indian Simmer and your experience here even better. So first, THANK YOU for everything!

I get a lot of email about tips on photography and that’s the reason why I started the series Food Photography – My Process. Your response to it was fabulous too. While working on the second post of the series, I thought about all the great questions I get on photographs I share here. I try my best to respond to each one of them but how about I do something similar here – share some technique specifics or my thoughts behind a photo of your choice so that everyone gets to read it?

11/365

So here’s the idea, if there is a photo you want to know more about, leave a comment with the link of that photo or send me an email. Depending on the questions/feedback I get, I’ll collate them and share with everyone in a single post. You can still send me direct emails with questions and I will continue to respond like before. Looking forward to hearing from you! Enjoy your Wednesday and the rest of the week!

How to make Paneer (Indian Cottage Cheese)

Homemade Paneer

Next month it will be one year since Indian Simmer came into existence and in this short span of time, I am so blessed to have touched so many people and their lives in some way. It sometimes surprises me when I think of how appreciative everyone has been of what I’m doing here and I get overwhelmed when I read your emails and messages. Sometimes with a kind word of appreciation, sometimes with a critique and sometimes with a request. Recently one such request came from @everynothing (her real name is Tricia, just so you know!) and she requested that I share my recipe for Matar Paneer. And being a lazy bum that I am, I mulled over it for quite a while. Finally, I picked it up yesterday. As soon as I started working on it, I knew that I have to make paneer at home – because I know what store bought tastes like! I had attempted this a few times before and every time it had turned out “not so pretty”. My search for the paneer holy grail took me to Radhika’s blog where she had shared her own method. I tried it and that was the first time my paneer tasted like “paneer”.

Making Paneer

For those who are not familiar with paneer, it is a type of cheese very common in Indian cuisine and is a good source of protein. But unlike most of the cheeses it doesn’t need rennet for coagulation. Instead, a form of food acid is added to hot milk which helps in the curdling process. The common food acids used are lemon, vinegar or yogurt. The curdled milk is then collected in a cheese cloth, hanged for sometime for all the excess water to drip out and then also pressed under weight for a few hours to squeeze the remaining water out (this also gives a firm shape to paneer). This might sound like a lengthy process, but it is so worth it! Now, making paneer at home is not exactly rocket science but there are a few subtle things/tips that I’ve realized can make or break the deal. So let me list them real quick before sharing the actual recipe.

Deal breaker tips in the process of making paneer at home:

  1. Try stirring the milk with a plastic spatula while heating it. Stirring will prevent the milk from sticking to the bottom. But if some milk still sticks to the bottom and burns, a plastic spatula will not scratch the bottom and spoil the whole milk.
  2. Stop the cooking process as soon as the milk curdles. I add ice to the milk. This way your paneer won’t come out rubbery.
  3. Don’t hang your paneer for too long. Take it off as soon as water stops dripping.
  4. The fat % in the milk doesn’t really change the way it tastes, the type of acid used DOES. But the taste variance is so minute that I can’t really tell a difference.

Homemade Paneer

Ingredients:

1/2 a gallon of milk (equals 1.8 liters)
3 1/2 tbsp lemon juice

You will also need:
3-4 cups of ice
Cheese cloth

Method:

Boil milk in a thick bottom pan. Stir it from time to time to keep it from sticking at the bottom.
Once the milk is boiling, turn off the heat and add lemon juice while stirring it continuously.
It will take just a few seconds for the milk to curdle and that’s exactly the time you have to stop the cooking process, so add ice to the pot.
Let it sit for about a minute and then strain it through strainer lined with cheese cloth. Once again wash the collected cheese with cold tap water (this helps wash that extra lemony flavor).
Take all the sides of the cheese cloth and tie them together. Hang it somewhere to let the extra liquid drip off (place an empty bowl below it for the liquid to collect).
Once the liquid (or whey) stops dripping, take out the cheese and make a big ball of it. Wrap again with the cheese cloth. To press the cheese and give it a shape, place it over a chopping board and put a heavy pan or pot over it. (I usually use my wrought iron pan and to add more weight I put a few cans of beans on top of it).
Let it sit for an hour or so.
In an hour you’ll have your homemade paneer which you can use to make all kinds of things. I made Matar Paneer with mine!

Clementine Tiramisu

Clementines

Are you one of those who always have a bunch of these in the fridge lately? And while you love munching on them, you would love to see have them in different form? If so, you are at the right place. It’s all about Clementines out here too and why not? This is the best time to get them in their freshest form and they taste so good! Lately they have been our breakfast, lunch and dinner in one form or the other.

IMG_0150

And here is something I’m making (almost) every day these days! Clementine Tiramisu . Yes a tiramisu soaked in clementine juice, layered with a creamy cheese and egg mixture with some dried cranberries sandwiched in between. And what the heck, I threw in some cocoa to top it off as well.

ClementineTiramisu

And I’m not kidding when I say that we are eating this every day. Probably because it is so light that it never really fills you up. So we are not getting bored and trust me people, we get bored with things PRETTY fast!

IMG_0136

Ok, so first for the people who don’t know exactly what a Tiramisu is, let me tell you a little about it. A traditional tiramisu is a pudding-like dessert that usually consists of sponge cake or ladyfingers dipped in a liqueur, then layered with grated chocolate and rich custard. Now that’s all I knew about a traditional tiramisu. It comes from Italy and since I didn’t know about the origin or history of this delicious dessert I did what everyone does when they don’t have an answer. I googled it! Found some interesting things about it, some of them being the fact that the tiramisu was originally made as a loose custard, it is only in recent years that mascarpone cheese has made its way into it. There’s a debate about who came up with that recipe n blah … You don’t wanna know that! All you wanna know is how you can eat it its made. Right?

9/365

The recipe is so simple! Just grab some eggs, get the yolks, save the whites for breakfast. Add some sugar, then some cheese, then whatever flavor you want. I wanted my tiramisu to have a clementine flavor so I added clementine juice to the custard and to make it a little tangy, I added a hint of lemon juice. Now start making layers of lady fingers (or sponge cake, whatever you have) and the custard. Following is the recipe for individual tiramisu which serves six people, but you can totally make a single cake with it as you can see in the photographs.

Ingredients:

24-30 ladyfingers
16 oz mascarpone cheese
2 cup freshly squeezed clementine juice (looks like a lot, but its not!)
1/2 cup dried cranberries (soaked in juice for a few hours)
6 large egg yolks (at room temperature)
1/3 cup sugar
1 tbsp lemon juice
2 tsp vanilla extract
1/8 cup cocoa powder (for dusting on the top) optional

ClementineTiramisu2

Method:

Beat egg yolks and sugar on a high speed until they become thick and light in color.
Just whisk the cheese a little to break it so that it doesn’t form lumps. Then turn the mixer to low and add mascarpone cheese, half of the clementine juice (one cup), lemon juice and vanilla extract.
Your custard is ready.
Now you can either use a 9×12 in. dish to layer your tiramisu or like me, get a few glasses or tall bowls.
Dip ladyfingers into the rest of the clementine juice and place them on the dish making first layer.
Sprinkle some cranberries and then pour half the custard over it. Spread it evenly to cover the whole surface.
Now repeat the same process starting with ladyfingers and keep going as far as you want!
Once you are done layering, smooth the top, cover it with a plastic wrap and pop it inside the refrigerator for at least 4-6 hours. This would help tiramisu soak all the moisture.
Before serving, garnish it with the fruit that you used or you can sprinkle a layer of cocoa powder on the top.

Have a Fabulous Friday everyone!

16

I know some photographs should have come here on Wednesday but it has been a little tough for me to pick up the camera, get out of the house, and/or both! Snow is just one of the reasons. Its freezing out here and to get out of my warm and comforting blanket has been bit of an issue.

10/365

So since I was lazy enough to come to you with a Wordless Wednesday I thought of wishing all you fabulous people a Fabulous Friday! Wish you a warm and relaxed Friday and rest of the weekend!

12/365

Homemade Naan with Malai Kofta

Another year is gone and we are all set with a new beginning, new dreams and new resolutions! The last few days of every year are a little bittersweet for me. The days are full of celebrations and color and smiles but in the back of your mind you always think that this is going to end very soon and life will be again back to the grind. This time was no different! All the celebrations are over, we are all back to business although still a little hung over!

IMG_9954

But for us, although the party is over, it is not at all boring around here! A lot is going on, a lot of plans in the making and a lot of changes waiting to happen of which I’ll tell you soon. But there’s one thing that never changes here whatever be the situation and that is cooking and eating a lot of yummy food! I realized that it has been a while since I posted some good traditional Indian food here so I thought of starting the year’s first recipe with it!Asked A what he would like to eat if I plan on making something nice and Indian and without wasting a second his answer was Naan and Malai Kofta. So Naan and Malai Kofta it is!

Naan&Kofta

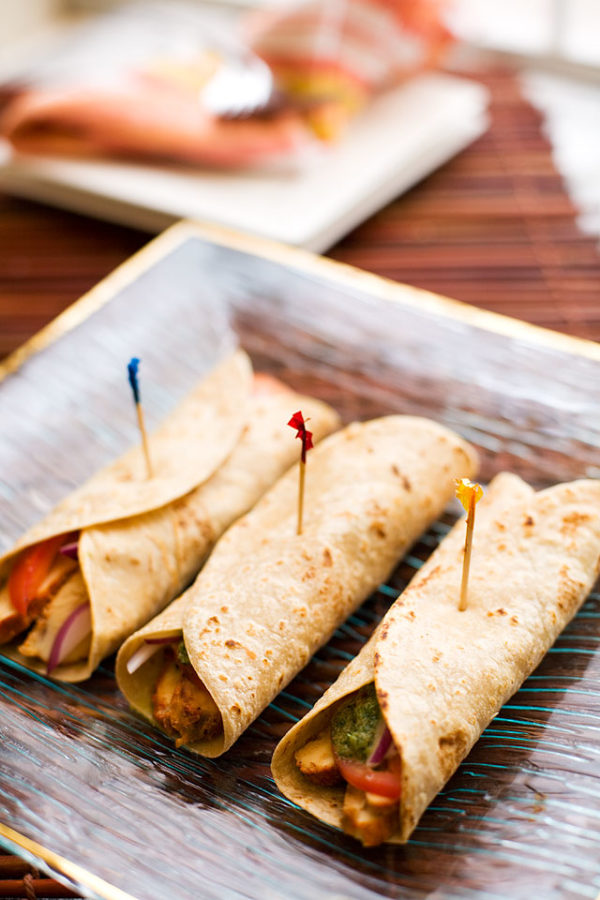
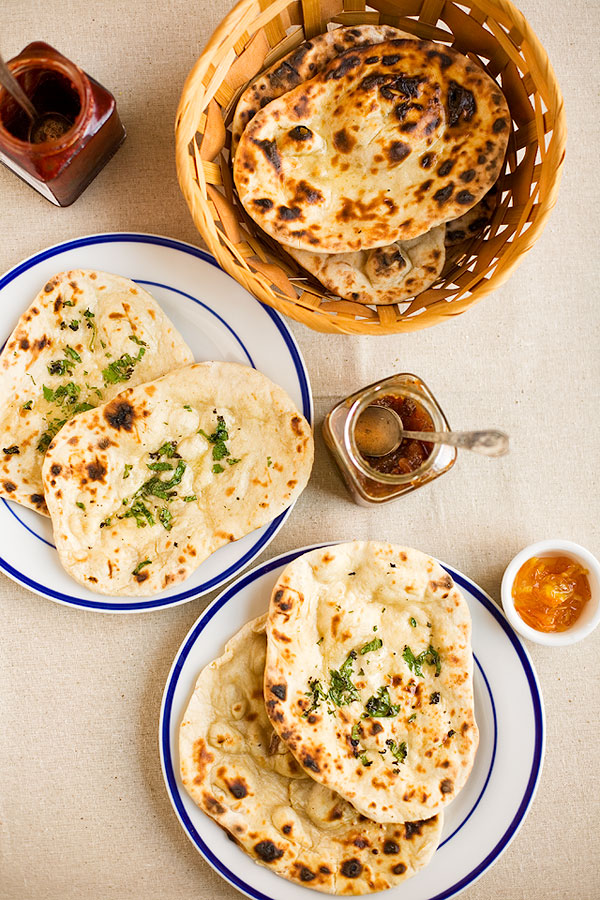
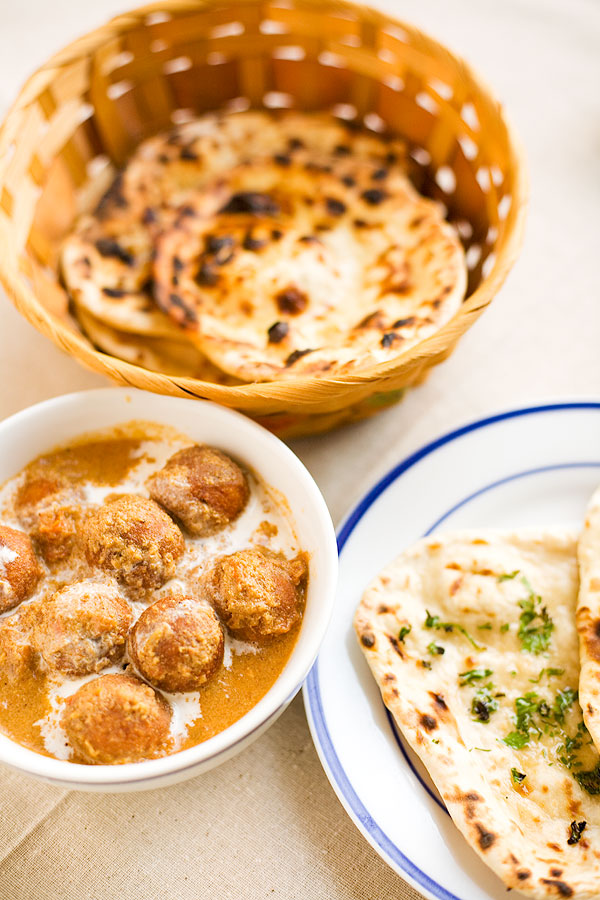
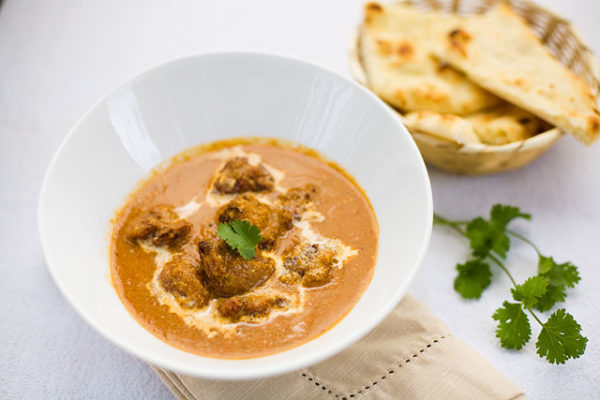
If you know Indian food then you know what Naan is. So I don’t even want to try and tell you how incredibly delicious, light and easy to make this Indian bread is! I’ll go there though but first let me quickly tell you what Malai Kofta is, if you are already not familiar with the dish. You can just call Malai Kofta an Indian vegetarian form of meatballs where potato dumplings (kofta) are fried and later cooked with a rich and creamy tomato sauce. You can definitely make it low fat without compromising on taste and that’s what I have tried to do here with this recipe. So let’s begin with how to make fresh restaurant style Naan bread (without yeast) at home and then get to the recipe for Malai Kofta.

IMG_9963

How to make Naan bread at home: 

Serves 4
Ingredients:
2 cups all purpose flour or wheat flour
1/2 cup of warm milk
1/2 cup of yogurt
1/4 tsp salt
3/4 tsp baking powder
1/2 tsp baking soda
1/2 tbsp sugar
1/2 tbsp oil
These are the ingredients for dough and then you can flavor your naan with all kinds of herbs. I made cumin naan, garlic naan, butter naan and some topped with cilantro greens. So this is up to you.

Method:

IMG_9915

Mix all the dry ingredients together and make a well of flour.
Now mix milk and yogurt together and pour half of it into the well and slowly combine it together.
I don’t think there’s an exact amount of liquid that should be added to the exact amount of flour to make a perfect dough. So what I do is add liquid slowly and combine it all together slowly until a soft dough is made. The dough should be soft enough for you to be able to dig your finger into it without applying any pressure. If dough sticks to hand too much then use little bit of oil on hand and then punch into the dough.
Cover with damp cloth and let it sit in a warm place for at least 2 hours.

Making-Naan

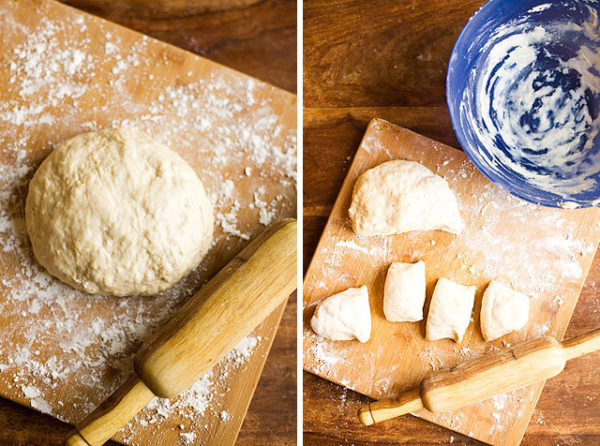
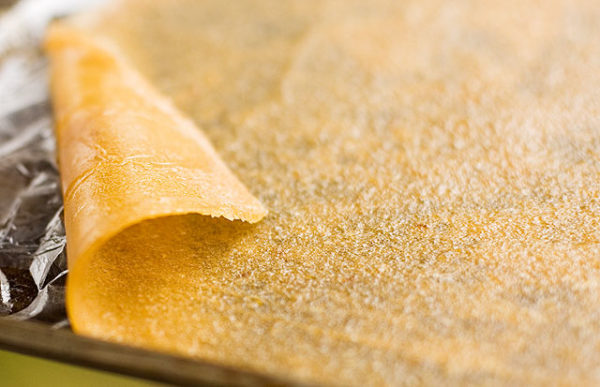
After a few hours, dust your working board, take out the dough and knead it for about 2-3 minutes. Divide the dough into smaller balls (in this case you should get about 8 balls to make naans).
Dust the board again and flatten the balls to make bread which is a little thick and elongated.
Now sprinkle one side of the bread with whichever flavor you want. I made cumin, minced garlic, chopped cilantro and some simple butter naans.
Brush the other side with water.
Heat a thick bottom skillet or a wok or any heavy bottom pan with a lid. Once its nicely hot place the naan wet side down which would stick and cover it with a lid.
Let it cook for about 30 secs or until you see bubbles on it.Now cook the other side of the naan over direct flame of the burner with the help of tongs. When you see some charred brown spots then you know that the naan is done.
Smother some good amount of butter on your naans and when you taste them you’ll know what a peaceful life means!

Recipe for Malai Kofta: 
As I said before, the traditional Malai Kofta is rich, creamy and nicely loaded with fat. But I tried to make a “not so fatty” version of it. I used grated squash dumplings instead of potato dumplings but you can use all kind of vegetables. By the way, the ingredients I’m going to be listing below might scare you but trust me – this dish is NOT complicated or difficult at all. And if you have to drive the car to go out and buy some ingredients, do it! Its so worth the effort!

IMG_2260

Serves 6
Ingredients:
For Koftas:
1 medium size bottle gourd or squash (grated and water drained)
2 tsp fennel seeds
2 tsp coriander seeds
1 tsp red pepper flakes
Corn flour to bind everything together to be turned into smaller balls later
Salt to taste
Oil for deep frying

For Gravy:

1 big bay leaf
2 black cardamom
3-4 cloves
1 tsp cinnamon powder
3-4 count peppercorn
1 1/2 tsp cumin seeds
Or instead of the 6 ingredients above, you can use a tablespoon of garam masala.
1 cup onion paste
2 tbsp garlic paste
1 tbsp ginger paste
2 green chili
1 cup tomato puree
2 1/2 tsp coriander powder
1 tsp turmeric
1/4 cup low fat cottage cheese
6-8 cashews
3 tbsp milk
1/4 cup olive oil
Salt to taste

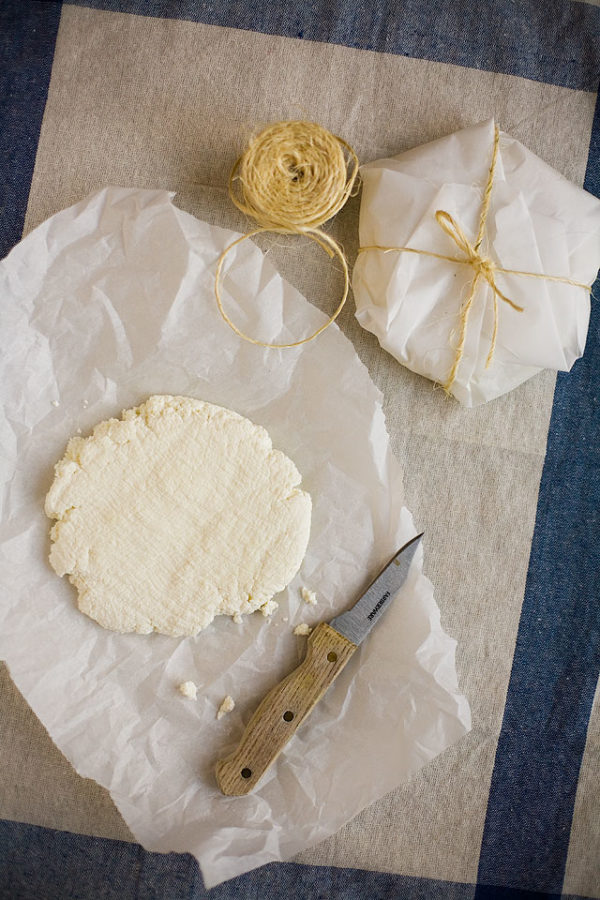
Method: For Kofta (vegetable dumplings)

Spices

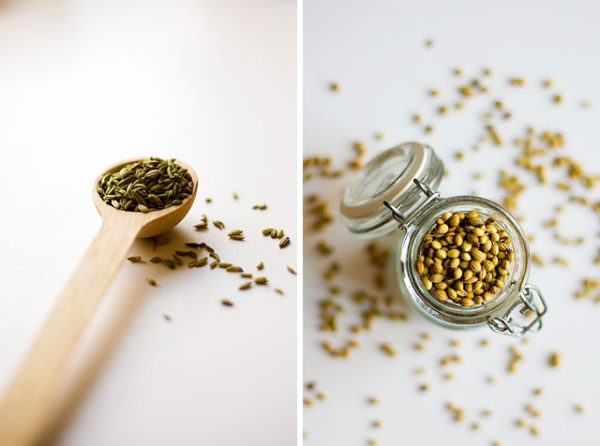
The two ingredients that you see above are the hidden jewels of your dumplings! Coarsely crush fennel seeds and coriander seeds and mix them with the rest of the ingredients. Add corn flour enough for everything to bind together well.
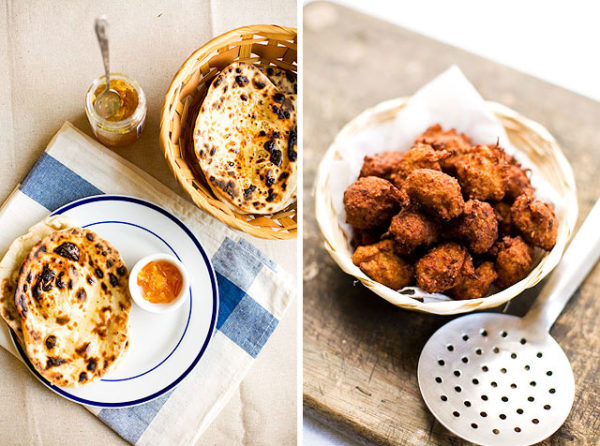
Make lime sized balls and deep fry them in oil at a temperature of somewhere around 350 deg. F.
Fry them until the dumplings turn nice and brown. Pull them out and drain all the extra oil on a paper towel.
These vegetable dumplings are a great way to give your little ones some vegetables. Works like a charm for me every time!

For the gravy:

Grind the bay leaves, cardamom, cloves, peppercorn, cumin and cinnamon in a coffee grinder to make a powder.
Soak cashews in milk for about an hour and 45 minutes and then make a paste out of them.
Heat oil in a pan and thrown in the onion, ginger and garlic paste.
Cook it well on medium heat for about 15 minutes or until the paste turns brown in color.
Now add salt and turmeric. The sign that your onion is well is that as soon as you add salt, oil will start separating.
Add coriander powder and tomato puree. Cook it for another 10 minutes or until all the water from the tomato is gone.
Now you can add your cottage cheese. This step might seem a little unusual to those who are used to adding heavy cream to their malai kofta or mughlai gravy but trust me on this one! And I’m talking about the boxed low fat cottage cheese which has a little liquid in it with cheese crumbles and not the paneer you get in Indian stores.
Keep stirring until all the crumbles of cheese dissolve and then add cashew paste.
Mix well and at last you have to add your spices (garam masala) powder. Mix again.
Add about 2 1/2 cups of water and let it simmer for a few minutes. I like my gravy a little thick, if you want it thinner add more water.
Throw in the kofta balls and give it a quick boil. (In case of potato koftas I cook the gravy seperately and then pour it over the koftas before serving or else they tend to get soggy if left in gravy for a while.)
Enjoy your koftas with homemade naans or rice!
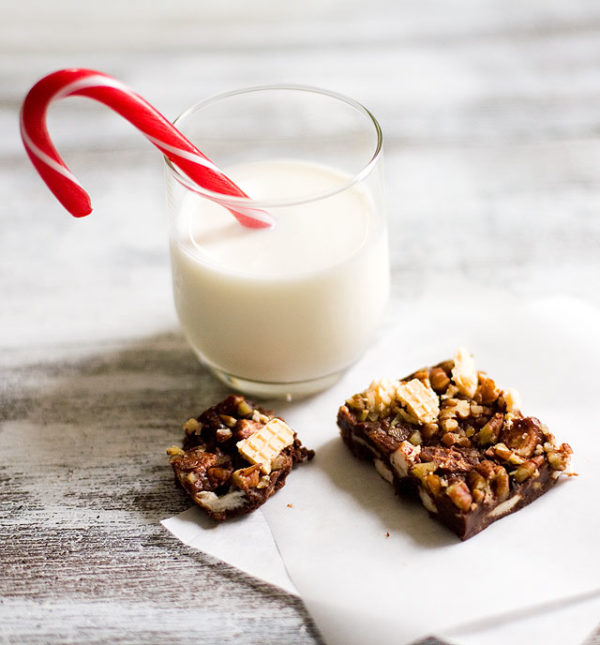
Wordless Wednesday – Simple Things!

Simple Things!
Canon 5D, Lens: Canon EF 50mm f/1.4 USM, 1/320 secs at f/2.0, ISO 200

What You Liked Most on Indian Simmer!

38

I was not very sure of what I was getting into when I started this blog. I already had a lot on my plate with a newborn at home and a busy life but I just wanted to do this. I began with the idea of documenting all the recipes that my mom and my mother-in-law gave me so that may be one day if my daughter asks for one then she can find it. But I really was not expecting that this would lead to something much much more than that. The name Indian Simmer, which I and A came up with one evening sipping coffee, has become my identity today. Today a lot of people know me more as Indian Simmer than Prerna Singh and I think that’s my biggest achievement. This blog, along with me, has come a long way in the past ten months and it all happened because of YOU! You who always appreciate and motivate me to do something better. So I just want to thank you for being here, for all your wonderful messages and for clicking on that link every time you saw an update from Indian Simmer.

Reading some of my favorite blogs, I got an idea that I loved and thought was cool, so I wanted to do something similar here at Indian Simmer too. Since this post is mostly about you and the love you have shown to this blog, I am listing the recipes that you liked the most during the year. Although I can barely call this list as the “Most Liked Recipes of 2010” because this blog itself came into existence after the year 2010 began, let me just call it the “Top 10 Recipes You Liked on Indian Simmer EVER!”

So here’s the countdown:

10: Tomato Tadka dal and Green Tomato Chutney
A simple lentil preparation made in Indian homes almost every day, kicked up a notch with tangy tomato flavor and some spicy tomato chutney.

IMG_1788


9: How to make a fruit leather at home?
An easy way to trick kids into having their fruit and vegetables.

IMG_2966

8: Pasta in creamy tomato sauce
One of my go-to recipes. A creamy tomato sauce with pumpkin seeds adding an extra oomph to the boring pasta and tomato sauce.

IMG_1123


7: Kati Roll
If you like Indian food but don’t have time to make anything elaborate, then just wrap it all up in a roll and eat it!

IMG_1904

6: Chocolate Cake
Can you call a chocolate cake staple? Because this one right here is at my house! A moist layered chocolate cake made with coffee.

IMG_0281


5: Lemon Mousse
A light tangy and creamy mousse which will rock your world as soon as you take a bite!

IMG_1292


4: Aloo Gobhi
Oh yeah, you know Aloo Gobhi if you know Indian food! This is another simple vegetarian preparation of potatoes and cauliflower cooked in ground spices.

IMG_2172


3: A simple hindu pooja meal
A few recipes prepared with little or no spices mostly for hindu religious meals.

IMG_2715

2: Palak Paneer
You like it, don’t you? Healthy spinach and cottage cheese cooked together in a creamy sauce making a perfect curry.

IMG_0615


1: Molten Chocolate Liquor Cake
It has chocolate, it has butter and it has liquor in it. What else do you need to make a top visited recipe?

IMG_2351

Happy New Year everyone!

Christmas with No Bake Frozen S’mores

IMG_9807

Wow, Christmas is gone and I am sort of counting down the days for next Christmas already! Don’t you think that the days you look forward to the most are also the days that pass you by in a flash? I guess it’s the waiting and the prepping part that makes everything more exciting than the actual day itself.

IMG_9850

I’m sure you all had a great Christmas! For some of you it must be a great opportunity to spend time with family and friends, for some it might have been a fun trip to someplace nice and some of you might even have spent it very privately with your close ones like I did. But regardless of how you spent it, I can guarantee that food was a big part of the occasion for you. Because as for all of us, food is more that just something we eat – a reason to come together, a point of conversation or simply an outlet we all need!

IMG_9607

My Christmas, as I said, was very simple and quiet with just my family in the house having fun with playstation, cooking/eating some GOOD food and watching the little one look out the window at falling snow with a glint in her eyes! I started with a long list of dishes I wanted to cook this Christmas. The whole list of recipes that I shared with you a few days back was on my list to tell you the truth, but as you can guess that I got overly ambitious which later turned into super panic and so I ended up choosing some of the simplest ones and these No Bake Frozen S’mores proved to be a huge hit! It’s another yummy, hassle free and cool recipe that I recently found.

Marshmallows

Speaking of cool, I wanted to tell you about this cool iPhone app that my friend Rebecca from Chow and Chatter recently launched. This app allows you to quickly and easily search her best recipes by cuisine. If you are into cooking, which I’m kinda guessing you are, then you might want to check this out!

ChocolateS'mores

Ok, so now about these No Bake frozen S’mores. I found this recipe at Tokyo Terrace who also got it from the Foodista Cookbook. It’s a very simple recipe with simple ingredients like chocolate and marshmallows which to me screams holidays! That was the reason I had to make it (other than the reason that I was lazy enough to make anything elaborate and instead sat on the couch and played games!)

Ingredients: Adapted from Foodista

1/2 cup heavy whipping cream
1 1/4 cups chocolate chips
2 cups miniature marshmallows
12 pieces sugar wafers
2 cups vanilla yogurt (I just thought full fat works better than no fat, just to hold everything better)
1/2 cup chopped walnuts
a few more sugar wafers for garnish

Method:

Heat cream in a pan until the sides start to bubble.
Remove from heat and stir in the chocolate chips and mix it all well together until all the chocolate melts.
Let it sit and cool for a few minutes and then add the marshmallows, yogurt and wafers which are broken into small bite sizes.
Line a flat dish (baking dish or any other dish with a slightly high edges) with a  foil.
Pour in the mixture into the dish and spread evenly.
Garnish with walnuts and sugar wafers and pop it into the freezer.
Let it chill for a few hours and then cut them into bars and enjoy!

IMG_9828

Hope each and every one of you had a fabulous time with family and friends and hope this Christmas fulfilled all your wishes and brought with it some new hopes and dreams!