We get several inquiries on the topics all related to food blogging. Food blogging is not just a hobby for people anymore, it’s slowly becoming serious business and as a member of the blogging community we couldn’t be prouder of the fact. So we thought, in addition to responding to your questions via email etc. we should start a series on Indian Simmer where we discuss in detail each one of those aspects, one topic at a time. To help us out, we will invite people from within the community who are also experts in their own field.
So to start the series we decided to pick one of the most beloved aspects of food blogging- Food Photography! The first topic we are discussing is Setting up for the Perfect Focus. And who better to discuss that than a person who is also a self taught master in food Photography and also a long time friend Meeta K Wolffe!

Thanks Indian Simmer for sharing your wonderful space with me. Thrilled to be here. And hello to my fellow foodies and food photographers!
Focus is such a fundamental aspect of good photo taking. A photo out of focus or one that has no primary point of center or interest will be extremely frustrating to the viewer.
One of the first things one should practice is getting the food you want to capture into focus – sharply.
There’s a lot you can do with focus to enhance a photo even further. Not only during the composition of the set-up but also learning how to highlight just parts of the food and blurring out the rest will allow you more creativity with your images.
Focus is a very important and fundamental element in photography, yet with food photography it can be very tricky to know exactly where to focus with your lens. Before you start composing, determine which one element or elements will be your main point of interest. The scene you set needs to help a viewer understand your message and not have the viewpoint all scrambled up with no primary focal point.
This point becomes even more important to comprehend when you want to use a shallow depth of field, where much of the image might be blurred and the spot that is in focus will stand out even more.
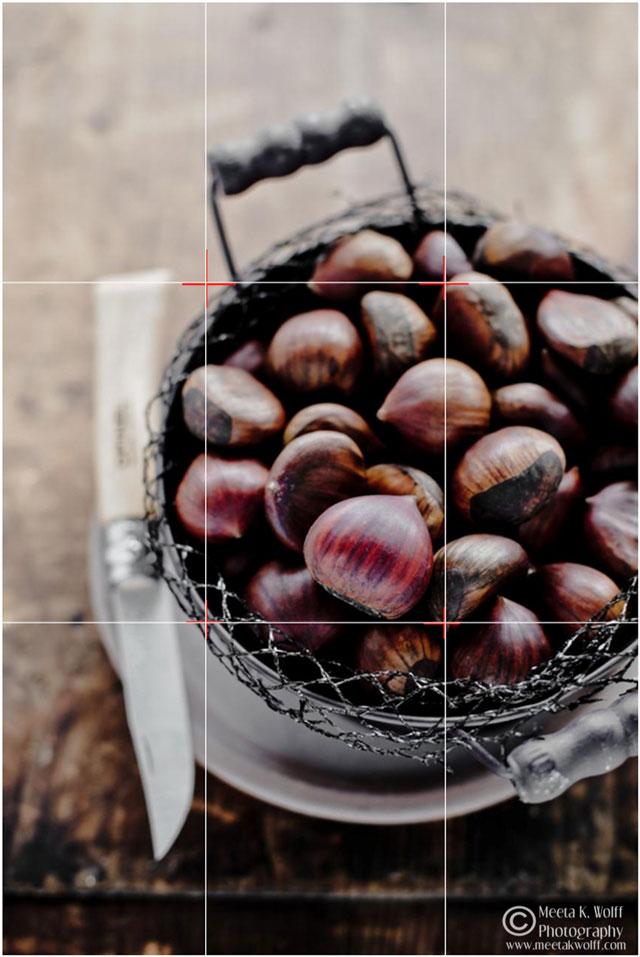
In the image of the chestnuts I found a few gorgeous slightly violet tinted chestnuts in the bag and decided to select one to be my main point of focus. I used a shallow depth of field to really highlight the single chestnut by pin pointing the focus on it and putting the other chestnuts below slightly out of focus. The viewer sees the other items but does not need to have each chestnut in clear focus to get the message in this image.
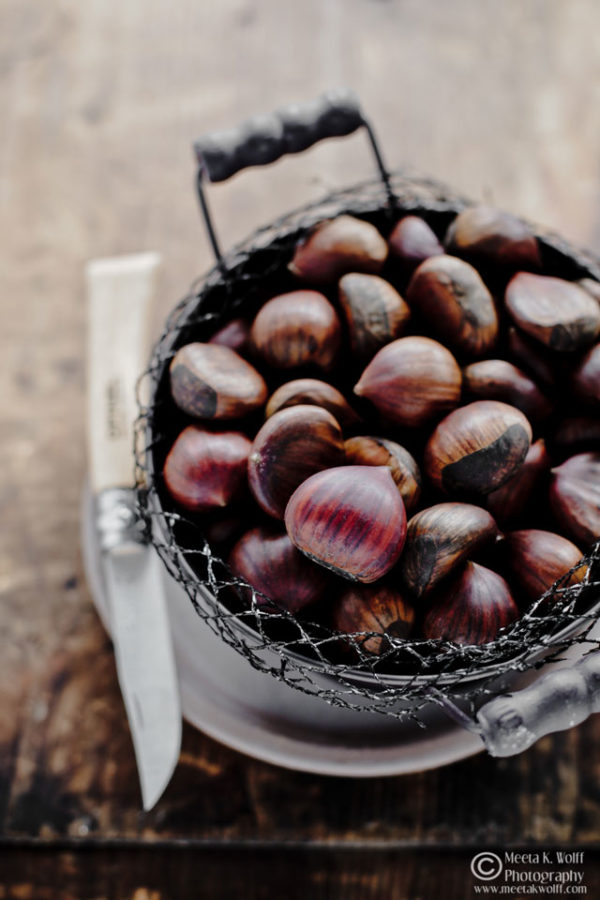 It can be a challenge to decide exactly where to put the focus point in your image. Think about your story for each image and what you want to portray. Often this will help you pinpoint where the focus should be in your image. For example, if you want to portray an entire dessert buffet, your focal point or center of interest will be pretty much in the middle of the image. If however, you are showcasing a specific dessert as part of the buffet you will focus directly on your showcase dessert directly.
A rough guideline to help you find not only your focus but also aid with placement is the rule of the thirds.
Rule of the thirds principle asks you to mentally divide your image into thirds (both horizontally and vertically) so that you have 9 parts.
With this grid in mind the ‘rule of thirds’ now identifies four important parts of the image that you may consider placing points of interest in as you frame your image.
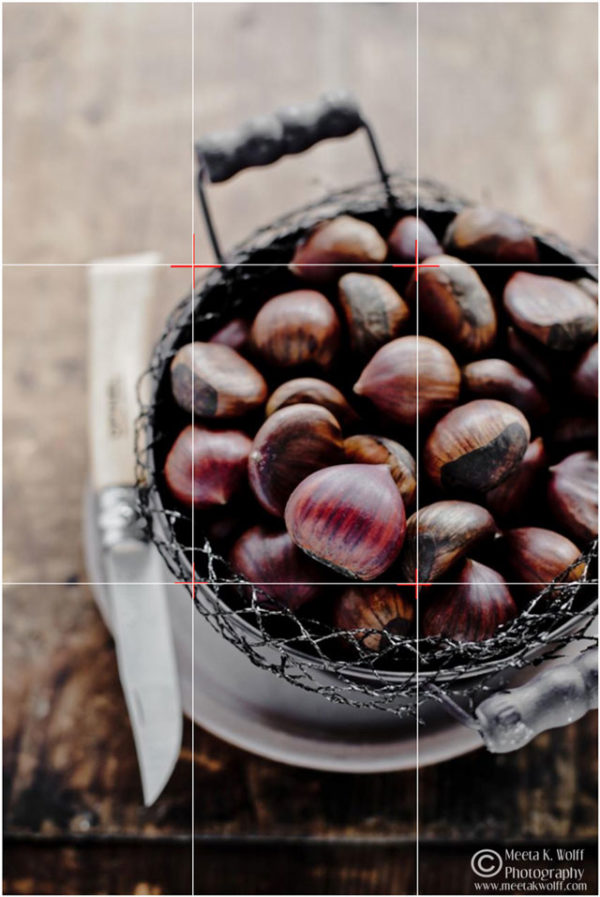 It also gives you four ‘sections’ (marked in red in the picture) that are also useful positions for elements in your photo.
The purpose of the rule is to help you achieve lines and placements of objects that are naturally pleasing to the human eye by giving the photo a more balanced appeal. Some subjects will be trickier than others, so my advice is if you seem to get stuck, try to move things around and find a few different placements. Have a look at the images and see which of the photos has the best focus point.
Do not get bogged down with the too many rules, free your mind and allow your intuition to find the best balance. The rule of the thirds offers a great start to practice or to find your way back if you get stuck, but free yourself from strict rules and allow yourself to have fun because only then will you be able to see other interesting angles and placements.
Basically, if your eyes are drawn to a certain point on the image you are viewing – that’s most probably where the focus should be.
Another tip is to focus on an item in the photo that is close to you, as opposed to far away or in the middle of the dish. However, if you have a set-up that has many elements in it and you want to describe the entire scene with one single shot it is a good idea to select a focus point toward the middle so that more than one specific item is included.
In the image of the Advocaat Cream the flat surface of the white creams was proving to be rather complex to find the perfect point of focus. I placed the cinnamon stars on top and used this as my specific point of focus. In the same way you can use garnishes or a particular ingredient to point your focus to. Furthermore, as there are many items in my frame I chose to focus on the one bowl in the front as the eyes naturally fall on this first.
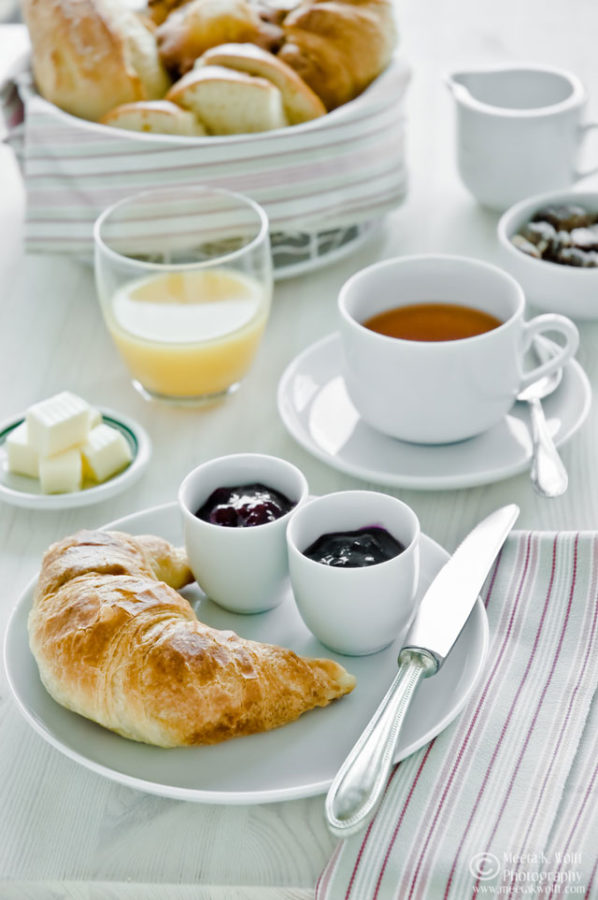
 In the breakfast image, once again there are many items in my shot and while I wanted the viewer to take in the entire scene, I pinpointed my point of focus on the croissant and selected a medium depth of field.
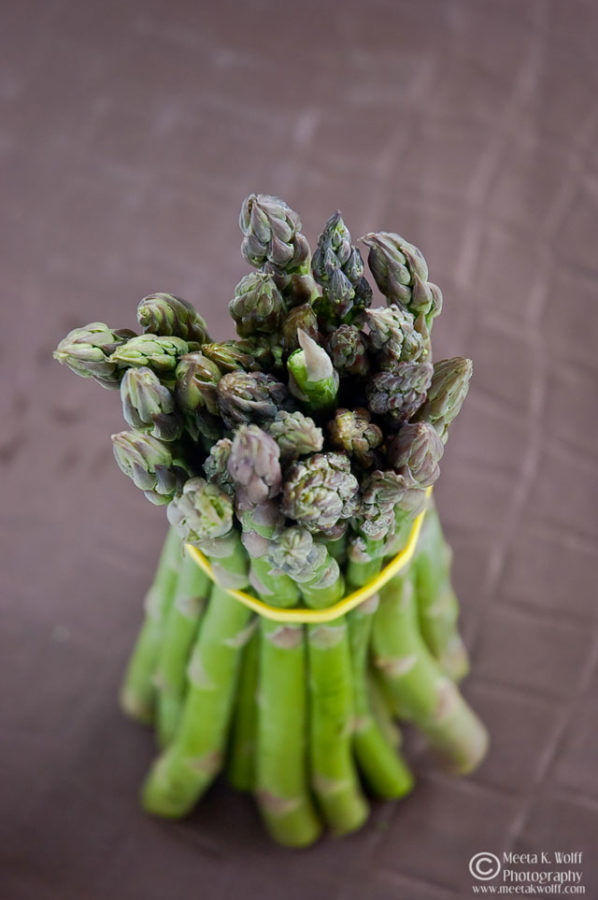
 In the asparagus image I was looking to shoot the lovely fresh vegetable which was my main ingredient for a dish. While I wanted to have the entire bunch in my shot I planned to highlight the tips. Being the most valuable part of the vegetable, it was easy to decide where the focus point would be. I focused on the asparagus tips towards the back of the bunch and blurred the stems as the color and volume take up a larger part of the image. However, while the viewer registers the stems and the color, the eyes are directed instantly towards the tips that are in focus.
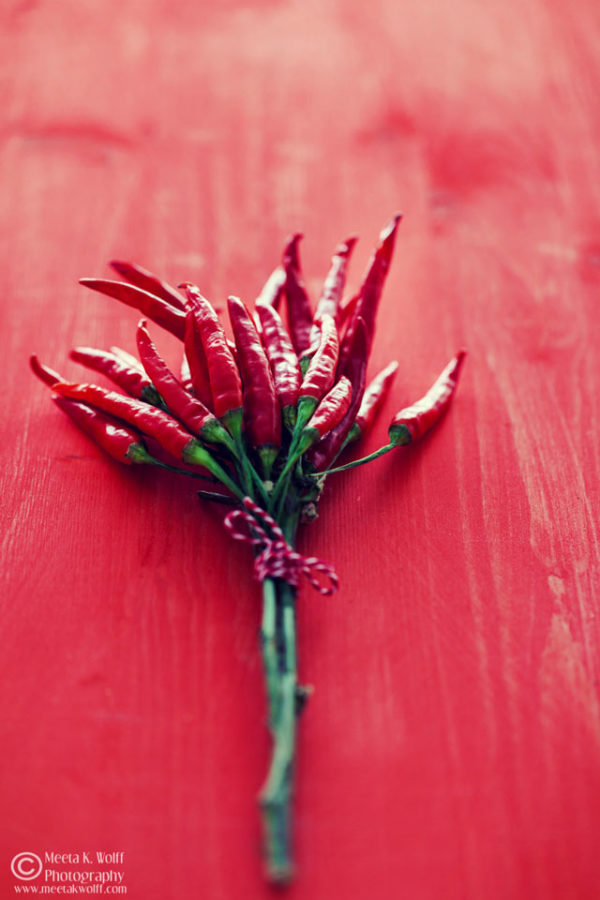
 Finally in the image with the chilli bunch, my focus was on the two chillies in the front but I wanted the viewer to get the picture of the entire bunch. By placing the bunch so that my two chillies are more or less focussed in the middle I selected a shallow depth of field allowing me to soften and blur other parts of the image. This way the viewer still takes in the wonderful long stem the chillies are on but his eyes fall first on the parts that are in focus.
 Selecting the right aperture and focus point to get the depth of field (DOF) you want often depends on what part of the image you want to highlight. Is it the entire table, just a plate or a blueberry on top of a dessert? The answer to these questions will often make it very easy to determine where that focus should be.
If you are would like to work further on your food photography here is a slight plug towards Meeta’s e-courses. She instructs comprehensive online Food Photography and Styling courses over at the interactive school of photography and multimedia The Compelling Image (TCI). These courses are aimed primarily at food bloggers and photographers who would like to enhance and hone their food photography and styling skills.
The course is compiled of 6 lessons in all aspects of photography and styling and a specified period to finish your entire course with homework assignments. Make sure to check out Meeta’s workshop and e-courses page: http://www.whatsforlunchhoney.net/p/food-photography-styling-workshops.html

Lovely input and yes you have touched almost all the finer points that needs to be kept in mind for having a great focus.
What a fab post Meeta. You have nailed every single aspect here… I am going to read them all over again when I m making my notes..
Thanks! Glad this helps Sandhaya!